Chicken Pot Pie Casserole
- Time: Active 15 minutes, Passive 30 minutes, Total 45 minutes
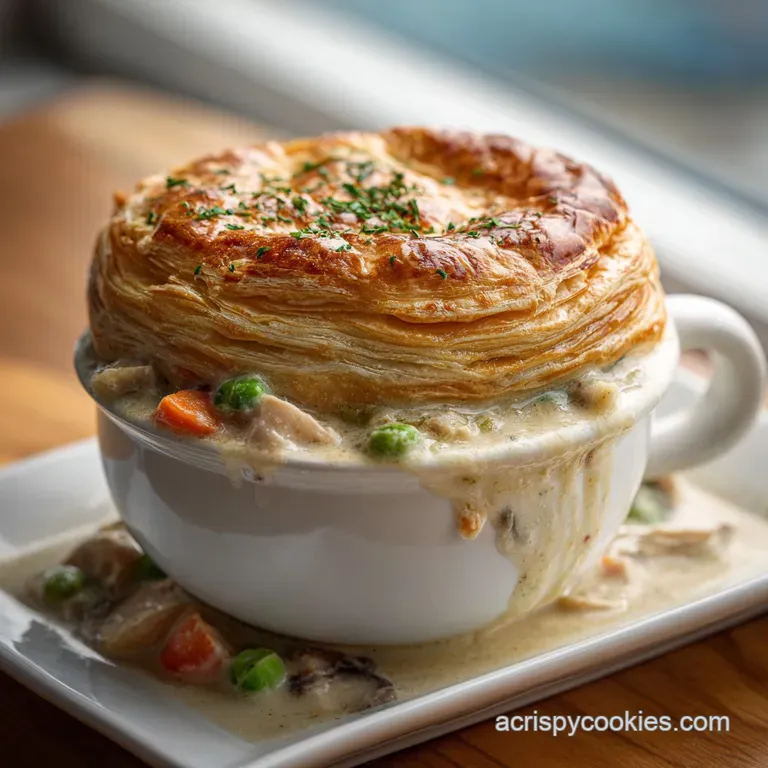
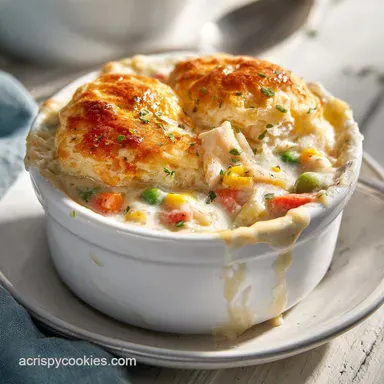
- Flavor/Texture Hook: Silky, herb flecked gravy meets a golden, shattering biscuit crust
- Perfect for: Stress free weeknight dinners or a crowd-pleasing Sunday supper
- The Best Mouthwatering Chicken Pot Pie Casserole
- Specific Timings and Yield Details
- Ingredients for Deep Flavor Profiles
- Essential Tools for Success
- The Cooking Method Explained Simply
- Fixing Common Casserole Errors
- Ways to Customize Your Filling
- Handling Leftovers and Food Waste
- Specific Comparisons for Your Kitchen
- Kitchen Wisdom and Myths
- What to Serve Alongside Casseroles
- Recipe FAQs
- 📝 Recipe Card
The Best Mouthwatering Chicken Pot Pie Casserole
Imagine the sound of a wooden spoon scraping against a heavy skillet as the butter begins to foam. There is a specific moment when the garlic and onions hit that hot fat a scent so nostalgic it practically pulls you into the kitchen by the nose.
We’ve all had those frozen pot pies that are mostly salt and sadness, but this mouthwatering chicken pot pie casserole is the antithesis of that. It’s the kind of meal that makes the whole house feel warmer the second it slides into the oven.
I remember the first time I tried to make a "quick" version of this. I used canned soup and it was... fine, I guess? But it lacked that soul satisfying depth. The gravy was thin, and the crust was soggy.
That’s when I realized that the real secret isn't just in the ingredients, but in the sequence of how you layer those flavors. You want a gravy that clings to the chicken, not a soup that drowns it. You want a crust that crackles.
This dish is my go to when I need a win. It feels like you’ve spent all afternoon hovering over the stove, but in reality, you can have the filling bubbling and the biscuits browning in about 15 minutes of hands on work. It’s a bit of a kitchen magic trick.
We’re going to use a few smart shortcuts, like frozen vegetables and pre made biscuits, but we’re going to treat them with the respect a gourmet meal deserves. Trust me, once you see those golden peaks emerging from the oven, you’ll never go back to the boxed stuff.
Specific Timings and Yield Details
To get the results we’re after, precision matters. This isn't just about throwing things in a dish; it's about the thermodynamics of the bake and the ratio of filling to crust. We are aiming for 8 generous servings, making this perfect for a large family or for those of us who live for leftovers the next day.
Efficiency Note: Since the filling is already hot when it goes into the baking dish, the oven time is strictly for the biscuits. This prevents the vegetables from turning into mush while the top browns.
| Thickness of Filling | Internal Temp | Rest Time | Visual Cue |
|---|---|---|---|
| 3-4 cm (standard dish) | 165°F (74°C) | 5 minutes | Gravy bubbles slowly at the edges |
| 5-6 cm (deep dish) | 165°F (74°C) | 10 minutes | Filling stops shifting when tilted |
| 2-3 cm (sheet pan style) | 165°F (74°C) | 3 minutes | Biscuits are dark gold on the bottom |
Before you get started, make sure your oven is truly preheated. A cold oven is the enemy of a flaky biscuit. We want that immediate burst of heat to turn the moisture in the dough into steam, which is what creates those beautiful, airy layers we all crave.
Ingredients for Deep Flavor Profiles
The beauty of this mouthwatering chicken pot pie casserole lies in the balance between the pantry staples and the fresh aromatics. Each component has a job to do. The heavy cream adds a luxurious mouthfeel that milk just can't match, while the thyme provides that earthy, floral backbone that defines a classic pot pie.
Science Tip: The roux (the flour and butter mixture) is what gives our gravy its structure. By cooking the flour for a minute or two, we neutralize the "cereal" taste and prepare the starch to swell and thicken the chicken broth and cream into a stable emulsion.
| Component | Science Role | Pro Secret |
|---|---|---|
| 85g Unsalted Butter | Fat medium for roux | Melt until foaming stops to ensure water is gone |
| 60g All Purpose Flour | Thickening agent | Whisk constantly to prevent clumps before adding liquid |
| 480ml Chicken Broth | Liquid base | Use low sodium to control the final seasoning level |
| 240ml Heavy Cream | Emulsifier and fat | Room temp cream prevents the sauce from breaking |
The Savory Filling
We start with 700g of cooked chicken. You can use a rotisserie chicken to save time, but ensure it's shredded into bite sized pieces so every spoonful has a bit of everything. The 300g of frozen vegetables (peas, carrots, corn) are added at the very end.
Since they are frozen, they actually help cool the filling slightly before the biscuits go on, which keeps the dough from melting into the sauce prematurely.
The Aromatic Foundation
One medium yellow onion, three cloves of garlic, and two stalks of celery might seem basic, but they are the "Holy Trinity" of comfort food. Slicing the celery thin ensures it softens at the same rate as the diced onion. We’re looking for translucency here, not browning.
If the onions start to brown, turn the heat down; we want sweetness, not the bitterness of charred bits in our silky white gravy.
The Golden Topping
The 450g of refrigerated flaky layers biscuits are our secret weapon. By brushing them with an egg wash (one large egg plus a tablespoon of water), we achieve a professional, lacquered finish that looks like it came from a bakery.
This wash also helps the dried herbs or salt (if you choose to add more on top) stick to the dough.
Essential Tools for Success
You don't need a professional kitchen to pull this off, but a few specific items make the process much smoother. A heavy bottomed skillet is non negotiable for the gravy. Thin pans have hot spots that can scorch the flour, ruining the base of your mouthwatering chicken pot pie casserole before it even gets to the oven.
- Large Heavy Bottomed Skillet: (e.g., a Lodge cast iron or an All Clad stainless steel). This holds heat evenly.
- Whisk: Essential for incorporating the broth and cream into the roux without lumps.
- 9x13 Inch Baking Dish: The standard size for this volume of filling.
- Pastry Brush: For that all important egg wash.
- Chef's Knife: A sharp blade makes quick work of the onion, garlic, and celery.
Chef's Tip: If you find your gravy is too thick after adding the chicken, don't panic. Whisk in an extra splash of chicken broth 15ml at a time. The starch in the flour will continue to hydrate as it bakes, so a slightly "flowy" sauce in the skillet is better than a thick paste.
The Cooking Method Explained Simply
Success with this recipe comes down to managing the moisture. If the gravy is too thin, the biscuits will sink and become gummy. If it's too thick, the dish will feel heavy. We are aiming for a consistency that coats the back of a spoon thick enough to feel substantial but thin enough to pool slightly on the plate.
1. Sautéing the Aromatic Foundation
Preheat your oven to 400°F (200°C). Start by melting 85g of unsalted butter in your skillet over medium heat. Once it’s bubbling, toss in the diced onion, celery, and minced garlic. Sauté them for 5 to 7 minutes.
You aren't looking for a deep sear; you want them to become soft and fragrant. When the onions are translucent and look almost like glass, you’ve hit the sweet spot.
2. Crafting the Silk Textured Gravy
Now, sprinkle the 60g of all purpose flour over the vegetables. Stir it in well so the flour coats the aromatics and soaks up all that delicious butter. Cook this for about 1 to 2 minutes. This is called a "blonde roux." It should smell slightly nutty but stay pale.
Slowly, and I mean slowly, whisk in the 480ml of chicken broth followed by the 240ml of heavy cream. Keep whisking until the mixture comes to a gentle simmer and starts to thicken into a velvety gravy.
3. Assembling the Casserole
Stir in the 700g of cooked chicken, the 300g of frozen vegetables, and your seasonings: 1 tsp dried thyme, 1 tsp kosher salt, 0.5 tsp pepper, and 15g of fresh parsley. The frozen veg will immediately stop the cooking process. Pour this mixture into your 9x13 inch baking dish. It should look rich and colorful.
4. Executing the Flaky Top
Take your 450g of chilled biscuits and arrange them on top of the hot filling. Don't press them down; just let them rest on the surface. Whisk the egg and water together and brush the tops generously. This is what creates that shattering, golden crust that contrasts so perfectly with the creamy interior.
5. The over High heat Bake
Slide the dish into the center of the oven. Bake for 25 to 30 minutes. You are looking for the filling to be bubbling vigorously at the edges and the biscuits to be a deep, rustic gold.
The aroma at this point will be incredible the scent of butter, thyme, and roasted chicken will fill your home. Let it sit for 5 minutes before serving so the gravy can set.
Fixing Common Casserole Errors

Even the most seasoned home cooks can run into a snag. The most frequent issue with a pot pie casserole is the "soggy bottom" syndrome where the biscuits don't cook through on the underside. This usually happens if the filling wasn't hot enough when the biscuits were added, or if the oven temperature was too low.
Rescuing a Thin Filling
If you realize your filling looks more like soup than gravy after adding the chicken, you can fix it before it goes into the oven. Create a "slurry" by mixing 1 tablespoon of cornstarch with 1 tablespoon of cold water. Whisk this into the simmering filling in the skillet.
Let it bubble for 30 seconds, and you’ll see it tighten up immediately.
| Problem | Root Cause | Solution |
|---|---|---|
| Gummy Biscuits | Filling was cold when topped | Ensure filling is simmering before moving to dish |
| Salty Gravy | High sodium broth used | Add a splash of heavy cream or unsalted broth to dilute |
| Burnt Tops | Oven rack too high | Move to center rack and tent loosely with foil |
Another common mistake I once made was overcrowding the biscuits. If they are packed too tightly, the heat can't circulate around the sides, leaving them raw in the middle. Give them just a tiny bit of breathing room.
Common Mistakes Checklist
- ✓ Always preheat the oven for at least 20 minutes to ensure a stable 400°F (200°C).
- ✓ Don't skip the egg wash; it provides the essential barrier that keeps the biscuits crisp.
- ✓ Use room temperature heavy cream to prevent the sauce from "breaking" or curdling.
- ✓ Ensure the chicken is fully cooked and seasoned before it enters the gravy.
- ✓ Let the dish rest! Five minutes of patience prevents the filling from running all over the plate.
Ways to Customize Your Filling
While the classic version is iconic, this recipe is a fantastic canvas for experimentation. If you want to lean into a more "Harvest" feel, you could swap the thyme for sage and add some diced parsnips or sweet potatoes to the aromatic sauté.
If you are looking for a different texture profile, you might want to try a Broccoli Casserole recipe logic here by adding shredded cheddar cheese directly into the gravy. This turns it into a "Cheesy Chicken Pot Pie" which is a massive hit with kids.
If you want a more rustic feel, do this: Swap the biscuits for a thick layer of garlic herb mashed potatoes. Add 100g of sautéed mushrooms to the onion mixture for an earthy "umami" boost.
Replace the chicken broth with a 50/50 mix of broth and dry white wine (like Sauvignon Blanc) for a sophisticated edge.
For those who love a bit of heat, a pinch of cayenne pepper or a teaspoon of Dijon mustard whisked into the gravy can add a lovely back end kick without overpowering the creamy base. If you're looking for a completely different flavor profile, you could even take inspiration from a Street Corn Chicken Bowl and use lime, cilantro, and chili powder in the base, though that’s moving away from the "pot pie" tradition into something entirely new.
Handling Leftovers and Food Waste
One of the best things about this dish is how well it reheats. The flavors actually have time to meld, making the gravy even more savory the next day. However, you have to be careful with the biscuits to ensure they don't turn into bricks.
- Fridge
- Store in an airtight container for up to 3 to 4 days.
- Freezer
- You can freeze the filling (without the biscuits) for up to 3 months. I don't recommend freezing the baked biscuits as they lose their texture.
- Reheating
- Use the oven! Put a slice in a 350°F (180°C) oven for 10 to 15 minutes. This crisps the biscuit back up. The microwave will make the crust soft and sad.
Zero Waste Tips: Don't throw away your celery leaves! Chop them up and toss them in with the parsley for extra flavor. If you have leftover chicken skin or bones from a rotisserie bird, simmer them with some water and vegetable scraps (onion ends, carrot peels) to make a quick "scrap broth" for your next meal.
Even the liquid from the canned corn can be used to replace a bit of the chicken broth for extra sweetness.
Specific Comparisons for Your Kitchen
Sometimes we have to choose between the long way and the short way. While I always advocate for the scratch made gravy in this recipe, I know life happens. Here is a quick look at how the fresh approach compares to the "emergency" shortcuts.
| Method | Texture | Flavor Depth | Time Investment |
|---|---|---|---|
| Scratch Gravy | Silky, customizable | High (herbaceous) | 15 minutes prep |
| Canned Soup Base | Thick, gelatinous | Medium (salty) | 5 minutes prep |
| Frozen Crust | Traditional, heavy | Low (bland) | 45 minutes bake |
| Biscuit Topping | Flaky, light | High (buttery) | 25 minutes bake |
The "Fresh vs. Shortcut" debate is always won by the roux. The difference in flavor between a flour and butter base and a can of "cream of something" soup is astronomical. It’s the difference between a meal you eat and a meal you remember.
Kitchen Wisdom and Myths
There are a lot of old wives' tales floating around about casseroles. Let’s clear a few up so you can cook with confidence.
Myth: You must cook the vegetables completely before baking. Truth: Absolutely not. In fact, if you sauté the frozen peas and carrots until they are soft before they go into the oven, they will turn into a gray mush during the 30 minute bake.
The heat of the gravy and the oven is more than enough to cook them through while maintaining their bright color and "snap."
Myth: Searing the chicken "locks in" the juices. Truth: Searing is about flavor, not moisture. The Maillard reaction (that browning on the meat) adds a deep, roasty note to the filling. However, in a pot pie, the chicken is submerged in gravy, so it stays moist regardless.
If you're using pre cooked chicken, don't worry about searing it again; the gravy will do the work of keeping it tender.
Myth: You need to grease the baking dish heavily. Truth: Because the filling is high in fat (butter and cream) and the biscuits are essentially butter delivery systems, the dish rarely sticks. A very light spray is fine, but you don't need a thick layer of grease.
What to Serve Alongside Casseroles
Since this mouthwatering chicken pot pie casserole is quite rich and heavy, you want side dishes that offer a "counterpoint." Think bright, acidic, and crunchy.
A simple arugula salad with a lemon shallot vinaigrette is the perfect partner. The peppery bite of the greens cuts right through the creaminess of the gravy. Alternatively, some roasted balsamic Brussels sprouts provide a nice charred contrast to the soft interior of the pie.
If you're serving this for a holiday or a big family get together, consider a side of cranberry sauce or a quick pickled cucumber salad. The acidity acts as a "palate cleanser," making every bite of the pot pie feel as impactful as the first.
Avoid serving this with other heavy starches like mashed potatoes or mac and cheese, as it can lead to "carb fatigue." You want your guests to leave the table feeling satisfied, not like they need a three hour nap!
The beauty of this recipe is that it’s a complete meal in one pan protein, fats, and vegetables all under a crust. It’s the ultimate expression of home cooking: simple, honest, and undeniably comforting. Now, go grab your skillet and let's get that butter melting.
You're about 45 minutes away from the best dinner of your week.

Recipe FAQs
How to ensure the gravy is thick and smooth?
Whisk the flour into the melted butter for 1-2 minutes to form a proper roux. Adding the heavy cream at room temperature also prevents the sauce from breaking, ensuring a silky consistency when you combine it with the broth.
Is it true I can use frozen chicken straight from the freezer?
No, this is a common misconception. You must use fully cooked, pre-shredded or cubed chicken to ensure the texture of the filling remains consistent and reaches food safe temperatures within the 30-minute bake time.
How to get the biscuit topping perfectly golden?
Brush the tops generously with an egg wash made from one beaten egg and a tablespoon of water. This creates the essential barrier that promotes browning and keeps the biscuit crust flaky rather than soft.
Can I make this ahead of time?
Yes, you can prepare the filling and refrigerate it. If you enjoyed learning to balance the gravy texture here, the same approach to thickening sauces works well for our creamy baked ziti.
Why is my filling running all over the plate after serving?
Let the casserole rest for five minutes before serving. This brief cooling period allows the gravy to set slightly, preventing it from turning into a soup on the plate.
How to prevent the bottom of the biscuits from getting soggy?
Preheat your oven for at least 20 minutes to a stable 400°F (200°C). A fully preheated oven ensures the biscuits begin puffing immediately upon contact with the hot filling, maintaining their structure.
Is it necessary to use low-sodium chicken broth?
Yes, it is highly recommended to control the final salt balance. Since you are adding one teaspoon of kosher salt, using low-sodium broth ensures the savory notes remain balanced without becoming overly salty during the thickening process.
Chicken Pot Pie Casserole
Ingredients:
Instructions:
Nutrition Facts:
| Calories | 578 kcal |
|---|---|
| Protein | 34.8 g |
| Fat | 31.7 g |
| Carbs | 37.8 g |
| Fiber | 3.2 g |
| Sugar | 4.1 g |
| Sodium | 687 mg |
