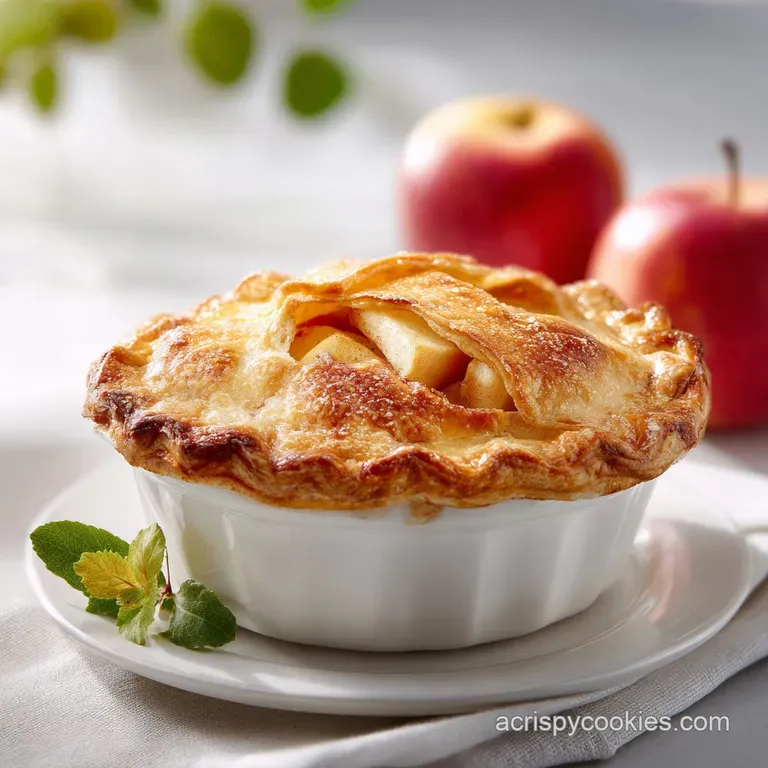
Flaky Apple Pie: Buttery and Golden
- Time: Active 45 minutes, Passive 60 minutes, Total 105 minutes
- Flavor/Texture Hook: Shattering, buttery layers with a concentrated maple apple tang.
- Perfect for: Holiday centerpieces or a serious weekend baking project.
- Mastering the Physics of a Flaky Apple Pie
- Precision Specs for Your Pie
- Selecting Your Essential Ingredients
- Must Have Tools for Success
- Perfecting the Step-by-Step Method
- Common Errors and Simple Fixes
- Scaling for Any Crowd
- Storing and Keeping Crusts Crisp
- Serving and Pairing Ideas
- Recipe FAQs
- 📝 Recipe Card
Mastering the Physics of a Flaky Apple Pie
We have all been there, standing in the kitchen, peering through the oven glass at a pie that looks beautiful on top, but deep down, you know the truth. You slice into it, and instead of a crisp, clean break, the bottom crust is a grey, translucent, rubbery mess. It is the ultimate kitchen heartbreak.
I spent years thinking I just didn't have "the touch" for pastry until I realized that a Flaky Apple Pie is not about magic; it is about managing water and temperature like a laboratory experiment.
The primary enemy of a shattering crust is premature gluten development. When water hits flour, those proteins start bonding, and if you overwork it, you end up with bread, not pastry. This recipe fixes that by using two specific tactical strikes: frozen butter shingles and apple cider vinegar.
The vinegar acts as a secret weapon, slightly tenderizing the dough and inhibiting that rubbery gluten stretch, while the frozen butter creates the actual physical layers you can see.
Trust me, once you see those distinct layers of fat visible in your raw dough, you will never go back to the "sand like texture" method. We are building a literal brick and mortar structure here, where the butter is the brick and the flour is the mortar.
When that 400°F heat hits the oven, the water in the butter evaporates instantly, puffing up the flour layers. It is physics, and it works every single time.
Why the Butter Stays Cold
Steam Expansion: When frozen butter hits a 400°F oven, the water content inside the fat flashes into steam, forcing the layers of flour apart before they can fuse.
Gluten Inhibition: Keeping the fat solid prevents it from coating every flour particle, which limits the amount of water flour contact and keeps the texture tender.
Structural Lamination: By flattening butter into shingles rather than tiny crumbs, you create wide "plates" of fat that act like mini puff pastry layers.
| Method | Texture Result | Structural Integrity | Best For |
|---|---|---|---|
| Fast (Cold Rubbed) | Crumbly/Short | Fragile | Tarts/Cookies |
| Classic (Shingled) | Shattering/Layered | Very Sturdy | Heavy Fruit Pies |
| Warm Fat (Melted) | Mealy/Dense | Soft | Cobbler toppings |
Choosing the right technique depends entirely on the weight of your filling. For 1.5kg of apples, you need the classic shingled method to ensure the base doesn't collapse under the weight and moisture of the fruit. This structural lamination is what separates a decent bake from a professional grade dessert.
| Component | Science Role | Pro Secret |
|---|---|---|
| All Purpose Flour | Provides the protein matrix | Use 10-11% protein for strength without toughness |
| Frozen Butter | Creates steam pockets | Freeze for 30 mins after cubing to ensure it's rock hard |
| Apple Cider Vinegar | Breaks down gluten bonds | Keeps the dough workable even if you over mix slightly |
| Maple Syrup | Lowers the freezing point | Draws moisture out of apples faster than granulated sugar |
A quick note on the flour: if you use bread flour, the protein is too high and your crust will be tough. If you use cake flour, it won't have the strength to hold the apples. Stick to a standard all purpose variety for that middle ground reliability.
Precision Specs for Your Pie
When you are aiming for a Flaky Apple Pie that people will actually talk about for weeks, you cannot guess. Baking is a game of ratios. I've found that using a kitchen scale is the difference between a crust that's "fine" and one that is world class.
If you're used to measuring with cups, try switching to grams just this once. You will see how much more consistent the dough feels when you aren't accidentally packing 20% more flour into a measuring cup.
There are three non negotiable checkpoints for this recipe. First, your butter must be 0°F (straight from the freezer). Second, your oven must be a true 400°F (200°C) before the pie enters.
Third, your apples must be sliced to a consistent 1/4 inch thickness. If they are too thick, they won't soften by the time the crust is mahogany; too thin, and they turn into applesauce.
Chef's Tip: Use a mix of Granny Smith and Honeycrisp apples. The Granny Smiths provide the pectin and tartness to keep the filling from being cloying, while the Honeycrisps hold their shape and add a floral sweetness.
Precision Checkpoints
- Butter Temp:0°F (Frozen)
- Internal Filling Temp:195°F (to ensure cornstarch is activated)
- Dough Rest: Minimum 60 minutes (do not skip this)
Selecting Your Essential Ingredients
- 375g All purpose flour: This provides the backbone.
- 225g Unsalted butter: Must be frozen and cubed.
- 120ml Ice water: Keep a few ice cubes in the measuring cup.
- 15ml Apple cider vinegar: The acid is key for tenderness.
- 5g Fine sea salt: Enhances the butter flavor.
- 1.5kg Apples: A 50/50 mix of Granny Smith and Honeycrisp.
- 100g Maple syrup: Used for macerating and deep flavor.
- 30g Cornstarch: Our thickening agent for the reduced syrup.
- 2 tsp Ground cinnamon: The classic warming spice.
- 0.5 tsp Ground ginger/nutmeg: Adds complexity to the fruit.
- 15ml Lemon juice: Prevents browning and balances sweetness.
| Original Ingredient | Substitute | Why It Works |
|---|---|---|
| Maple Syrup | Brown Sugar (Packed) | Similar molasses notes, but syrup draws out juice faster. |
| Apple Cider Vinegar | Lemon Juice | Provides the necessary acidity to inhibit gluten development. |
| Cornstarch | Tapioca Starch | Similar thickening power, though tapioca gives a glossier finish. |
If you find yourself enjoying the science of buttery doughs, you might also find the laminated layers in a Cheddar Bay Biscuit Casserole interesting, as it uses a similar cold fat principle but for a savory application.
Must Have Tools for Success
You don't need a high end laboratory to make a Flaky Apple Pie, but you do need a few specific items. A heavy glass or ceramic 9 inch pie plate is better than thin tin because it holds heat more consistently, which helps cook the bottom crust.
You will also want a rimmed baking sheet to catch any drips there is nothing worse than the smell of burning sugar on the floor of your oven.
A pastry blender is helpful, but honestly, your hands are your best tools. I prefer using my fingers because I can feel the temperature of the butter. If the butter starts to feel soft or greasy, I can stop immediately and put the whole bowl back in the freezer for ten minutes.
That tactile feedback is something a machine just can't give you.
Finally,, get a decent rolling pin. A heavy French rolling pin (the tapered kind) gives you much better control over the thickness of the dough than the ones with handles and ball bearings. You want to feel the resistance of the dough as you move.
Perfecting the step-by-step Method
- Prep the dry base. In a large bowl, toss the 375g flour and 5g sea salt until combined. Note: Whisking ensures the salt is evenly distributed for consistent flavor.
- Shingle the fat. Add the 225g frozen butter cubes. Use your thumb and forefinger to flatten each cube into a large, thin "shingle" or flake. Stop when the butter looks like a pile of smashed walnuts.
- Hydrate the dough. Add the 15ml vinegar to the ice water. Incorporate it tablespoon by tablespoon into the flour, tossing with a fork until the dough just barely holds together when squeezed.
- Chill and rest. Divide the dough into two discs, wrap tightly in plastic, and chill for at least 60 minutes. Note: This allows the flour to hydrate fully and the butter to re harden.
- Macerate the fruit. Toss 1.5kg sliced apples with 100g maple syrup, lemon juice, and spices. Let sit for 30 minutes until a pool of juice forms at the bottom of the bowl.
- Reduce the syrup. Drain the liquid into a saucepan and simmer over medium heat until it reduces into a thick, bubbling syrup. Whisk this back into the apples along with 30g cornstarch.
- Roll and fit. Roll out the bottom disc to 12 inches. Fit it into the 9 inch plate, leaving an inch of overhang. Keep the dough cool; if it gets floppy, chill it for 10 minutes.
- Fill and seal. Add the apple mixture. Roll out the top crust and place it over the apples. Crimp the edges to seal and cut four large vents in the center.
- Bake for glory. Place on a rimmed sheet and bake at 400°F (200°C) for 60 minutes until the crust is deep mahogany and the filling is visibly bubbling through the vents.
- Cool completely. This is the hardest part. Let it rest for at least 3 hours. Note: The filling only sets properly as it cools to room temperature.
Common Errors and Simple Fixes
The most common disaster with a Flaky Apple Pie is the "gap." You know it the space between the top crust and the fruit where the apples have shrunk, leaving a hollow cavern. This happens because the fruit loses volume as it cooks.
By macerating the apples and reducing the syrup beforehand, we "pre shrink" the fruit, ensuring the crust and filling stay in contact.
Another issue is the dough "shrinking" back from the edges of the pan during baking. This usually means the gluten was too tense. If you find the dough resisting your rolling pin, stop. Walk away for five minutes, let the proteins relax, and then try again. Never fight your dough; it will always win.
Why Your Crust Is Tough
The primary culprit is over mixing after adding water. As soon as that liquid hits the flour, the clock is ticking. You want to mix only until there are no dry flour pockets left at the bottom of the bowl. If you keep kneading, you’re making bread, and you’ll lose that shattering texture.
| Problem | Root Cause | Solution |
|---|---|---|
| Crust is pale and soft | Oven temperature too low | Verify with an oven thermometer; bake at 400°F. |
| Filling is runny | Cornstarch didn't activate | Ensure the filling reaches 195°F and bubbles for 5-10 mins. |
| Bottom is soggy | Moisture migration from fruit | Macerate apples and reduce juice into syrup first. |
Common Mistakes Checklist
- ✓ Never use room temperature butter; it must be frozen to create steam.
- ✓ Don't skip the vinegar; the acid is essential for the "short" texture.
- ✓ Always bake on the bottom rack for the first 20 minutes to heat the base.
- ✓ Avoid over handling the dough; the heat from your hands melts the fat.
- ✓ Let the pie cool fully; cutting it warm will result in a soupy mess.
Scaling for Any Crowd
If you are cooking for a larger party, doubling this recipe is straightforward, but do not double the salt and spices linearly. Use 1.5x the amount of cinnamon and salt to avoid overwhelming the fruit. For the dough, work in two separate batches rather than one giant bowl.
It is much easier to keep the butter cold and manage the hydration in smaller quantities.
When scaling down for a single crust galette, use half the dough and half the fruit. Since a galette has more airflow, reduce the bake time by 15 minutes. Regardless of size, the temperature remains the same that 400°F kick is vital for the initial puff.
If you’re planning a larger dessert spread, these flaky principles apply well to other bakes too. You could pair a slice of this pie with some Soft Peanut Butter Blossoms for a variety of textures on your dessert table.
Serving Size Guide
| Servings | Apple Weight | Pan Size | Cook Time |
|---|---|---|---|
| 4 People | 750g | 6 inch Deep | 45 minutes |
| 8 People | 1.5kg | 9 inch Standard | 60 minutes |
| 12 People | 2.25kg | 10x15 Slab | 55 minutes |
Storing and Keeping Crusts Crisp
A Flaky Apple Pie is at its absolute peak about 4 to 6 hours after it leaves the oven. However, if you have leftovers, store them on the counter covered loosely with foil for up to 2 days.
Do not put it in the fridge immediately; the humidity in a refrigerator is the enemy of a crisp crust and will turn your hard earned layers into a damp sponge.
For long term storage, you can freeze slices of the baked pie. Wrap them individually in parchment and then plastic wrap. They will stay good for up to 3 months. To reheat, avoid the microwave at all costs it vibrates the water molecules and makes the crust chewy.
Instead, use an air fryer or oven at 350°F for 10 minutes to re crisp the fat.
Zero Waste Tip: Don't throw away those dough scraps! Toss them in cinnamon sugar and bake them on a small tray for 10 minutes. We call them "pie fries" in my house, and they are usually gone before the actual pie is even out of the oven.
You can also use apple peels and cores to make a simple stovetop syrup or add them to your compost.
Serving and Pairing Ideas
While a slice of Flaky Apple Pie is a masterpiece on its own, a few additions can take it to the next level. A sharp, aged cheddar cheese melted over the top is a traditional pairing that balances the maple sweetness perfectly. If you prefer the classic route, a high fat vanilla bean ice cream is the way to go.
The contrast between the hot, spiced apples and the freezing cream is a sensory experience you shouldn't miss.
For a Shattering, Never Soggy Base
The real secret to a dry bottom crust is heat. I always place my pie plate on a preheated heavy baking sheet. This acts as a heat sink, transferring energy directly into the bottom of the glass plate the moment it enters the oven.
It's like searing a steak you want that immediate contact to set the structure before the juices from the fruit start to seep down.
Mythes About Pastry Dough
One common misconception is that you need "special" pastry flour. In reality, standard all purpose flour is more than enough as long as you control the hydration. Another myth is that the "soggy bottom" is inevitable with fruit pies. It isn't.
If you macerate the fruit and use a high initial heat, you can achieve a crisp base every single time. Searing the crust with heat is just as important as the ingredients themselves.
Final thought: don't be afraid of a dark crust. Most home cooks pull their pies too early. You want a deep, mahogany brown. That color is the Maillard reaction in action, and it is where all the complex, toasted butter flavor lives.
If the edges are getting too dark while the center is still pale, just shield them with a bit of aluminum foil and keep going. Your patience will be rewarded with the best pie of your life.

Recipe FAQs
Why must the butter be frozen before mixing?
Frozen butter is essential for creating steam driven layers. As the butter melts in the 400°F oven, it creates pockets of air that result in a signature flaky texture rather than a greasy, dense crust.
How to handle the dough without melting the fat?
Work quickly and keep your touch light. If you enjoyed learning to manage heat sensitive fats here, see how that same fat ratio logic applies to maintaining structure in our other bakes.
Is it true I can substitute the apple cider vinegar with more water?
No, this is a common misconception. The vinegar is strictly necessary because its acidity inhibits gluten formation, ensuring the dough remains tender and "short" rather than tough.
How to ensure the bottom crust does not become soggy?
Bake the pie on the bottom rack for the first 20 minutes. This intense direct heat helps set the base crust before the fruit juices begin to release in volume.
Should I store the pie in the refrigerator to keep it fresh?
How to achieve a thick consistency for the apple filling?
Reduce the macerated apple juices in a saucepan until syrupy. Combining this concentrated liquid with the cornstarch before baking creates a stable, thickened filling that won't run when sliced.
Why must I wait to slice the pie after baking?
Cutting the pie while warm results in a soupy mess. The filling requires time to cool and set properly, which typically takes about 4 to 6 hours after leaving the oven.
Flaky Apple Pie
Ingredients:
Instructions:
Nutrition Facts:
| Calories | 497 kcal |
|---|---|
| Protein | 5.4g |
| Fat | 23.2g |
| Carbs | 68.1g |
| Fiber | 4.9g |
| Sugar | 23.4g |
| Sodium | 248mg |
