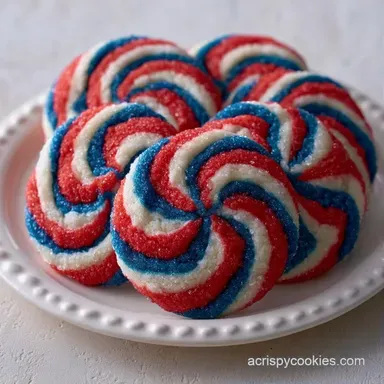
Red White and Blue Pinwheel Cookies: Party-Ready
- Time:45 minutes active + 2 hours chilling
- Flavor/Texture Hook: Sweet vanilla sugar cookie with a crisp, snap like edge
- Perfect for: 4th of July parties and patriotic potlucks
Red White and Blue Pinwheel Cookies
I remember the first time I tried making these for a neighborhood party. I skipped the chill time because I was rushing, and my beautiful spirals turned into colorful blobs the second they hit the oven. It was a disaster. The red bled into the white, and the whole thing looked like a melted crayon.
But once I realized that temperature is everything with a sugar cookie, things changed. You need that dough to be cold and stiff so the knife slices through without squishing the layers.
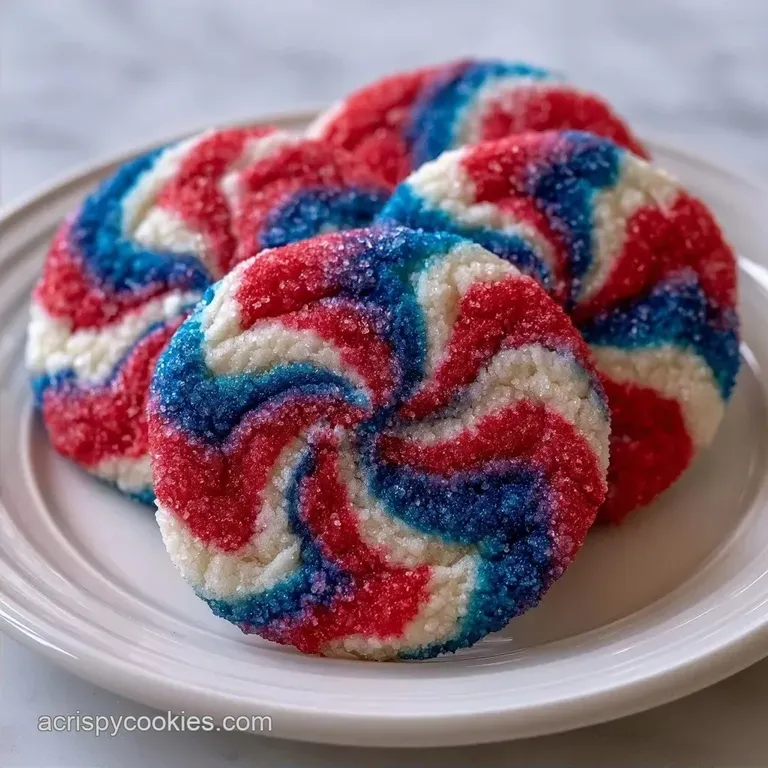
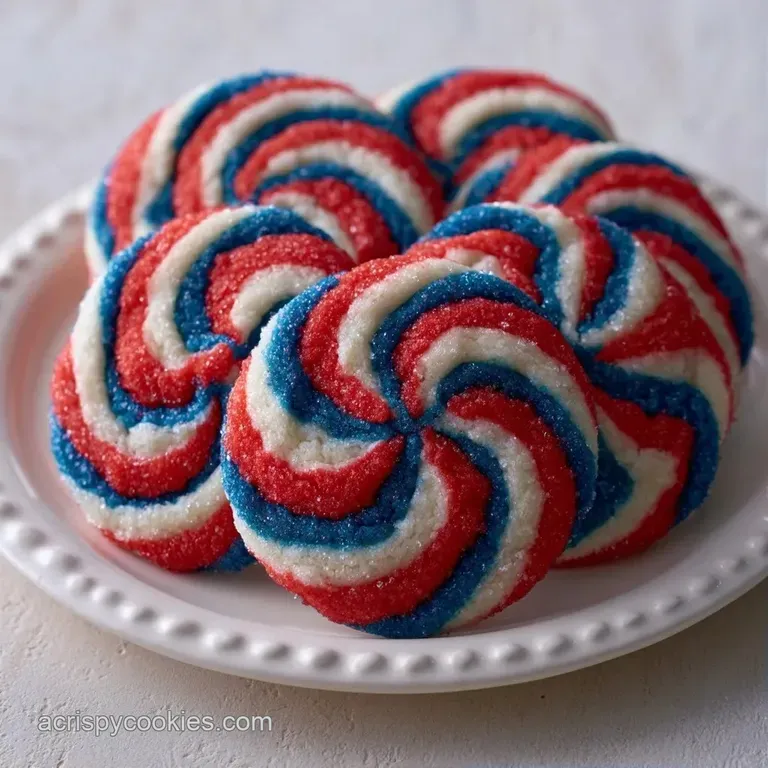
When you get this right, the colors stay crisp and the spiral looks like a professional bakery treat. These Red White and Blue Pinwheel Cookies are a total crowd pleaser because they look way harder to make than they actually are.
Stop the Spiral Smush
The reason most of these cookies fail is that the dough is too soft when it's sliced. If the butter is already starting to soften at room temperature, the pressure from the knife pushes the colors into each other.
Cold Fats: Chilling the log for 2 hours freezes the butter, which means the cookie keeps its shape and doesn't spread. Gel Colors: Using gel instead of liquid coloring prevents the dough from becoming too wet and sticky.
| Method | Time | Texture | Best For |
|---|---|---|---|
| Slow Chill | 2 hours | Very stable, sharp lines | Large batches |
| Flash Freeze | 30 minutes | Firm, quick set | Last minute baking |
You can actually use a method similar to how I handle Classic Chocolate Chip Cookies recipe by chilling the dough to control the spread. In this case, the chill is mandatory for the visual spiral.
Getting Your Ingredients Ready
For the base, we use a standard sugar cookie ratio. It's a balance of enough fat for flavor but enough flour to hold the structure.
| Ingredient | What It Does | Best Swap |
|---|---|---|
| Unsalted Butter | Provides structure and richness | Vegan butter stick |
| All Purpose Flour | Creates the crumb and shape | 1:1 gluten-free blend |
| Gel Food Coloring | High pigment without adding water | Powdered food color |
| Granulated Sugar | Adds sweetness and crisp edges | Caster sugar |
- 1 cup (225g) unsalted butter, softened to room temperature Why this? Ensures a smooth, creamy base
- 3/4 cup (150g) granulated sugar Why this? Gives the cookie a crisp edge
- 1 large (50g) egg Why this? Binds the dough together
- 1 tsp (5ml) vanilla extract Why this? Classic flavor profile
- 2 1/4 cups (280g) all purpose flour Why this? Provides necessary structure
- 1/2 tsp (3g) baking powder Why this? Gives a tiny bit of lift
- 1/4 tsp (1.5g) salt Why this? Balances the sugar
- 1/2 tsp red gel food coloring Why this? Concentrated color
- 1/2 tsp royal blue gel food coloring Why this? Deep, vibrant blue
Tools for the Job
You don't need a professional kitchen for this, but a few specific tools make the process much easier.
- Stand mixer or hand mixer: A KitchenAid is great for getting the butter and sugar pale.
- Sifter: Essential for removing flour lumps that can break the spiral.
- Parchment paper: Prevents sticking and ensures the bottom doesn't burn.
- Sharp chef's knife: A dull knife will squish the dough instead of slicing it.
- Rolling pin: Helps get the logs to a uniform 8 inch length.
Steps to Build Spirals
Let's get into the actual process. Focus on the temperature of the dough at every stage.
Phase 1: Constructing the Foundation
- Beat the softened butter and granulated sugar on medium high until the mixture looks pale and velvety. Note: This incorporates air for a lighter bite
- Add the egg and vanilla extract, beating until fully incorporated.
- Sift in the flour, baking powder, and salt. Mix on low until a soft dough forms; do not overmix.
Phase 2: Creating the Color Blocks
- Split the dough into three equal portions of approximately 1 cup each.
- Leave one portion white. Knead red gel coloring into the second portion and blue gel into the third until colors are uniform. Note: Use your hands for a more even color
- Roll each colored dough into a smooth log approximately 8 inches long.
Phase 3: The Spiral Assembly
- Lay the red, white, and blue logs side by-side and roll them together into a single log.
- Chill the log in the refrigerator for 2 hours (or 30 minutes via flash freeze method) to stabilize the fats.
Phase 4: The Bake
- Slice the chilled log into uniform cookies using a sharp chef's knife.
- Bake on parchment lined sheets at 180°C for 10 minutes until edges are crisp.
Chef's Note: To get a cleaner cut, dip your knife in hot water and wipe it dry between every single slice. This prevents the dough from sticking to the blade.
Fixing Your Cookie Blobs
Even with a plan, sugar cookies can be temperamental. The most common issue is the "melted look."
Why Your Spirals Squish
If the dough is too warm, the butter melts before the flour sets. This causes the colors to run.
If the Colors Look Dull
This usually happens if you use liquid drops instead of gel. Liquid colors dilute the dough and lose their vibrancy in the oven.
If the Dough is Too Sticky
If your kitchen is hot, the dough will be hard to roll. Put the individual colored portions in the fridge for 10 minutes before rolling them into logs.
| Problem | Root Cause | Solution |
|---|---|---|
| Bleeding Colors | Dough was too warm | Chill log for full 2 hours |
| Flat Cookies | Over beaten butter | Mix flour on low speed |
| Lumpy Spirals | Flour not sifted | Sift all dry ingredients |
Changing Up the Taste
While the classic vanilla is great, you can easily tweak the flavor of these Red White and Blue Pinwheel Cookies.
For a Zesty Summer Twist
Add 1 tsp of lemon zest to the base dough. The acidity cuts through the sugar and makes them feel fresher.
For a "Cookies and Cream" White Section
Fold 2 tbsp of finely crushed Oreo crumbs into the white dough portion. It adds a nice visual contrast.
For a Vegan Alternative
Use a high-quality vegan butter stick and a flax egg. Note that the texture will be slightly denser.
For a gluten-free Version
Substitute all purpose flour with a 1:1 gluten-free baking blend that contains xanthan gum.
If you're in the mood for something different after the holiday, try some Blueberry White Chocolate Cookies for a more fruity vibe.
Since this is a visual treat, how you present them matters.
| Level | Presentation | Tweak |
|---|---|---|
| Simple | Single layer plate | Space them out evenly |
| Polished | Dusting of sugar | Use a fine mesh sieve |
| Restaurant | Vertical stack | Add fresh raspberries and blueberries |
Keeping Them Fresh
Sugar cookies stay good for a while, but humidity is the enemy of a crisp edge.
Fridge Storage
Keep them in an airtight container for up to 5 days. If they soften, pop them in a 150°C oven for 2 minutes to crisp back up.
Freezer Storage
You can freeze the unbaked log for up to 3 months. Wrap it tightly in plastic wrap and foil. Thaw in the fridge overnight before slicing and baking.
Room Temperature
Store in a cool, dry place for 3 days. Avoid the top of the fridge where it's warm, as the cookies can get greasy.
Zero Waste Tip
If you have little scraps of dough left over after rolling the logs, don't toss them. Roll them into tiny balls and bake them as "confetti dots" for a quick snack.
Great Summer Pairings
These cookies are very sweet, so they pair best with things that have a bit of tartness or a refreshing quality.
The Dessert Platter
Arrange these pinwheels on a wooden board with sliced green apples, fresh strawberries, and a bowl of whipped cream. The contrast of the bright colors against the wood looks great for photos.
The Ultimate Summer Pairing
Serve them with an iced hibiscus tea or a cold lemonade. The acidity of the drink cleanses the palate between bites of the buttery cookie.
Pairing with Other Treats
If you're hosting a big bash, these go well alongside a bowl of mixed berries or a light lemon tart. Avoid serving them with other heavy, buttery desserts to keep the meal balanced.
Recipe FAQs
How to keep the colors from bleeding?
Chill the log thoroughly for 2 hours. This stabilizes the butter and sets the shape, preventing the red, white, and blue doughs from merging during the bake.
Is it true I can skip the chilling step to save time?
No, this is a common misconception. Skipping the chill will cause the log to flatten in the oven, which destroys the distinct pinwheel spiral.
How to get clean slices without smearing the colors?
Use a sharp chef's knife and slice in one decisive motion. Avoid a sawing motion, as this drags the colored dough into the white sections.
Why did my cookies spread too much in the oven?
Ensure the butter was softened, not melted. If the butter is too warm, the cookies lose their structure. If you enjoyed mastering temperature control here, see how the same fat-stability principle works in our custard ice cream.
Is it true that liquid food coloring is a direct substitute for gel?
No, this is a common misconception. Liquid coloring adds excess moisture to the dough, which can make the mixture sticky and cause the colors to bleed.
How to adapt these for other holidays?
Swap the red and blue gel coloring for different hues. Try green and red for Christmas or orange and purple for Halloween.
How to store the cookies to maintain their crispness?
Place them in an airtight container at room temperature. Store them in a cool, dry place to keep the edges from softening.
Red White And Blue Pinwheel Cookies