Crisp Edge Chocolate Chip Cookies: Browned Butter
- Time: 20 min active + 2 hrs chilling
- Flavor/Texture Hook: Nutty browned butter with rippled, crispy edges
- Perfect for: When you want a bakery style treat without the bakery price
The smell of butter browning in a saucepan is, in my opinion, the best scent in a kitchen. It starts as a simple sizzle, then turns into a nutty, toasted aroma that tells you the water has evaporated and the milk solids are caramelizing.
That specific smell is the signal that your cookies are about to go from basic to something that tastes like it came from a high end bistro.
I used to struggle with cookies that were either too soft or just plain flat. I wanted that specific contrast - a rim that cracks when you bite it, but a center that still feels like melted chocolate. This method fixes that by combining a long chill time with a physical shock to the pan midway through baking.
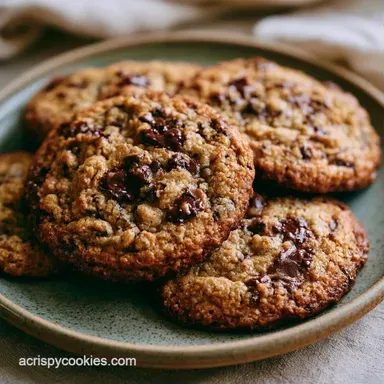
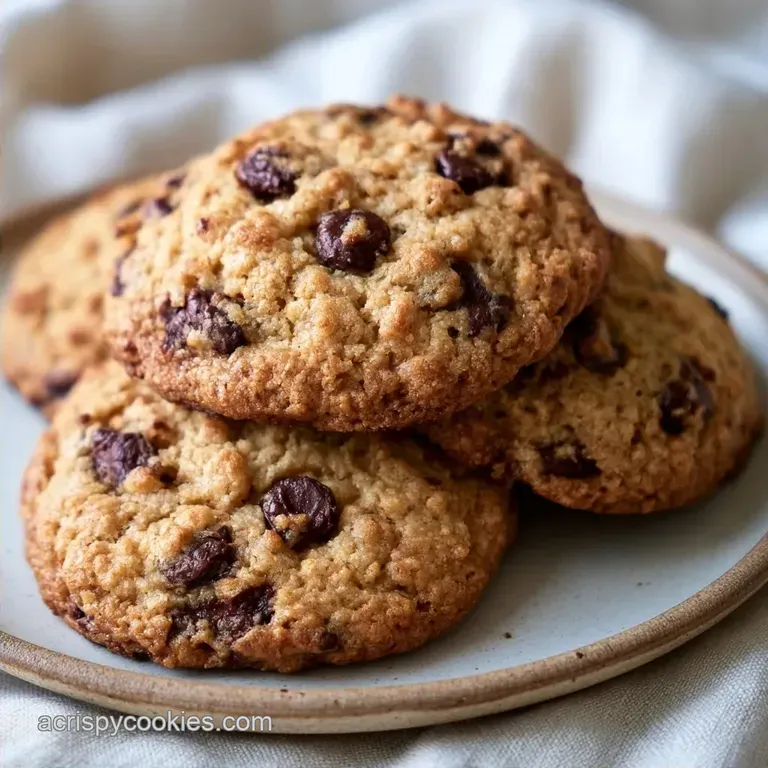
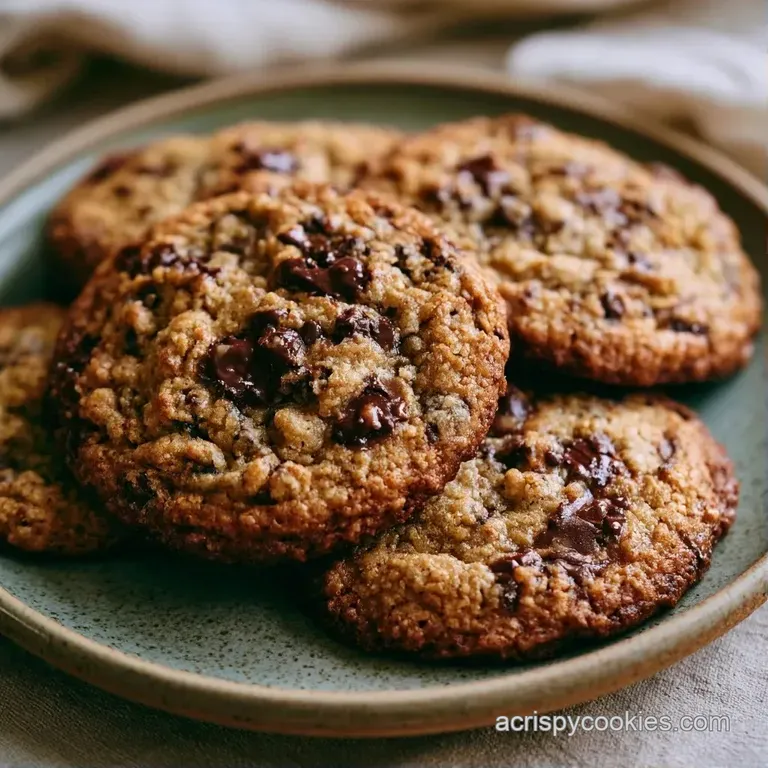
You can expect a cookie that looks a bit rustic, with ripples and pools of chocolate. These Crisp Edge Chocolate Chip Cookies aren't perfectly round, but that's where the flavor lives. The edges get a deep gold color while the middle stays tender.
Crisp Edge Chocolate Chip Cookies
The logic here is all about moisture control and heat. By browning the butter, we remove a significant amount of water, which prevents the cookies from becoming cakey. This lets the sugars concentrate and caramelize more effectively against the hot baking sheet.
- Brown Butter
- Removing water from the fat means the dough doesn't steam as much, leading to a tighter, crispier edge.
- The Chill
- Cold dough prevents the fat from melting too quickly in the oven, which keeps the center from overcooking before the edges crisp up.
- Pan Banging
- Tapping the pan collapses the cookie, forcing the dough outward to create those thin, crunchy ripples.
| Method | Prep Time | Texture | Best For |
|---|---|---|---|
| Brown Butter | 20 min | Nutty & Crisp | High end flavor |
| Melted Butter | 5 min | Soft & Chewy | Quick cravings |
| Creamed Butter | 15 min | Cakey & Tall | Traditional style |
Ingredient Deep Dive
| Ingredient | What It Does | Best Swap |
|---|---|---|
| Browned Butter | Adds nuttiness and reduces moisture | Ghee (use 1:1) |
| Light Brown Sugar | Adds chew and molasses depth | Dark brown sugar (richer) |
| All Purpose Flour | Provides the structure | 1:1 GF blend (denser) |
| Dark Chocolate | Adds bitter contrast to the sugar | Semi sweet chunks |
The Ingredient List
- 225g unsalted butter, browned and cooled Why this? Removes water for a crispier edge
- 150g granulated white sugar Why this? Encourages spreading and crispness
- 165g packed light brown sugar Why this? Keeps the center chewy
- 50g large egg, room temperature Why this? Binds the dough without adding too much liquid
- 10ml vanilla extract Why this? Classic aromatic base
- 280g all purpose flour Why this? Standard protein for structure
- 5g baking soda Why this? Helps the cookies brown and spread
- 3g salt Why this? Balances the heavy sugar
- 170g semi sweet chocolate chips Why this? Stable chocolate pockets
- 85g chopped dark chocolate chunks Why this? Creates melted chocolate pools
Gear You'll Need
You don't need a professional kitchen, but a few things make a difference. A heavy bottomed saucepan is a must for browning the butter, as thin pans can burn the milk solids too quickly. I prefer using a stand mixer such as KitchenAid for the sugars, but a hand mixer works fine too.
For the baking, use a heavy gauge baking sheet. Thin sheets warp and create uneven hot spots, which means some cookies will burn while others stay raw. Line them with parchment paper or a silicone mat. Avoid greasing the pan with butter, as that can cause the cookies to slide and lose their rippled shape.
Making the Cookies
Phase 1: Preparing the Flavor Base
Melt butter in a saucepan over medium heat. Whisk it constantly until you see mahogany colored bits forming at the bottom and it smells nutty. Remove it from the heat and let it cool for 15 minutes. Note: If it's too hot, it will melt the sugars instantly and ruin the texture.
Beat the cooled browned butter with the white and brown sugars. Mix until combined but not over beaten. Add the egg and vanilla extract. Beat on medium high until the mixture is smooth and glossy.
Phase 2: The Gentle Fold
In a separate bowl, whisk together the flour, baking soda, and salt. Slowly mix these dry ingredients into the wet mixture on the lowest speed. Stop as soon as the flour streaks disappear. Note: Overmixing develops gluten, which makes cookies tough.
Fold in the semi sweet chocolate chips and the dark chocolate chunks by hand using a spatula. This keeps the chocolate distributed without breaking the chunks.
Phase 3: The Precision Bake
Chill the dough for 2 hours. This is a non negotiable step for the texture.
Scoop the dough into balls and place them on the sheet. Bake for 10 minutes. Midway through, at the 5 minute mark, firmly tap the baking sheet against the oven rack. This collapses the air pockets and pushes the dough out to create those edges.
Pull them out until the edges are golden brown but the centers still look slightly underdone.
Chef's Note: If you want that "restaurant look," press a few extra chocolate chunks into the tops of the cookies immediately after they come out of the oven.
Fixing Cookie Problems
Baking is a bit of a balancing act. If your kitchen is too hot, the butter melts before the structure sets. If you use too much flour, you get a biscuit instead of a cookie.
Cakey Texture Issues
This usually happens if you use too much flour or if the butter wasn't browned properly. When too much water remains in the butter, it creates steam, which lifts the cookie up.
Lack of Spread
If the cookies stay in balls, the dough might have been too cold or the baking soda is old. Make sure your soda is fresh and the oven is fully preheated.
Timing the Pull
Pulling them too late is the most common error. The cookies continue to cook on the hot pan for a few minutes after leaving the oven.
| Problem | Root Cause | Solution |
|---|---|---|
| Too Flat | Butter was too melted | Chill dough longer |
| Burnt Bottoms | Pan is too thin | Use a double sheet or parchment |
| Dry Center | Overbaked | Pull when center looks "soft" |
Twists and Substitutions
If you want to change the vibe, you can swap the chocolate for white chocolate and dried cranberries. For a saltier hit, sprinkle flaky sea salt on top the second they come out of the oven.
For those who prefer something even thinner, you can check out thin crunchy versions of this style. If you find this recipe too crisp and want something softer, you can increase the brown sugar by 20g and reduce the white sugar by the same amount.
Decision Shortcut:
- For more crunch: Use only white sugar.
- For more chew: Increase the brown sugar.
- For a nuttier taste: Brown the butter for an extra 2 minutes until very dark.
Scaling the Batch
When making a half batch, beat one egg in a small bowl and use exactly 25g. Reduce the bake time by about 20%, as smaller batches can sometimes cook faster depending on your oven's airflow.
If you're doubling or tripling the recipe, do not multiply the salt and baking soda linearly. Use 1.5x the salt and soda for a 2x batch to avoid a metallic aftertaste. Work in batches on your baking sheets. Never crowd the pan, or the cookies will merge into one giant sheet.
For double batches, lower the oven temperature by about 15°C and extend the bake time by 2-3 minutes to ensure the centers set.
Cookie Beliefs
Some people think you need to "cream" butter and sugar for 5 minutes to get a good cookie. For this recipe, that's actually a mistake. Too much air makes them cakey, and we want them dense and rippled.
Another common thought is that you should use melted butter for a chewy center. While melted butter does help, browned butter does the job better because it adds flavor while removing the water that causes that "bread like" texture.
Storage and Freshness
Store these in an airtight container at room temperature for up to 5 days. If you want to keep them longer, the freezer is your best friend. Freeze them as raw dough balls on a tray first, then transfer them to a bag. You can bake them straight from the freezer, just add 2 minutes to the cook time.
To keep them from getting stale, put a slice of white bread in the container. The cookies will absorb the moisture from the bread, keeping the centers soft. If you've made too many, you can blend them into a crumble for ice cream toppings. For a different style of treat, you might enjoy chewier cookies for a softer daily snack.
Serving Suggestions
These go best with a cold glass of milk or a bitter espresso to cut through the sweetness. For a more gourmet approach, serve them warm with a scoop of vanilla bean ice cream and a drizzle of salted caramel.
If you're serving these at a party, arrange them on a wooden board with some fresh raspberries and sliced pears. The acidity of the fruit balances the rich, nutty browned butter of the Crisp Edge Chocolate Chip Cookies perfectly.
Recipe FAQs
What's the secret to crispy chocolate chip cookies?
Tapping the baking sheet against the oven rack midway through baking. This action collapses air pockets, creating those signature crisp, rippled edges.
What makes cookies crispy rather than chewy?
The use of browned butter and a balanced sugar ratio. Browned butter removes water content, while the combination of white and brown sugars encourages the dough to spread and caramelize.
How to make cookies crispy outside and soft inside?
Chill the dough for 2 hours before baking. Cold dough prevents the fats from melting too quickly, ensuring the center stays tender while the edges crisp up.
How to bake Crispy and Easy Chocolate Chip Cookies?
Brown the butter, chill the dough for 2 hours, and bake for 10 minutes. Firmly tap the pan against the rack halfway through the cook time to achieve the best texture.
Is it true that you can skip chilling the dough without affecting the texture?
No, this is a common misconception. Skipping the chill step causes the cookies to spread too rapidly, resulting in a thin, flat cookie rather than one with a soft center and crisp edges.
How to store these cookies to keep them from getting stale?
Place them in an airtight container at room temperature with a slice of white bread. The cookies absorb moisture from the bread to maintain their softness; if you prefer a different crunch, try our golden brown cookies.
Are there cookies for diabetics?
No. This recipe relies on granulated white sugar and light brown sugar, which are not suitable for those managing diabetes.
Crisp Edge Chocolate Chip Cookies