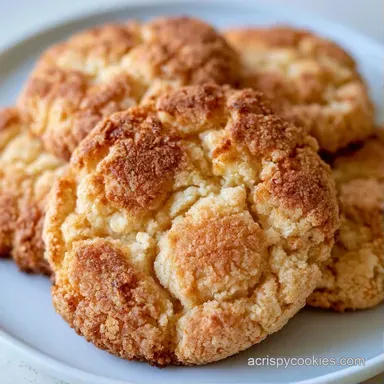
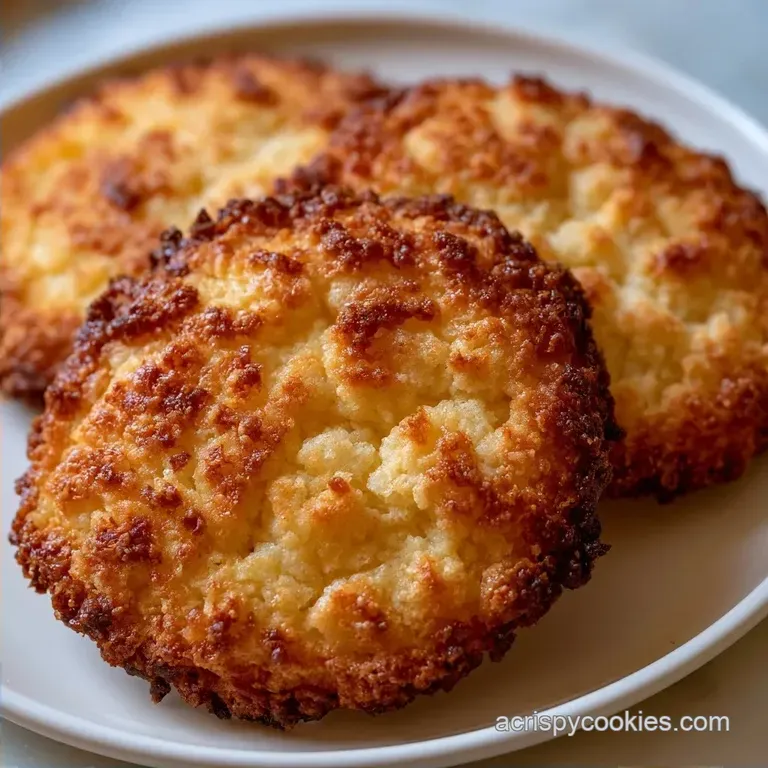
Crunchy Brown Butter Cookies: Shattering Crisp Edges
- Time:15 minutes active + 30 minutes chilling = Total 57 minutes
- Flavor/Texture Hook: Shattering crisp edges with a velvety, toasted hazelnut finish
- Perfect for: A high impact treat that feels fancy but uses basic pantry staples
Crunchy Brown Butter Cookies
That first sizzle is where the magic happens. You know the sound - that frantic bubbling in the pan as the butter stops melting and starts to foam. Then comes the scent: it shifts from plain cream to something that smells like toasted hazelnuts and warm caramel.
It's a sensory trigger that tells every flavor detective in the room that something serious is happening in the kitchen.
But let's be real, I've had my share of disasters. I once tried a "quick" brown butter version where I didn't let the butter cool. I dumped the boiling hot fat straight into the sugar and egg, and the result was a nightmare.
Instead of distinct cookies, I ended up with one giant, greasy pancake that covered the entire baking sheet. It was a sugary disaster that looked more like a broken mirror than a dessert.
That's why we're doing this differently. These Crunchy Brown Butter Cookies are the fix for the "pancake effect." We're focusing on temperature control and a specific emulsion process to ensure you get that gorgeous contrast between a crisp, golden perimeter and a slightly tender center. Trust me on this, the extra few minutes of patience with the cooling butter is what separates a home bake from a restaurant quality copycat.
Secret to the Texture
I've spent a lot of time wondering why some cookies shatter when you bite them while others just bend. It comes down to how we handle the fats and the air.
- Water Evaporation
- Browning the butter boils off the water content, meaning there's less steam to puff up the cookie, leading to a denser, crispier snap.
- Air Incorporation
- Beating the egg on high for two minutes creates a stable structure that supports the heavy fats, preventing the dough from collapsing.
- Fat Solidification
- Chilling the dough for 30 minutes ensures the butter is cold when it hits the oven, which slows the spread and keeps the edges from burning before the middle sets.
- Sugar Crystallization
- The mix of white and brown sugar creates a balance where the white sugar helps the edges crisp up while the brown sugar keeps the center velvety.
| Method | Time | Texture | Best For |
|---|---|---|---|
| Melted Butter | Fast | Soft/Cakey | Quick weekday snacks |
| Creamed Butter | Medium | Thick/Puffy | Traditional bakery style |
| Brown Butter | Slow | Shattering/Rich | Gourmet flavor depth |
The Technical Details
To get that professional finish, you have to treat the ingredients like components in a lab. It's not just about mixing; it's about the state of the matter.
Component Analysis
| Ingredient | Science Role | Pro Secret |
|---|---|---|
| Unsalted Butter | Fat & Flavor | Brown until amber for the deepest nuttiness |
| Brown Sugar | Moisture & Chew | Packed tight to ensure a caramel like base |
| Baking Soda | Lift & Color | Reacts with brown sugar to create a golden hue |
| Semi Sweet Chips | Contrast | Use high cocoa chips to balance the rich butter |
If you're looking for that specific "bakery" result, keep these three precision checkpoints in mind. First, your oven must be exactly 175°C (350°F) - a few degrees off can either cause over spreading or a raw center.
Second, the dough must chill for at least 30 minutes; skipping this is the fastest way to get the pancake effect. Third, pull them out at exactly 12 minutes when the edges are golden but the centers still look slightly underbaked.
The Ingredient List
Right then, let's get your mise en place sorted. I'm using metric weights here because it's the only way to be consistent. If you're using cups, please be careful not to pack the flour too tightly.
- 225g (1 cup) unsalted butter Why this? Provides the toasted base flavor
- 5ml (1 tsp) vanilla extract Why this? Adds aromatic warmth
- 150g (3/4 cup) granulated white sugar Why this? Essential for the crispy edges
- 150g (3/4 cup) packed light brown sugar Why this? Adds moisture and chew
- 50g (1 large egg) Why this? Binds the dough and adds lift
- 250g (2 cups) all purpose flour Why this? Standard protein for structure
- 5g (1 tsp) baking soda Why this? Promotes browning and spread
- 3g (1/2 tsp) salt Why this? Cuts through the heavy sweetness
- 255g (1 1/2 cups) semi sweet chocolate chips Why this? Balanced sweetness and bitterness
- Flaky sea salt (for finishing)
| Original Ingredient | Substitute | Why It Works |
|---|---|---|
| Unsalted Butter | Salted Butter | Same fat content. Note: Reduce added salt by 1/4 tsp |
| Light Brown Sugar | Dark Brown Sugar | More molasses. Note: Deeper flavor, slightly softer texture |
| All Purpose Flour | gluten-free Blend | 1:1 ratio. Note: Use a blend with xanthan gum for similar snap |
| Semi Sweet Chips | Dark Chocolate Chunks | Higher cocoa. Note: More bitter, pairs well with salty butter |
Essential Kitchen Tools
You don't need a professional kitchen to crack the code on these, but a few specific tools make the process much smoother.
For the butter, use a light colored saucepan. This is a non negotiable. If you use a dark or black pan, you won't be able to see the milk solids changing color, and you'll likely burn the butter before you realize it's browned. I usually use a stainless steel pot.
A stand mixer such as a KitchenAid is great for that 2 minute egg beat, but a hand mixer works just as well. You'll also need parchment paper. Do not grease the pan with butter or oil; the dough needs to grip the surface slightly to maintain its structure. Finally, a wire cooling rack is essential.
If you leave the cookies on the hot pan, they'll continue to bake from the bottom and can become overly hard.
Step by step Guide

Let's crack on with the actual process. Follow these steps closely, especially the cooling and chilling phases.
Phase 1: Crafting the Brown Butter
Melt the 225g of butter in your light colored saucepan over medium heat. Whisk constantly. You'll see it foam up, then subside. Watch for the brown bits to form at the bottom. Once it smells nutty and looks amber, remove it from the heat immediately.
Stir in the 5ml of vanilla extract and let it cool for 10 minutes. Note: Cooling prevents the eggs from scrambling.
Phase 2: Creating the Emulsion
In a large bowl, combine the cooled brown butter with 150g white sugar and 150g brown sugar. Beat them together until the mixture looks like wet sand. Now, add the 50g egg and beat on high for 2 minutes. Watch for the batter to lighten in color and become fluffy.
This is where we build the structure.
Phase 3: Folding and Chilling
Sift in 250g flour, 5g baking soda, and 3g salt. Use a spatula to fold the ingredients gently. Stop the moment you see no more white streaks of flour. Fold in the 255g of chocolate chips. Scoop the dough into balls and put them in the fridge for 30 minutes.
Note: This is the "anti pancake" insurance policy.
Phase 4: Baking to Golden Perfection
Preheat your oven to 175°C (350°F). Place the chilled balls 2 inches apart on your parchment lined sheets. Bake for 11–13 minutes until the edges are golden and the centers look slightly soft.
Remove from the oven and sprinkle immediately with flaky sea salt. Transfer to a wire rack to cool.
Chef's Note: For an even more professional look, press a few extra chocolate chips into the top of each ball right before they go into the oven. It creates those beautiful chocolate pools you see in high end bakeries.
Fixing Common Issues
Even with a plan, things can go sideways. Most cookie problems are actually temperature problems.
Troubleshooting Common Issues
| Issue | Solution |
|---|---|
| Why are my cookies too flat | This usually happens if the butter was too hot when mixed with the sugar or if you skipped the chilling step. |
| Butter burnt instead of browned | Butter goes from "perfectly browned" to "burnt" in about ten seconds. If the solids turn black instead of golden brown, the flavor will be bitter. If this happens, you have to start over. |
| Why didn't my cookies spread | This is often caused by over chilling or using too much flour. If you packed your flour into the measuring cup, you might have added 20-30g too much. |
The Texture Checklist
- ✓ Butter is amber, not black
- ✓ Egg beaten until pale and fluffy
- ✓ Dough chilled for at least 30 mins
- ✓ Edges are golden before removing
- ✓ Salt added while still hot
Ways to Customize
Once you've nailed the base recipe for these Crunchy Brown Butter Cookies, you can start playing with the flavor profile. If you want a darker, more intense taste, try using dark brown sugar instead of light. It adds a deeper molasses note that pairs beautifully with the toasted butter.
For those who want a different kind of treat, you might enjoy my Classic Chocolate Chip Cookies recipe which focus more on a chewy center than a shattering edge. If you're feeling adventurous, try swapping the semi sweet chips for chunks of white chocolate and dried cranberries - the tartness cuts through the richness of the brown butter perfectly.
Another pro move is to add a pinch of espresso powder to the flour. It doesn't make the cookies taste like coffee, but it acts as a flavor enhancer for the chocolate, making it taste more "expensive."
Storage and Scraps
To keep that shatter crisp texture, storage is key. Store these in an airtight container at room temperature for up to 5 days. If you put them in the fridge, they'll lose their snap and become too soft. For long term storage, you can freeze the baked cookies for up to 3 months.
Just thaw them for 20 minutes or pop them in a 150°C oven for 3 minutes to bring back the crispiness.
As for zero waste, never throw away the leftover browned butter bits in your pan. If you have a tablespoon or two left over, stir it into your morning oatmeal or drizzle it over sautéed vegetables. It's essentially liquid gold.
If you have a bit of dough left that's too small for a cookie, fry it in a pan for a quick "cookie fry" snack.
Best Serving Pairings
These cookies are incredibly rich, so you need something to balance the decadence. A cold glass of whole milk is the classic choice, but a tart berry tea also works wonders to cleanse the palate between bites.
If you're serving these as part of a larger dessert spread, they pair surprisingly well with a slice of Cinnamon Sugar Sourdough Bread toasted with a bit of honey. The contrast between the savory, fermented notes of the sourdough and the sweet, nutty crunch of the cookies is a real treat for the taste buds.
For a more formal presentation, serve them on a wooden platter with some fresh raspberries and a dollop of whipped cream on the side. The brightness of the fruit cuts through the heavy butter, making the whole experience feel lighter.
Recipe FAQs
How to make cookies crispy outside and soft inside?
Bake at 350°F (175°C) for 11 13 minutes. This timeframe allows the edges to set and golden while the center remains slightly underbaked and tender.
How can I ensure that cookies are crisp when I bake them?
Refrigerate the dough for at least 30 minutes. Chilling solidifies the fats, which prevents the cookies from spreading too thin and ensures a structured, crunchy snap.
How to make the middle dough of cookies crisp?
Increase the baking time by 1 2 minutes. This removes more moisture from the center of the cookie, creating a uniform crunch from edge to middle.
How to make these crunchy cookies soft and chewy instead?
Reduce the baking time by 2 minutes. This leaves more moisture in the center of the cookie, resulting in a chewier, softer texture.
How to prevent cookies from becoming soft during storage?
Store them in an airtight container at room temperature. Avoid the refrigerator, as the humidity will destroy the snap and make the cookies soft.
Why did my cookies turn out too flat?
Cool the browned butter for 10 minutes before mixing. If the butter is too hot when combined with the sugar, the batter becomes too fluid and spreads excessively in the oven.
Is it true that browning the butter is just for color?
No, this is a common misconception. Toasting the milk solids creates a deep, nutty flavor profile. If you enjoyed mastering this flavor here, see how the same principle works in our brown sugar cookies.
Crunchy Brown Butter Cookies