Deep Flavor Crispy Cookies: Rich and Toasted
- Time: 20 min active + 10 min baking = Total 30 mins
- Flavor/Texture Hook: Toasted nutty aroma with a shattering snap
- Perfect for: Coffee pairings or late night treats
That sudden sizzle when the butter starts to foam is the exact moment the magic happens. I remember this specific obsession starting at a tiny bakery in Vermont where the cookies weren't just sweet, they tasted like toasted hazelnuts and dark caramel.
I spent way too much time trying to figure out why my home versions were always soft puffs instead of those thin, lacey disks that actually snap.
The breakthrough wasn't in the flour or the sugar, but in the temperature of the fat. By pushing the butter past the melting point into the "browned" stage, we change the entire profile of the dough. These Deep Flavor Crispy Cookies are a re creation of that specific, sophisticated crunch that you usually only find in professional pastry shops.
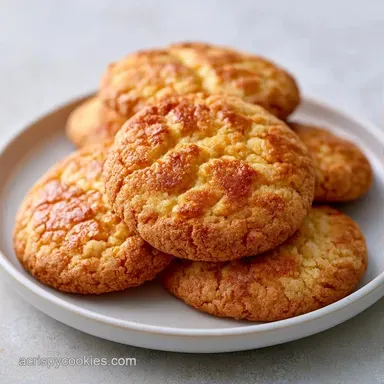
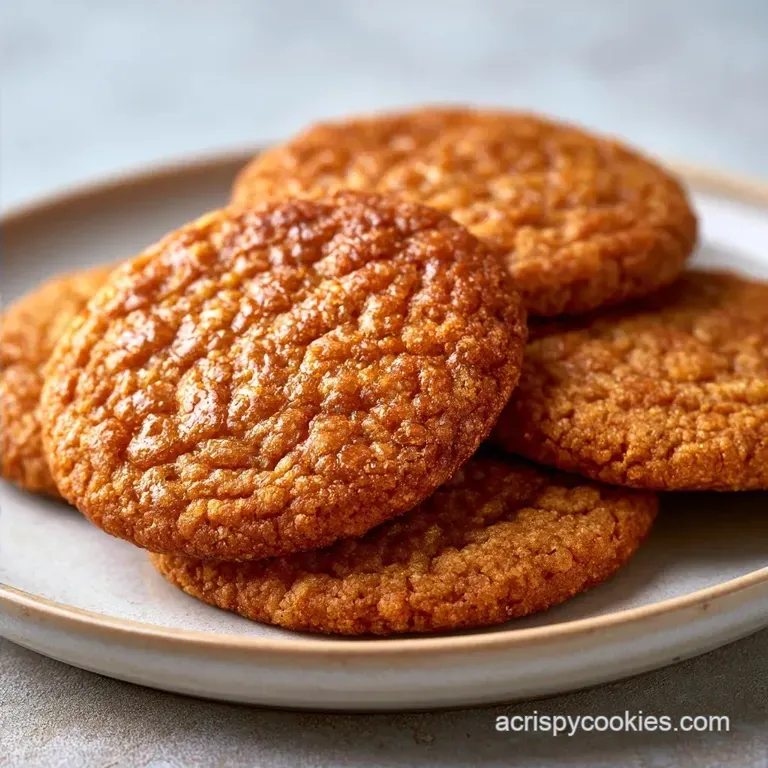
You can expect a cookie that is thin, mahogany colored, and has a velvety chocolate finish. It's a focused approach to baking where we prioritize the depth of the sugar and the roast of the butter over everything else.
Trust me, once you smell the browned butter hitting the sugar, you'll never go back to softened butter again.
Deep Flavor Crispy Cookies
The goal here is a specific kind of crunch. We aren't looking for a hard biscuit, but a delicate, shattering texture that melts into a rich, buttery finish. By using a combination of dark brown sugar and a hint of cocoa powder, we build layers of flavor that feel complex rather than just sugary.
Since we are using a skillet to brown the butter, the process is fast. We're skipping the long chilling times found in many other recipes, which means you can go from craving to eating in about half an hour. If you're in the mood for something softer, my Classic Chocolate Chip Cookies recipe are a great alternative, but for that distinct snap, this is the way to go.
The Secret to Getting the Snap
To get that specific texture, we have to manipulate how the sugars and fats interact in the oven. Here is what's actually happening in your pan:
- Milk Solid Toasting: Heating butter until it browns creates a nutty aroma. This is basically a concentrated version of the flavor you get in toasted nuts.
- Moisture Control: The cocoa powder acts like a sponge, soaking up tiny amounts of extra liquid. This helps the cookie set firmer and prevents it from becoming a chewy puddle.
- Sugar Caramelization: Using dark brown sugar means more molasses. When this hits the heat, it creates a deeper, more complex sweetness that tastes almost like toffee.
- Egg Yolk Ratio: Adding an extra yolk provides fat without adding the water found in egg whites. This keeps the cookie rich but prevents it from puffing up like a cake.
| Butter Method | Time | Texture | Best For |
|---|---|---|---|
| Creamed (Cold) | Long | Thick/Soft | Soft batch cookies |
| Browned (Hot) | Fast | Thin/Crispy | Deep flavor snacks |
Component Analysis
Understanding the role of each ingredient helps when you're adjusting the recipe on the fly. We aren't just mixing things; we're building a flavor profile.
| Ingredient | Science Role | Pro Secret |
|---|---|---|
| Browned Butter | Flavor Base | Brown it until mahogany, not just gold |
| Cocoa Powder | Depth/Structure | Sift it to avoid bitter clumps |
| Dark Brown Sugar | Color/Tack | Pack it tight for consistent sweetness |
| Egg Yolk | Richness | Use room temp eggs to prevent splitting |
The Right Tools
You don't need a professional kitchen, but a few specific tools make this much easier. I always use a heavy bottomed stainless steel skillet for the butter because it lets me see the brown specks clearly. A non stick pan is too dark, and you might burn the butter before you realize it's toasted.
For the baking, parchment paper is non negotiable. These cookies spread more than a standard drop cookie, and without parchment, you're risking a sticky mess. A digital scale is also a huge help for the flour, as "cups" can vary wildly depending on how you scoop.
Getting the Process Right
Right then, let's get into the actual making. Follow these steps closely, especially the butter stage, as that's where the flavor lives.
- Melt butter in a skillet over medium heat. Whisk constantly as it foams. Once small brown specks appear and it smells like toasted hazelnuts, remove from heat immediately. Note: This happens fast; don't walk away from the stove.
- Allow the browned butter to cool for 5-10 minutes. Note: Adding eggs to boiling butter will scramble them.
- Whisk the cooled browned butter with granulated white sugar and dark brown sugar until combined.
- Beat in the egg, egg yolk, and vanilla extract until the batter is glossy and smooth.
- Stir in the all purpose flour, baking soda, salt, and cocoa powder. Mix until just combined. Note: Overmixing creates gluten, which makes the cookies tough instead of crispy.
- Gently fold in the semi sweet chocolate chips until evenly distributed.
- Roll dough into small, 1 inch balls (about 1 tablespoon each). Place 2 inches apart on parchment lined baking sheets.
- Slide into a preheated oven.
- Bake 10 mins until the edges are golden and the center looks set.
Chef's Tip: To get a more professional look, press a few extra chocolate chips into the top of each ball right before they go into the oven. It prevents the chips from hiding inside the dough.
Fixing Common Cookie Mishaps
Even for a flavor detective, things can go sideways. Most issues with this recipe come down to temperature control. If your butter is too hot when you add the sugars, the dough will be too oily.
Cookies are too flat
If your cookies spread into one giant sheet, the butter was likely too hot when mixed, or your oven wasn't fully preheated. This causes the fat to liquefy too quickly before the flour can set.
Center is still soft
Underbaking is the main culprit here. Because of the cocoa powder, these cookies look darker than usual, so it's easy to think they're done when they aren't. Look for the edges to be firmly set.
Burnt bottoms
This usually happens if you're using a dark colored baking sheet. Dark pans absorb more heat. You can solve this by doubling up your parchment paper or lowering the rack by one level.
| Problem | Root Cause | Solution |
|---|---|---|
| Greasy dough | Butter too hot | Cool butter to 90°F before mixing |
| Cakey texture | Too much flour | Use a scale for 280g exact weight |
| Bitter taste | Burnt butter | Remove from heat at first brown speck |
Common Mistakes Checklist:
- ✓ Did you cool the butter before adding eggs?
- ✓ Did you avoid overmixing the flour?
- ✓ Are the balls exactly 1 inch?
- ✓ Is your oven fully preheated?
- ✓ Did you use parchment paper?
Mix It Up
The beauty of this base is how well it handles additions. If you want to lean into the chocolate side, you can add a tablespoon of instant espresso powder. According to Serious Eats, coffee doesn't make things taste like coffee in small amounts; it just makes the chocolate taste "more" like chocolate.
If you're looking for something different, you can swap the chips for chopped walnuts or pecans. The toasted nut flavor of the browned butter pairs perfectly with actual nuts. For a different treat entirely, try these alongside my homemade hot chocolate mix for the ultimate winter night.
| Original Ingredient | Substitute | Why It Works |
|---|---|---|
| Dark Brown Sugar | Muscovado Sugar | Even deeper molasses flavor. Note: Makes cookies slightly softer |
| Semi sweet Chips | Bittersweet (70%) | Cuts the sweetness with acidity. Note: More intense chocolate taste |
| All purpose Flour | White Whole Wheat | Adds a grainy, rustic texture. Note: Denser crumb |
- - For extra crunch
- Bake for an additional 1-2 mins.
- - For a saltier finish
- Sprinkle flaky sea salt on top immediately after baking.
- - For a fudgier center
- Use slightly larger dough balls (1.5 inches).
Adjusting Your Batch Size
Scaling this recipe is pretty straightforward, but you have to be careful with the eggs. If you're cutting the recipe in half, you can't easily use half an egg. The best trick is to beat one egg in a small bowl and then weigh out 25g of it.
When doubling the recipe, don't double the salt and baking soda exactly. Start with 1.5x the amount and taste the dough. Too much baking soda can leave a metallic aftertaste in the Deep Flavor Crispy Cookies.
Also, work in batches; overcrowding your counter with dough can lead to it getting too warm, which ruins the snap.
Busting Cookie Lore
You'll often hear that you must chill your dough for 24 hours to get the best flavor. While that's true for some chewy recipes, it's not necessary for this one. Because we brown the butter, we've already developed the flavor that chilling usually provides.
Another common myth is that adding more flour makes a cookie crispier. In reality, too much flour makes them cakey and dry. The crispness in this recipe comes from the ratio of sugar to fat and the removal of water through browning the butter.
Storage and Freshness
To keep that shatter crisp texture, store these in a single layer in an airtight container. If you stack them too high while they're still slightly warm, they can trap steam and soften. I find that they stay fresh for about 5 days at room temperature.
If you have leftovers, you can freeze the baked cookies for up to 3 months. Just pop them in the oven at 300°F (150°C) for 3 minutes to bring back that fresh baked sizzle.
For zero waste, if you have leftover browned butter in the pan, stir it into your morning oatmeal or use it to sauté mushrooms.
Best Ways to Eat These
These are designed to be a contrast of flavors. The bitterness of the cocoa and the saltiness of the butter make them a great partner for a cold glass of milk or a strong espresso. If you're serving them for a party, try placing them on a platter with some fresh raspberries to add a bit of acidity.
For a really indulgent experience, serve them slightly warm with a scoop of vanilla bean ice cream. The heat from the Deep Flavor Crispy Cookies will melt the ice cream just enough to create a velvety sauce that complements the crunch.
Just make sure you don't let them sit too long, or you'll lose that signature snap we worked so hard for!
Recipe FAQs
How to make cookies crispy outside and soft inside?
Combine granulated and brown sugars. White sugar promotes crisp edges, while the dark brown sugar retains enough moisture to keep the center tender.
How can I ensure that cookies are crisp when I bake them?
Brown the butter before mixing. This process removes water from the fat, preventing the cookies from steaming and ensuring a snappier texture.
How to make the middle dough of cookies crisp?
Space the 1 inch balls 2 inches apart. Proper spacing allows heat to circulate and moisture to evaporate from the center of the cookie during baking.
Are crispy cookies more popular than soft cookies?
It depends on personal preference. While some prefer a chewy bite, others favor the intense caramelization and snap found in crispy varieties.
Should I go with soft and chewy, or crispy and crunchy?
Choose crispy for a deeper, toasted flavor profile. If you enjoy this snap, you'll love the similar technique used in our brown sugar cookies.
Is it true that adding extra flour makes cookies crispier?
No, this is a common misconception. Increasing the flour ratio typically results in a cakey or dry cookie rather than a crisp one.
How to store these to keep them crispy?
Store them in a single layer in an airtight container. Stacking cookies while they are still slightly warm traps steam and softens the texture.
Deep Flavor Crispy Cookies