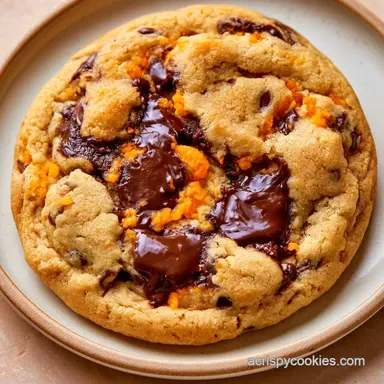
Golden Halloween Chocolate Chip Cookies
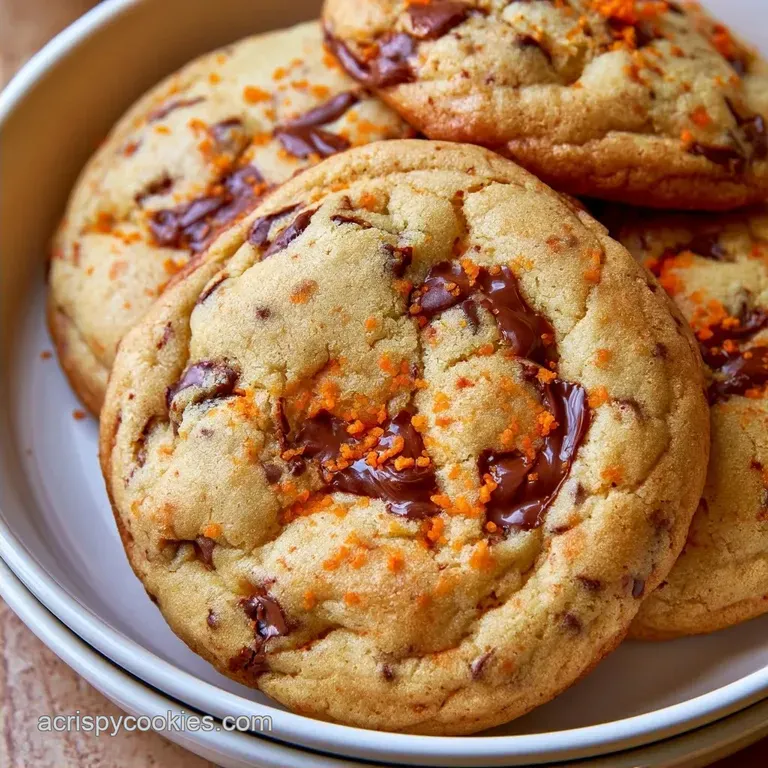
- Time: 5 min active + 10 min bake
- Texture: Chewy center with mahogany gold edges
- Ideal for: Last-minute party platters and kid-friendly baking
The aroma of melted chocolate and toasted sugar fills the house, and the kitchen is a disaster of frosting and orange sprinkles. I recall one October when I spent four hours on an intricate cake, only for it to slide off the plate five minutes before guests arrived.
That was the day I decided to stop overcomplicating my party sweets.
Now, I prefer recipes that are fast and visually bold. These cookies are exactly that, offering a high-impact look without requiring a professional degree or an entire afternoon of work.
You'll find a cookie that is slightly bendable in the middle and crisp around the rim. These Halloween Chocolate Chip Cookies are a lifesaver during the seasonal chaos, meaning they're fast to prep and even faster to decorate.
Why These Cookies Hit the Spot
- Brown Sugar Ratio: The extra molasses pulls moisture from the air to keep the center soft. This is the same trick used in my chewy chocolate chip cookies to avoid a dry snap.
- Flash Heat: Baking at 375°F sears the outside of the Halloween Chocolate Chip Cookies quickly. This locks in the center moisture before the dough over spreads.
The Quick Specs
| Feature | Detail |
|---|---|
| Total Time | 15 minutes |
| Oven Temp | 375°F (190°C) |
| Yield | 24 cookies |
| Texture | Chewy center, mahogany rim |
The speed of this recipe comes from the simplified mixing method. We aren't whipping air into the butter for ten minutes, just getting it pale and fluffy enough to support the chips.
The Halloween Chocolate Chip Cookies List
| Ingredient | Role | If You Don't Have It |
|---|---|---|
| Unsalted Butter | Fat and richness | Margarine (makes them softer) |
| Brown Sugar | Moisture and chew | Coconut sugar (grittier texture) |
| Baking Soda | Lift and browning | 1/4 tsp baking powder (less brown) |
| All Purpose Flour | Structure | 1:1 GF Blend (drier crumb) |
Wait until your butter is truly softened before starting. If it's too cold, the sugars won't incorporate, and you'll end up with lumps in your dough.
Gathering Your Essentials
- 1/2 cup (115g) softened unsalted butter Why this? Creates a buttery, rich foundation
- 3/4 cup (150g) packed brown sugar Why this? The molasses ensures a chewy bite
- 1/4 cup (50g) white granulated sugar Why this? Promotes crispier edges
- 1 large egg (50g) Why this? Acts as the binder for the batter
- 1 tsp (5ml) vanilla extract Why this? Offsets the sweetness
- 2 cups (250g) all-purpose flour Why this? Provides structural integrity
- 1 tsp (5g) baking soda Why this? Allows the cookies to rise
- 1/2 tsp (3g) salt Why this? Balances out the sugar
- 1 1/2 cups (255g) semi-sweet chocolate chips Why this? Delivers a timeless taste
- 24 candy eyeballs (approx. 20g) Why this? Gives them a creepy appearance
- 2 oz (56g) melted semi-sweet chocolate Why this? Ideal for piping on spider legs
To soften the butter, I typically let it sit at room temperature for two hours. If you're short on time, pop it in the microwave for 5 to 10 seconds, taking care not to let it fully melt.
Gear for the Kitchen
Basic equipment will do just fine. While a handheld mixer works perfectly, using a stand mixer like a KitchenAid can speed up the creaming stage.
You'll also need: Large mixing bowl Parchment paper (don't skip this or the cookies will stick) Baking sheets Piping bag or a small Ziploc bag for the melted chocolate Measuring cups and spoons
Parchment paper is a game-changer here. It prevents the bottoms from burning and simplifies cleanup, which is a huge help when you have a house full of guests.
From Prep to Plate
Phase 1: Quick Dough Prep
- Cream together the softened butter, brown sugar, and granulated sugar. Mix until the consistency is light and airy.
- Incorporate the egg and vanilla extract. Beat at medium speed until well blended.
- Gently fold in the flour, baking soda, and salt, stopping once the flour streaks vanish. Note: Avoiding over-mixing prevents toughness.
- Hand-stir the chocolate chips to keep them intact.
Phase 2: Baking with Precision
- Form the dough into 1-inch spheres, using roughly 1 tablespoon per ball.
- Arrange them on parchment-lined baking sheets, leaving 2 inches of space between each.
- Bake at 375°F (190°C) for 8–10 minutes until the edges reach a deep golden brown while the centers remain slightly soft.
- Allow them to set on the baking sheet for 5 minutes to finish cooking.
Phase 3: Adding Spooky Details
- Embed one or two candy eyes into the top of every warm cookie.
- After cooling, place a chocolate chip in the middle. Using a piping bag filled with melted chocolate, pipe 8 slender legs around the chip.
The secret is that "underbaked" center. If they seem fully cooked while in the oven, they will become too hard after cooling.
Fixing Spooky Baking Glitches
Temperature is the most common hurdle. When the room is overly warm, the butter can lose its structure, causing your Halloween Chocolate Chip Cookies to flatten out.
Fixing Flat Cookies
Should the dough feel oily or the cookies lose their shape, the butter probably exceeded the ideal temperature. To remedy this, place the portioned dough balls in the freezer for 5 minutes prior to baking. This solidifies the fats to preserve the cookies' lift.
Preventing Burnt Bottoms
To avoid scorched bottoms, be mindful of residual pan heat. Ensure the baking sheet is fully cooled before the next batch, or add a second layer of parchment paper as an insulator.
| Problem | Root Cause | Solution |
|---|---|---|
| Flat cookies | Butter too warm | Chill dough balls 5 mins |
| Tough texture | Over mixing flour | Mix only until streaks vanish |
| Eyeballs sliding | Cookies too cold | Press in while still warm |
| Burnt bottoms | Hot baking sheet | Cool pan between batches |
Additionally, if the eyeballs won't stay put, the cookies have cooled too quickly. Handle them in small groups to ensure they stay warm enough for the toppings to adhere.
Fun Twists and Swaps
Feel free to customize these cookies to suit your taste. If you're looking for a lighter option, applesauce oatmeal cookies make a great addition to your dessert platter.
| Original Ingredient | Substitute | Why It Works |
|---|---|---|
| Semi sweet chips | White chocolate | Equal fat levels. Note: Sweeter, pairs well with orange dye |
| Brown Sugar | Maple sugar | Similar moisture levels. Note: Provides a signature fall taste |
| Vanilla Extract | Almond Extract | More intense scent. Note: Use half the amount |
Decision Shortcut: More chew? → Add 1 tbsp molasses. A salty touch? → Sprinkle flaky sea salt on top. A nutty twist? → Swap 1/4 cup flour for almond flour.
For a colorful look, mix a drop of orange food coloring into the butter and sugar. This creates a bright orange dough, allowing the chocolate chips to resemble "dirt" for the spiders.
Storage and Scraps
Store your Halloween Chocolate Chip Cookies in a container with a piece of parchment paper between layers. This prevents the chocolate legs from sticking to other cookies.
Fridge Life
They stay fresh in the fridge for 5 days. If they get too hard, a quick 5 second zap in the microwave brings back that velvety center.
The Freezer
You can freeze the baked cookies for 2 months. Just wrap them tightly in foil. To eat, let them thaw at room temperature for an hour.
Zero Waste
Don't throw away the leftover melted chocolate in your piping bag. Drizzle it over sliced apples or bananas for a quick snack while you're decorating the rest of the batch.
Serving the Spooky Batch
The presentation is where these really shine. I like to arrange them on a large black platter to make the orange dough and white eyeballs pop.
The Spooky Platter
Create a "spider web" pattern using the remaining melted chocolate across the platter. Place the cookies at the intersections of the web. Add some candy corn or plastic spiders in the gaps to fill out the space.
The Perfect Pairing
These are rich, so pair them with something tart. A cold glass of apple cider or a sharp cheddar cheese slice balances the sweetness of the chocolate.
Since these take only 15 minutes from start to finish, they're the ideal solution for when you realize you forgot the dessert for the party. Just keep your oven at 375°F, follow the timings, and your Halloween Chocolate Chip Cookies will be the hit of the night.
Recipe FAQs
Can I stack these cookies?
No, use parchment paper between layers. This prevents the chocolate legs from sticking to other cookies during storage.
How to pipe the chocolate legs?
Wait for cookies to cool completely. Piping melted chocolate onto a cold surface keeps the lines sharp and prevents smudging.
Is it true that the centers must be fully browned?
Actually, no. Pull the cookies from the oven while centers look slightly underbaked to ensure a soft, chewy texture.
When is the best time to add candy eyes?
Press them in while cookies are slightly warm. The residual heat helps the eyeballs adhere securely to the top.
What other spooky treats can I bake?
Try recipes with different textures. If you enjoyed the themed decorating here, see how the same creative approach works in witch finger treats.
Halloween Chocolate Chip Cookies: Golden