Perfect Pumpkin Pie with Sweetened Condensed Milk
- Time: Active 15 minutes, Passive 50 minutes, Total 65 minutes
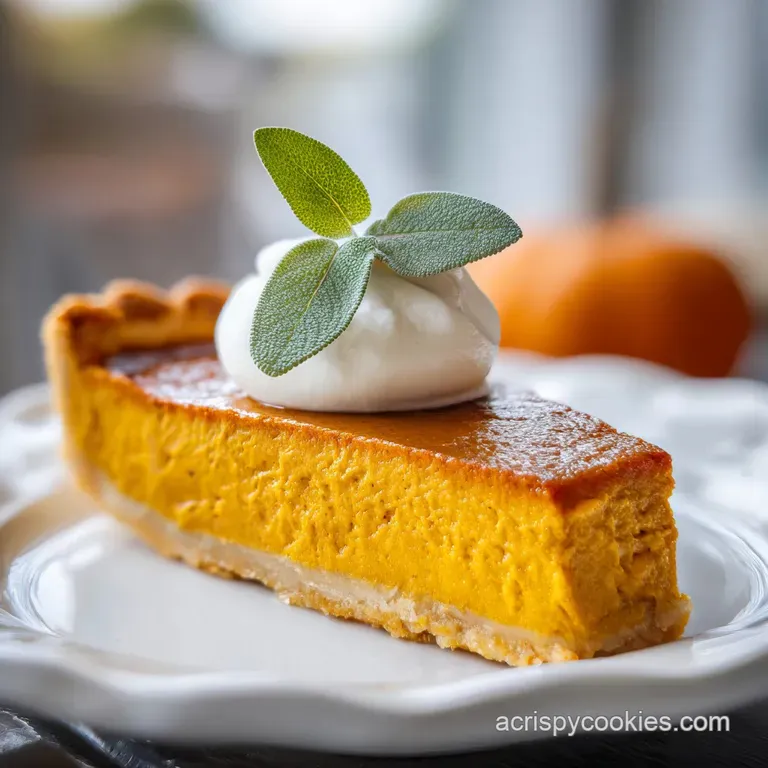
- Flavor/Texture Hook: Silky smooth custard with a buttery, shatter crisp crust
- Perfect for: Holiday centerpieces or a reliable, fail proof Sunday dessert
- Making the Perfect Pumpkin Pie with Sweetened Condensed Milk
- Essential Recipe Details and Timing
- Selecting the Finest Pie Components
- Tools for a Flawless Bake
- Step-by-Step Filling and Baking
- Fixing Common Pumpkin Pie Issues
- Creative Twists on the Classic
- Keeping Your Pie Fresh Longer
- Finishing Touches for Your Dessert
- Recipe FAQs
- 📝 Recipe Card
Making the Perfect Pumpkin Pie with Sweetened Condensed Milk
The kitchen smells like a warm hug. It’s that specific, intoxicating aroma of cinnamon, nutmeg, and ginger blooming in the oven's heat, mingling with the scent of butter browning in the crust.
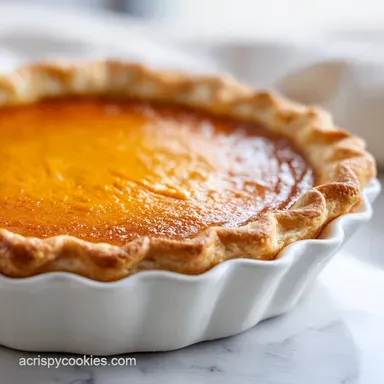
Whenever I pull a tray out, the sight of a perfectly smooth, pumpkin orange surface without a single hairline fracture in the center feels like a genuine triumph. I remember the first time I ditched the evaporated milk for the thick, glossy ribbons of sweetened condensed milk; the texture of the batter changed instantly, becoming heavy and luxurious in a way that promised a much better result than the watery mixtures I’d struggled with before.
Discover the ultimate "Perfect Pumpkin Pie with Sweetened Condensed Milk" featuring one unforgettable recipe. This isn't just about mixing ingredients; it’s about understanding how those components interact to give you that velvety, melt in-the mouth feel every single time.
We’ve all been there cutting into a pie only to find a soggy bottom or a filling that feels more like scrambled eggs than a custard. I spent a long time figuring out that the secret isn't just in the pumpkin, but in how we handle the proteins and the moisture levels within that beautiful 9 inch deep dish crust.
I want you to think about the way the fork should glide through a slice. It shouldn't meet resistance, but it should hold its shape cleanly on the plate. There is a specific satisfaction in seeing those sharp, clean edges when you serve a slice to a friend.
We are going to look at the exact timing windows and temperature shifts that make this happen. Trust me, once you see how the sweetened condensed milk acts as both a sweetener and a structural stabilizer, you’ll never want to go back to the thin, traditional recipes that leave too much to chance.
Stable Custard Filling Science
Pre Cooked Protein Stability: Sweetened condensed milk contains milk solids that have already been concentrated by heat, reducing the "free water" in the filling that usually causes cracks.
over High heat Crust Setting: Starting the bake at 220°C (425°F) allows the fats in the dough to expand and set the structure before the filling can soak in.
Glucose Protein Interaction: The sugar in the condensed milk bonds with the egg proteins, slowing down their coagulation so they stay soft and velvety rather than becoming rubbery.
| Pie Thickness | Internal Temp | Rest Time | Visual Cue |
|---|---|---|---|
| 1.5 inch (Standard) | 175°F (80°C) | 2 hours | Center has a slight gelatinous jiggle |
| 2 inch (Deep Dish) | 180°F (82°C) | 3 hours | Edges look matte; center is glossy |
| Mini Pie (Tart) | 170°F (77°C) | 45 minutes | Filling looks domed and firm |
When you are looking for that visual cue in the oven, don't wait for the middle to look solid. If the center doesn't move when you gently nudge the pan, it’s already overbaked, and you’ll likely see cracks as it cools.
You want it to look like a set bowl of Jell O stable on the outside but with a rhythmic, soft bounce in the very center.
Essential Recipe Details and Timing
Getting the timing right is the difference between a dessert that people polite eat and one they ask for seconds of. We are looking at exactly 15 minutes of hands on work, mostly whisking and prepping the crust, followed by a 50 minute stay in the oven.
This split temperature method is a technique I learned after years of soggy bottoms; we need that initial blast of heat to crisp the base before we drop the temperature to gently coddle the custard filling.
I always suggest having your eggs at room temperature before you start. It seems like a small detail, but cold eggs can cause the pumpkin puree to seize up slightly, making it harder to get that perfectly uniform emulsion. If you’re in a rush, just pop the eggs in a bowl of warm water for five minutes.
It makes the whisking process much smoother, ensuring the dark brown sugar dissolves completely into the pumpkin fiber without leaving any grainy pockets.
| Component | Science Role | Pro Secret |
|---|---|---|
| Pumpkin Puree | Fiber Structure | Use canned for consistent moisture levels versus fresh |
| Condensed Milk | Fat & Sugar Emulsion | Whisk slowly to avoid incorporating air bubbles |
| Large Eggs | Protein Binder | Add one at a time for a sturdier internal network |
| Dark Brown Sugar | Humectant | Adds molasses notes that deepen the spice profile |
Whisking is actually where most people go wrong. If you whisk too vigorously, you’ll incorporate tiny air bubbles that expand in the oven and then collapse as the pie cools, creating a cratered look.
You want to use a slow, circular motion, almost like you're folding the ingredients together rather than beating them.
Selecting the Finest Pie Components
When it comes to the "Perfect Pumpkin Pie with Sweetened Condensed Milk", every ingredient has a job to do. I’m a big advocate for using a 9 inch deep dish pie crust because it gives you a better ratio of filling to pastry.
If you use a shallow pan, you’ll likely have leftover filling, and the pie will cook too fast, leading to a drier texture.
- 1 9 inch deep dish pie crust: The foundation.
- Substitute: Graham cracker crust (Note: Changes texture to a crunchier, sweeter base).
- 1 large egg white, lightly beaten: The moisture barrier. Why this? It prevents the pumpkin moisture from migrating into the pastry.
- 15 oz pumpkin puree: The bulk.
- Substitute: Roasted butternut squash puree (Note: Slightly sweeter and more floral).
- 14 oz sweetened condensed milk: The creamy engine. Why this? Provides fat, sugar, and milk solids in one shelf stable, dense package.
- 2 large eggs, room temperature: The structural set.
- Substitute: 1/2 cup silken tofu (Note: Creates a denser, vegan friendly set filling).
- 1/4 cup dark brown sugar, packed: The flavor depth.
- Substitute: Coconut sugar (Note: Adds a toasted, almost burnt caramel undertone).
- 2 tsp pumpkin pie spice: The soul. Why this? A balanced blend of cinnamon, ginger, cloves, and nutmeg.
- 1/2 tsp sea salt: The enhancer.
- Substitute: Table salt (Note: Use 1/4 tsp instead as it's more concentrated).
Speaking of the crust, if you have a few extra minutes, I highly recommend checking out my Flaky Apple Pie tips for handling dough. The way you shingle the butter can make a massive difference in how the bottom of this pumpkin pie stands up to the heavy filling. Using a rimmed baking sheet under the pie plate isn't just for spills; it also helps conduct heat directly to the bottom of the pie more effectively than a wire rack alone.
Tools for a Flawless Bake
You don't need a kitchen full of gadgets, but a few specific items make this recipe much easier. A large glass mixing bowl is my favorite for the filling because it lets you see if any spice clumps are hiding at the bottom.
You’ll also want a sturdy whisk not one of those flimsy ones that bends under the weight of the condensed milk.
The most important tool, honestly, is the 9 inch deep dish pie plate. If you use a metal tin, the heat transfer will be faster, which might require you to shave 5 minutes off the cook time.
Glass or ceramic plates take a little longer to heat up but hold that heat more steadily, which is better for the gentle finish of a custard. I also recommend a rimmed baking sheet (like a half sheet pan) to place the pie on; it makes it so much easier to get the pie in and out of the oven without disturbing the liquid center.
If you find yourself needing more side dishes for a big dinner, a tray of crispy roast potatoes can actually go in the oven at the same time if you manage your racks correctly. Just remember that adding more cold items to the oven can drop the ambient temperature, so you might need to keep an eye on the pie's progress.
step-by-step Filling and Baking

Preparing Your Pie Crust
- Preheat your oven to 220°C (425°F). Fit the pie dough into a 9 inch deep dish pie plate and crimp the edges firmly. Note: Crimping prevents the dough from sliding down the sides during the initial heat blast.
- Brush the bottom and sides of the crust with a thin layer of lightly beaten egg white to create a moisture barrier. Note: This creates a "protein shield" that keeps the crust from getting soggy.
Whisking Your Pumpkin Filling
- In a large mixing bowl, whisk together the pumpkin puree, dark brown sugar, pumpkin pie spice, and sea salt until smooth. Note: Mixing the spices into the puree first ensures even distribution without clumping.
- Add the two large eggs one at a time, whisking gently after each addition to combine without adding excess air. Note: Incorporating eggs slowly keeps the emulsion stable.
- Slowly pour the 14 oz of sweetened condensed milk into the mixture, whisking until the filling is completely smooth and uniform. Note: The batter should look glossy and thick, like a heavy cream.
Mastering the Oven Temperature
- Pour the filling into the prepared crust. Place the pie on a rimmed baking sheet. Note: The sheet pan acts as a heat conductor for the bottom crust.
- Bake at 220°C (425°F) for 15 minutes. until the crust edges begin to look golden and set.
- Reduce the oven temperature to 180°C (350°F) and bake for an additional 35 minutes until the center is set but retains a slight jiggle.
- Remove the pie from the oven and place it on a wire rack. Note: Airflow under the pie plate prevents the bottom from continuing to cook too much.
- Allow the pie to cool completely at room temperature for at least 2 hours before slicing. Note: The residual heat finishes the setting process of the eggs.
Fixing Common Pumpkin Pie Issues
Even with the best intentions, things can go sideways. The most common heartbreak is seeing a big crack right down the middle of your "Perfect Pumpkin Pie with Sweetened Condensed Milk". This usually happens because the pie was left in the oven too long, or the temperature was dropped too late.
When the egg proteins get too hot, they tighten up and squeeze out moisture, leading to that split.
Avoiding Center Filling Cracks
If you see the edges of the filling starting to puff up or rise like a soufflé, get that pie out of the oven immediately! That puffing is a sign that the eggs are overcooking. A perfectly cooked pie will remain mostly flat across the top.
If you do get a crack, don't panic that’s exactly what whipped cream was invented for.
Preventing Soggy Pie Bottoms
The "soggy bottom" is the result of the moisture in the pumpkin soaking into the raw dough before it has a chance to bake. That’s why we use the egg white wash and the initial over high heat bake.
If you still find your crust is a bit soft, try moving the oven rack to the lowest position for the first 15 minutes of baking.
| Problem | Root Cause | Solution |
|---|---|---|
| Filling is watery | Underbaked or low-fat | Bake until 175°F; use full fat condensed milk |
| Crust is pale | Oven temp too low | Ensure preheat reaches 220°C (425°F) |
| Spices are clumpy | Added to liquid first | Whisk spices into pumpkin puree before milk |
Common Mistakes Checklist
- ✓ Forgot to bring eggs to room temperature (leads to uneven mixing)
- ✓ Over whisked the filling (causes air bubbles and cracking)
- ✓ Skipped the egg white barrier (guarantees a soggy bottom)
- ✓ Cut the pie while it was still warm (filling won't be set and will run)
- ✓ Used "Pumpkin Pie Filling" instead of "Puree" (filling already has sugar/spices)
Creative Twists on the Classic
While the classic version is iconic, sometimes you want to shake things up. The beauty of the sweetened condensed milk base is that it is incredibly forgiving. If you want a deeper, more sophisticated flavor, try the Maple Bourbon twist.
Simply replace the dark brown sugar with two tablespoons of high-quality maple syrup and add a splash of bourbon to the filling. The alcohol burns off, but it leaves behind a woody, smoky note that pairs perfectly with the pumpkin.
Crustless Dietary Pie Options
For those who are avoiding gluten or just want a lighter dessert, you can actually bake this filling without a crust at all. Simply grease a glass pie dish very well with butter and pour the filling directly in.
You’ll need to reduce the initial over high heat bake time to 5 minutes, then proceed with the 180°C (350°F) step for about 30-35 minutes. It turns into a beautiful, crustless pumpkin custard that’s almost like a flan.
Rich Brown Sugar Caramelization
If you really love that deep caramel flavor, try browning 1/4 cup of butter in a pan until it smells nutty and looks amber. Let it cool slightly, then whisk it into the pumpkin puree before adding the condensed milk. It adds a "toffee" note to the pie that is absolutely legendary.
Just be sure to whisk it in well so the fat doesn't separate.
| Serving Size | Ingredient Adjustments | Pan Size | Cook Time |
|---|---|---|---|
| 4 People | Half filling; 1 egg | 6 inch pan | 35 mins total |
| 8 People | Standard recipe | 9 inch deep | 50 mins total |
| 16 People | Double filling/crust | Two 9 inch pans | 55 mins total |
One thing to keep in mind when scaling up is that two pies in the oven will create more steam. You might need to rotate the pans halfway through the 35 minute bake to ensure they both brown evenly. Don't try to bake two pies on the same rack if they are touching; airflow is your friend here.
Keeping Your Pie Fresh Longer
Proper storage is the key to maintaining that "shatter crisp" crust. Once the pie has cooled completely at room temperature, it must go into the fridge. Custard based pies are high in protein and moisture, which makes them a magnet for bacteria if left out on the counter overnight.
Cover it loosely with plastic wrap or aluminum foil but wait until it's cold, or condensation will form on the underside of the wrap and drip onto your beautiful pie surface.
- Fridge: Store for up to 4 days. The crust will soften slightly over time, but the flavor actually deepens by day two.
- Freezer: You can freeze this pie! Wrap it tightly in three layers of plastic wrap and then foil. It stays good for 2 months. Thaw it slowly in the fridge for 24 hours before serving.
- Zero Waste Tip: If you have leftover pumpkin puree (since 15 oz is usually one standard can), stir it into oatmeal, mix it into pancake batter, or freeze it in an ice cube tray for future smoothies.
If you have leftover scraps of pie dough, don't toss them! Roll them out, sprinkle with cinnamon and sugar, and bake them alongside the pie for 10 minutes. We call these "pie fries" in my house, and they are the best snack while you wait for the main event to cool.
Finishing Touches for Your Dessert
Presentation is where you get to have some fun. While a plain pumpkin pie is beautiful in its simplicity, a few garnishes can make it look like it came from a high end bakery. A massive dollop of freshly whipped cream is non negotiable for me.
I like to add a tiny bit of maple syrup and a pinch of salt to my cream to tie it back to the pie's flavors.
Testing Your Pie Doneness
If you want a more rustic look, you can use any leftover dough to cut out leaf shapes using a small cookie cutter. Bake these on a separate tray for 10-12 minutes until golden, then arrange them around the edge of the pie after it has cooled.
It covers any slight shrinkage of the crust and looks incredibly professional for a holiday dinner.
Perfect No Shrink Custard Texture
Another trick is the "dusting" method. Right before serving, place a lace doily or a paper cutout over the pie and lightly dust it with powdered sugar or extra pumpkin spice. When you lift the template, you’ll have a beautiful pattern left behind.
It’s a simple way to add visual interest without needing any advanced decorating skills.
Final Myths Debunked
- Myth: You must blind bake the crust with pie weights. Truth: While it helps some recipes, the over high heat start (220°C) combined with the egg white wash in this recipe effectively sets the crust without the extra hassle of weights.
- Myth: Fresh pumpkin is always better. Truth: Fresh pumpkin varies wildly in water content and stringiness. For a consistent, velvety custard, high-quality canned puree is the "pro choice" for predictable results.
- Myth: Cracks are inevitable. Truth: Cracks are a sign of overcooking. If you pull the pie when it still has a "jiggle," the carryover heat will finish the job perfectly without splitting the surface.
This "Perfect Pumpkin Pie with Sweetened Condensed Milk" is all about that balance of science and soul. By respecting the temperatures and the ingredients, you’re creating something that isn't just a dessert, but a memory. Now, go grab your whisk and let's get that oven preheated!

Recipe FAQs
Is it better to use evaporated milk or sweetened condensed milk in pumpkin pie?
Use sweetened condensed milk for a richer, custard like texture. It eliminates the need for extra granulated sugar and creates a denser, velvet smooth finish compared to the thinner consistency produced by evaporated milk.
What is the secret to a good pumpkin pie?
The secret is temperature control and patience. Start the bake at 425°F for 15 minutes to set the crust, then drop to 350°F to finish. If you enjoyed mastering this custard based set, see how the same principles apply to our homemade custard ice cream.
Which pie is best for diabetics?
No, this recipe is not suitable for a diabetic diet. It contains significant amounts of sugar from the sweetened condensed milk and brown sugar, making it high in carbohydrates.
Is it true that I should whisk the filling vigorously to get it smooth?
No, this is a common misconception. You should whisk gently; over whisking incorporates too much air, which causes the surface to crack or bubble during the baking process.
How to ensure the bottom crust does not become soggy?
Brush the raw crust with a thin layer of lightly beaten egg white before filling. This creates an essential moisture barrier that keeps the bottom crisp during the 50-minute bake time.
How to tell when the pumpkin pie is fully cooked?
Remove the pie from the oven when the center is set but still slightly jiggly. It will finish firming up as it cools completely on a wire rack.
What are common mistakes when making pumpkin pie?
Common errors include using pre-spiced pumpkin pie filling instead of pure pumpkin puree and slicing the pie while it is still warm. Always wait for the pie to cool entirely to ensure the filling is properly set and sliceable.
Perfect Pumpkin Pie Recipe
Ingredients:
Instructions:
Nutrition Facts:
| Calories | 318 kcal |
|---|---|
| Protein | 7.2 g |
| Fat | 11.8 g |
| Carbs | 47.2 g |
| Fiber | 1.9 g |
| Sugar | 34.1 g |
| Sodium | 295 mg |
