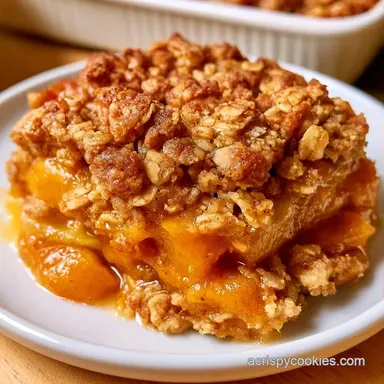
Pumpkin Apple Crisp with Maple Syrup
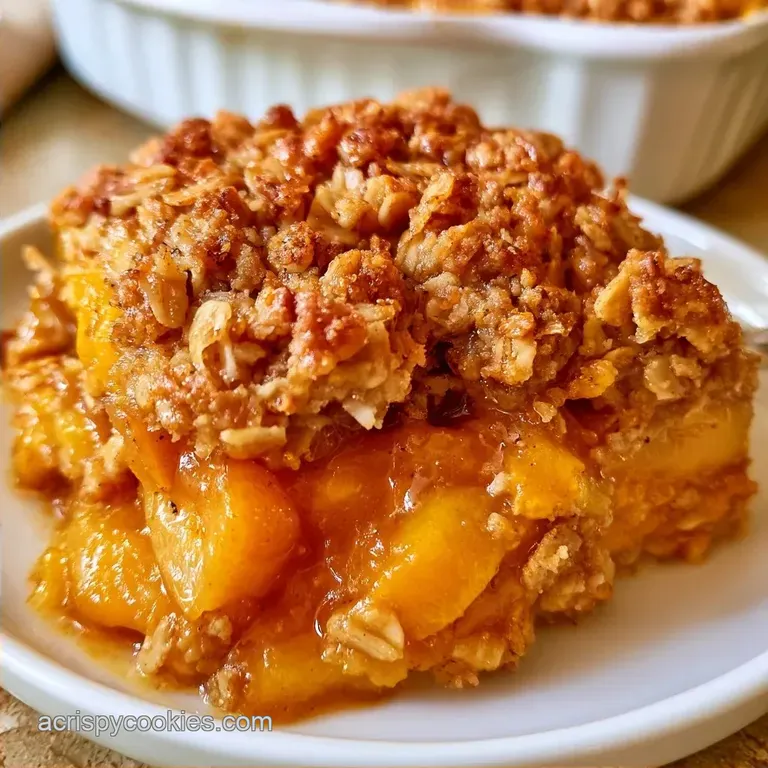
- Time: 15 min active + 40 min bake
- Flavor/Texture Hook: Tart sweet fruit with a shattering mahogany gold crust
- Perfect for: Cozy autumn weeknights or a crowd-pleasing potluck dessert
Ever wonder why most fruit crisps end up as a puddle of syrup at the bottom of the dish? I spent a while digging into the texture of autumn bakes, trying to figure out why some hold their shape while others collapse. The answer usually comes down to how the fruit interacts with the thickener.
Then I tried mixing pumpkin puree directly into the fruit. It creates this rich, jammy base that grips the apples, preventing that dreaded soupiness. This Pumpkin Apple Crisp is basically a flavor detective's dream, contrasting the bright acidity of Granny Smith apples with the earthy depth of pumpkin.
You can expect a dessert that hits a few different notes at once. You get the crunch of toasted oats, the softness of cooked apples, and a warm, spiced finish. It's the kind of dish that smells like a fireplace and a wool sweater.
Pumpkin Apple Crisp: Autumn Fruit Bake
Right then, let's get into the specifics. This recipe focuses on a high contrast experience. We're aiming for a filling that's tender but not mushy, topped with a crust that actually cracks when you dig your spoon in.
- - Base
- Tart, earthy, and warm.
- - Topping
- Buttery, salty, and toasted.
- - Finish
- A hit of maple sweetness.
Since I'm all about that restaurant quality result at home, I've tracked a few precision checkpoints. First, your butter for the topping must be chilled (about 4°C) to ensure it doesn't melt before it hits the oven. Second, the apples should be diced into uniform 1.5cm cubes so they cook evenly.
Third, the filling is done when it bubbles at the edges, typically around the 35 minute mark.
The Science of Texture
I've looked into why this combination works so well. It's less about magic and more about how the ingredients behave under heat.
- Pectin Binding: Apples are naturally high in pectin, and the added pumpkin puree provides extra fiber. These two bind together with the cornstarch to create a stable, thick sauce.
- Sugar Caramelization: The brown sugar in the topping reacts with the butter to create a crisp shell. This prevents the topping from absorbing too much moisture from the fruit.
Gathering Your Essentials
The key here is using the right apple. I prefer Granny Smith for the tartness or Honeycrisp for the structure. If you use a soft apple, it'll turn into applesauce.
| Ingredient | Role | If You Don't Have It |
|---|---|---|
| Granny Smith Apples | Provide tartness and structure | Honeycrisp or Braeburn (slightly sweeter) |
| Pumpkin Puree | Thickens and adds earthiness | Roasted butternut squash puree |
| Rolled Oats | Creates the crunch | Quick oats (texture will be softer) |
| Unsalted Butter | Adds richness and crispness | Coconut oil (frozen/cubed) |
You'll also need a few pantry staples to tie it all together.
The Base Filling:
- 600g Granny Smith or Honeycrisp apples, peeled and dicedWhy this? Keeps the shape during baking
- 120g pumpkin pureeWhy this? Binds the juices
- 60ml pure maple syrupWhy this? Adds a woody sweetness
- 8g cornstarchWhy this? Thickens the syrup
- 2g ground cinnamon
- 2g pumpkin pie spice
- 1.5g sea salt
The Oat Topping:
- 90g rolled oatsWhy this? Maximum texture
- 65g all purpose flourWhy this? Holds the crumble together
- 100g brown sugar, packedWhy this? Deep caramel flavor
- 115g unsalted butter, chilled and cubedWhy this? Creates steam pockets
- 3g ground cinnamon
- 1.5g sea salt
If you're looking for more pumpkin themed treats, these pumpkin pie bars are a great shout for something more structured.
Required Kitchen Tools
You don't need anything fancy here. A few basic tools will do the job perfectly.
- 9 inch glass pie plate: Glass is great because you can see the bubbling filling.
- Medium mixing bowl: For the fruit base.
- Large mixing bowl: For the crumble.
- Pastry cutter or fork: To work the butter into the flour.
- Chef's knife: For those precise apple cubes.
I usually use a standard stainless steel bowl for the topping. It stays cooler than plastic, which helps keep the butter from melting while you're rubbing it in.
Steps for the Bake
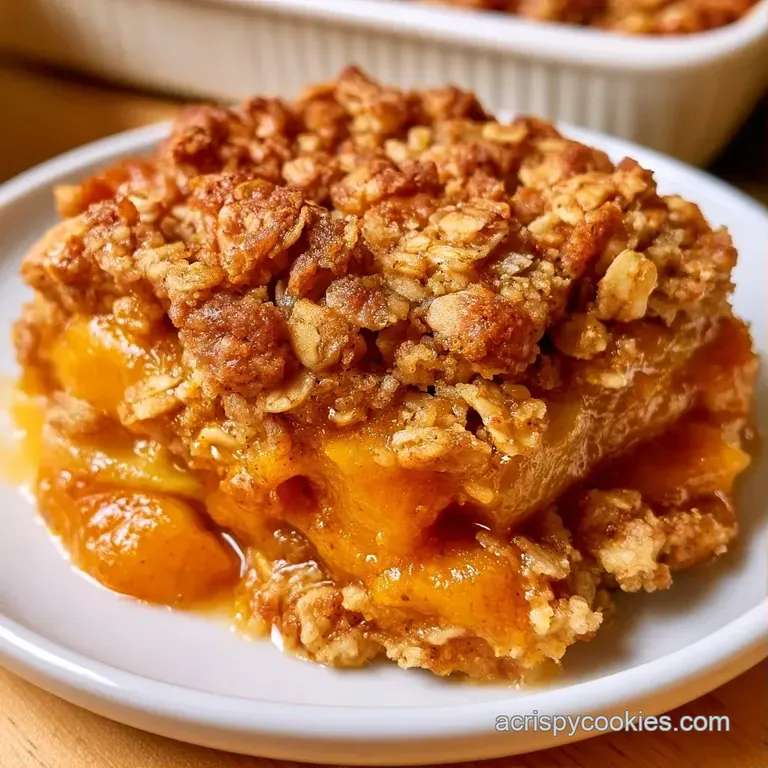
Let's crack on with the assembly. Trust me on the butter temperature - if it's too soft, your topping will be a flat cookie instead of a crumble.
Preparing the Base
- Combine the diced apples, pumpkin puree, maple syrup, cornstarch, cinnamon, pumpkin pie spice, and salt in a medium bowl. Toss everything together until the apples are thoroughly coated in the pumpkin mixture.
- Spread the apple pumpkin mixture evenly into the bottom of your 9 inch glass pie plate. Note: Don't pack it down too hard; leave some room for air.
Crafting the Crumble
- In a large bowl, whisk together the rolled oats, all purpose flour, brown sugar, cinnamon, and salt.
- Add the chilled, cubed butter to the dry mixture.
- Use a pastry cutter or your fingertips to work the butter in until you see coarse crumbs with pea sized lumps. Note: Avoid overmixing, or you'll lose the texture.
Finishing the Bake
- Preheat your oven to 190°C (375°F).
- Sprinkle the oat topping evenly over the Pumpkin Apple Crisp base.
- Bake for 35-40 minutes until the fruit filling is bubbling around the edges and the topping is a deep mahogany gold.
Chef's Note: If the topping is browning too quickly but the filling isn't bubbling, loosely cover the dish with foil for the last 10 minutes.
Solving Common Issues
Even the best recipes can go sideways if the humidity is high or the apples are too juicy. Most issues with a Pumpkin Apple Crisp come down to moisture management.
If the topping feels like a paste rather than a crumble, your butter was likely too warm. The goal is to have distinct bits of butter that melt in the oven, creating those little gaps that make the topping crisp. If this happens, you can still bake it, but it will be more like a cobbler than a crisp.
For those dealing with a filling that's too runny, it usually means the apples released more water than expected. This happens often with certain apple varieties. Next time, add an extra 2g of cornstarch to the base.
Fixing a Soggy Bottom
When the bottom of the crisp is mushy, it's often because the filling was over mixed or the dish was too crowded. Ensure you're using a pie plate that allows for some evaporation.
Addressing Pale Toppings
If your topping is pale after 40 minutes, your oven might be running cool. You can turn on the broiler for 1-2 minutes at the very end, but watch it like a hawk so it doesn't burn.
| Problem | Root Cause | Solution |
|---|---|---|
| Runny filling | Too much apple juice / low starch | Increase cornstarch by 2g |
| Flat, cookie like top | Butter was too warm | Use frozen butter cubes |
| Apples are too hard | Pieces were cut too large | Dice apples to exactly 1.5cm |
| Burnt topping | Oven rack too high | Move rack to the middle position |
Different Ways to Serve
You can easily adapt this recipe to suit the occasion. I enjoy experimenting with different techniques and textures to see which combination works best.
Gluten-free Options
To make this pumpkin apple crisp gluten-free, substitute the all-purpose flour with a gluten-free multipurpose mix. Almond flour is another excellent option, though it imparts a nuttier flavor and results in a slightly softer topping.
Healthier Alternatives
For a more wholesome version, replace the brown sugar with coconut sugar or monk fruit sweetener. I also recommend using chilled coconut oil as a substitute for butter. You'll lose a bit of that classic richness, but the crunch remains intact.
Slow Cooker Adaptation
If you prefer using a crockpot, cook the filling on high for 2 hours, then add the topping and cook for one additional hour. This version is incredibly comforting and has a pudding-like texture.
I've included a quick comparison to help you decide which method to choose.
| Feature | Oven Method | Slow Cooker Method |
|---|---|---|
| Topping Texture | Shattering and crisp | Soft and chewy |
| Filling Consistency | Jammy and thick | Soft and stewed |
| Effort Level | Medium (requires monitoring) | Low (set and forget) |
Adding a Nutty Crunch
For extra depth, fold 50g of chopped walnuts or pecans into the oat topping. The oils in the nuts toast up beautifully, complementing the earthy pumpkin.
Keeping It Fresh
This treat stays fresh for a while, although the topping will gradually lose its crispness as it absorbs moisture from the fruit.
Fridge: Keep in a sealed container for a maximum of 4 days. Freezer: To maintain a crunchy crust, I follow the same freezing technique I use for these apple pie bars. The baked Pumpkin Apple Crisp can be kept frozen for up to 3 months; just wrap it securely in foil and plastic wrap to stop freezer burn.
Reheating: To restore the crunch, avoid the microwave. Instead, heat it in the oven at 175°C (350°F) for roughly 10-15 minutes, which helps the topping crisp up and the sugars caramelize again.
Zero Waste Tip: Save your apple peels! Mix them with some sugar and cinnamon, then bake at 150°C (300°F) for 15 minutes to make your own cinnamon apple chips.
Pairing and Presentation
The beauty of a Pumpkin Apple Crisp is in the contrast. Since the dish is rich and warm, you want something cold and sharp to balance it out.
The Classic Pairing: A big scoop of vanilla bean ice cream. The ice cream melts into the warm fruit, creating a creamy sauce that's just a bit like a custard.
The Sophisticated Twist: Try a dollop of crème fraîche or Greek yogurt. The tanginess of the cultured cream cuts through the maple syrup and brown sugar, making the whole dish feel lighter.
The Beverage Match: A hot cider or a dark roast coffee works best. The acidity in the coffee mirrors the tartness of the Granny Smith apples.
- - For a crowd
- Serve family style in the baking dish with a pitcher of cold cream.
- - For a date night
- Plate individual portions and garnish with a sprig of fresh mint.
- - For a cozy night in
- Serve in a bowl with a heavy drizzle of salted caramel.
Myths About Fruit Crisps
There are a few common misconceptions about these desserts that we should address.
Some believe you must pre-cook the apples on the stove to prevent a runny filling. This is unnecessary if you use a binder like pumpkin puree and a thickener like cornstarch, as the oven provides plenty of time for the apples to soften.
Another frequent claim is that melted butter improves the flavor of the topping. In reality, melted butter produces a dense, cookie-like consistency. To achieve that signature "shattering" texture, chilled, cubed butter is the only way to go.
This Pumpkin Apple Crisp is all about the finer details. By getting the butter temperature right and choosing the ideal apple, you'll create a dessert that far surpasses anything from a generic cafe. It's the kind of recipe that fills your home with the scent of autumn for hours.
Now, grab your apples and let's get baking.
Recipe FAQs
Do pumpkin and apple go together?
Yes, they pair beautifully because the tartness of the apples cuts through the creamy sweetness of the pumpkin. For another way to use these flavors, try our brown butter pumpkin cookies.
What is the difference between apple crumble and apple crisp?
The main difference is the texture of the topping. A crisp includes rolled oats for a crunchier finish, while a crumble usually relies on flour and butter.
How do I get the perfect crumble topping?
Use chilled, cubed butter when mixing the topping. This prevents the mixture from melting and ensures you get those distinct, crunchy lumps.
Is it true I should use softened butter for the topping?
Surprisingly, no. Softened butter will cause the topping to spread into a flat cookie instead of remaining as a crumble.
Pumpkin Apple Crisp with Maple Syrup