Homemade Hot Chocolate Mix: Velvety and Dark

- Time: Active 10 minutes, Passive 0 mins, Total 10 minutes
- Flavor/Texture Hook: Velvety, dark, and deeply chocolatey
- Perfect for: Holiday gifting, snowy weeknights, or pantry stocking
- Crafting the Ultimate Homemade Hot Chocolate Mix
- Logic Behind This Rich Formulation
- Precision Metrics for Perfect Cocoa
- Quality Elements for Your Base
- Vital Tools for Silky Mix
- Step-by-Step Mixing and Sifting
- Solving Common Cocoa Texture Issues
- Simple Flavor and Dietary Swaps
- Storage Stability and Zero Waste
- Better Ways to Serve Mugs
- Culinary Truths and Myths
- Recipe FAQs
- 📝 Recipe Card
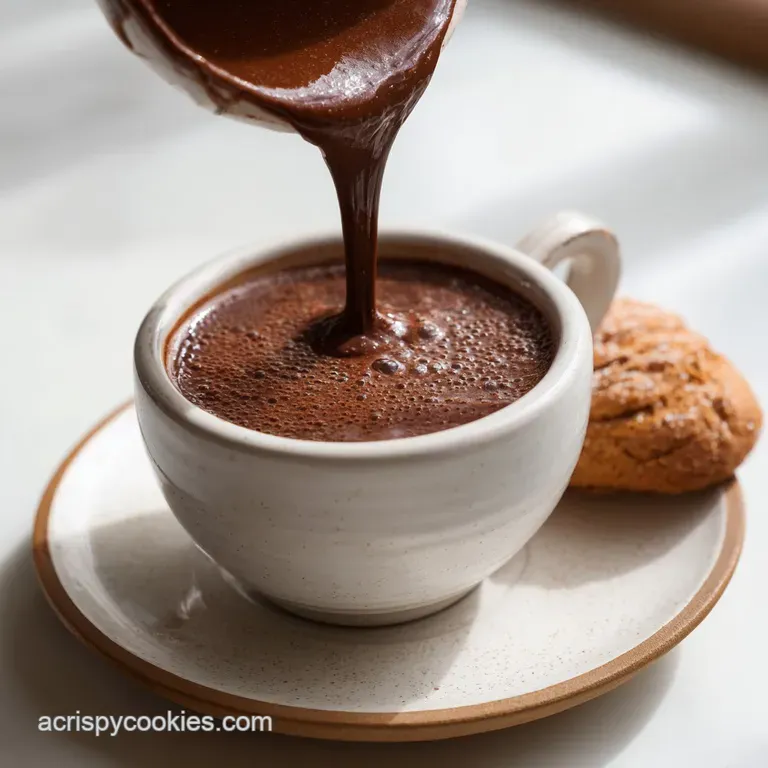
Crafting the Ultimate Homemade Hot Chocolate Mix
The first time I realized how subpar the grocery store packets were, I was sitting in a tiny cafe in the Alps. The cocoa there didn't just taste like sugar and water; it felt like a warm, liquid blanket. When I got home, I spent weeks trying to recreate that exact thickness.
I went through tubs of cocoa and bags of sugar, realizing that the "secret" wasn't a secret at all it was just about the fat content and the particle size of the chocolate itself.
Most people settle for a thin, watery drink because they think a mix can't be luxurious. But when you hear the sharp shatter of a high-quality dark chocolate bar being pulsed into fine shards, you know you're onto something different. Adding that real chocolate component changes the entire chemistry of the mug.
It turns a simple beverage into a rich, silt free experience that actually coats the back of your spoon.
We are going to move past the standard powdered sugar and cocoa combo. By using specific ratios of Dutch processed cocoa and full fat dry milk, we create a base that is both stable on the shelf and decadent in the cup.
This is the recipe I give to my friends who think they don't like hot chocolate one sip and they are usually asking for a jar to take home.
Logic Behind This Rich Formulation
The success of a cocoa mix depends entirely on how the particles interact with hot liquid. We aren't just stirring things together; we are creating a dry emulsion that ready to bloom the moment heat is applied.
- Lipid Suspension: The inclusion of real dark chocolate shards provides cocoa butter, which creates a velvety mouthfeel that powders alone lack.
- Alkalinity Balance: Using Dutch processed cocoa raises the pH, resulting in a smoother, less acidic flavor profile that pairs better with dairy.
- Solubility Mechanics: Sifting the sugar and cocoa together prevents the formation of "dry pockets" that often lead to lumps in the final mug.
- Flavor Amplification: Sea salt and espresso powder act as chemical catalysts that sharpen the perception of chocolate on the taste buds without adding their own distinct flavors.
Pulverizing for Instant Solubility
The key to a mix that doesn't leave a sludge at the bottom is the size of your chocolate pieces. When we pulse the dark chocolate bar, we want it to reach a "sand like" consistency. This allows the cocoa butter to melt almost instantly when it hits 180°F (82°C) water or milk.
If the pieces are too large, they sink; if they are pulverized correctly, they stay suspended in the liquid.
Balancing the Fat to Solids Ratio
Standard mixes are often too high in sugar and too low in fats. By using 2 cups of full fat dry powdered milk and 1 cup of non dairy powdered creamer, we ensure there is enough fat to carry the flavor of the 2 cups of Dutch processed cocoa.
This ratio mimics the texture of a cooked ganache rather than a simple flavored tea.
| Preparation Method | Time | Texture Result | Best For |
|---|---|---|---|
| Hot Water | 2 mins | Lighter, cocoa forward | Quick afternoon fix |
| Whole Milk | 4 mins | Silky, thick, decadent | True dessert experience |
| Stovetop Simmer | 8 mins | Ultra thick, frothy | Entertaining and parties |
Enhancing Flavor with Salt
It might seem strange to add a full teaspoon of fine sea salt to a sweet mix, but it is non negotiable. Salt suppresses bitterness and highlights the fruity notes in the dark chocolate shards. This is similar to the technique used in my Chocolate Ricotta Brick recipe, where salt is the bridge between the fat and the cocoa.
Precision Metrics for Perfect Cocoa
When we talk about "perfection" in the kitchen, we're really talking about consistency. This recipe yields exactly 20 servings, provided you follow the weight based measurements. Cocoa powder is notoriously difficult to measure by volume because it settles and compacts, so using 180g for those 2 cups is your best bet for a repeatable result every single time.
| Feature | Homemade Mix | store-bought Packet |
|---|---|---|
| Primary Fat | Real cocoa butter & milk fat | Partially hydrogenated oils |
| Sweetener | Fine powdered sugar | High fructose corn syrup solids |
| Additives | Natural espresso & sea salt | Artificial vanillin & stabilizers |
The inclusion of the espresso powder is another precision point. At 2 teaspoons for the entire batch, you won't taste coffee. Instead, the caffeine and bitterness of the espresso enhance the darker notes of the cacao bean. It's a trick I often use in other desserts, like when I'm making a No Bake Chocolate recipe where I want the chocolate to really pop against the oats.
Quality Elements for Your Base
To get that old fashioned hot chocolate mix recipe feel, you need to be picky about your ingredients. Don't grab the first tin of cocoa you see. Look for "Dutch processed" or "alkalized" cocoa; it has a darker color and a much mellower taste than natural cocoa powder, which can be quite sharp and acidic.
- Dutch processed cocoa powder: 2 cups (180g). Why this? Provides a deep color and smooth, non acidic chocolate flavor.
- Powdered sugar: 2 ½ cups (300g). Why this? Dissolves faster than granulated sugar and contains cornstarch for thickness.
- Full fat dry powdered milk: 2 cups (256g). Why this? Adds the necessary dairy proteins and fats for a creamy body.
- Non dairy powdered creamer: 1 cup (80g). Why this? Improves emulsification and prevents the cocoa from separating in the cup.
- Dark chocolate bar (60%+): 4 oz (113g). Why this? Real cocoa butter creates a luxurious, silky mouthfeel.
- Fine sea salt: 1 tsp. Why this? Cuts the sweetness and amplifies the chocolate aromatics.
- Espresso powder: 2 tsp. Why this? Acts as a flavor enhancer to deepen the cacao profile.
| Ingredient | Science Role | Pro Secret |
|---|---|---|
| Dutch Cocoa | Flavor/Color | Sift twice to remove stubborn lumps |
| Powdered Sugar | Solubility | The cornstarch content acts as a thickener |
| Sea Salt | Flavor Ionizer | Use fine grain so it dissolves instantly |
For the chocolate bar, make sure it is chilled before you start. Warm chocolate will turn into a paste in the food processor, whereas chilled chocolate will shatter into the perfect sandy texture we need for an easy homemade hot chocolate mix.
Vital Tools for Silky Mix
You don't need a professional lab, but a few specific tools will make this homemade hot chocolate mix for gifts look and taste far better. A food processor is the most efficient way to incorporate the chocolate shards, but if you don't have one, a high speed blender works on the pulse setting.
Just be careful not to over process, or the friction heat will melt the chocolate butter.
A fine mesh sieve is your second best friend. Powdered sugar and cocoa are magnets for moisture, and they love to form little hard rocks. Sifting isn't just about removing lumps; it's about aerating the powder so it mixes into your milk without a fight. If you’ve ever made my Penn Station Chocolate recipe, you know that the way you handle dry ingredients dictates the final texture of the treat.
Chef's Tip: Freeze your chocolate bar for 10 minutes before processing. This ensures it breaks into clean shards rather than melting into a clump from the blade's friction.
step-by-step Mixing and Sifting
- Chill the chocolate. Place the 4 oz dark chocolate bar in the freezer for 10 minutes. Note: This prevents the cocoa butter from softening during the pulsing phase.
- Pulverize the bar. Break the chilled chocolate into small pieces and pulse in a food processor until it looks like coarse sand.
- Sift the base. Pass the 2 cups cocoa powder and 2 ½ cups powdered sugar through a fine mesh sieve into a large bowl. Note: This removes any clumps that would cause "dry spots" in your drink.
- Combine the dairy. Whisk in the 2 cups dry milk powder and 1 cup non dairy creamer.
- Add the enhancers. Stir in the 1 tsp sea salt and 2 tsp espresso powder until the color is uniform throughout.
- Integrate the shards. Fold the pulverized dark chocolate into the powder mixture.
- Aerate the mix. Give the entire bowl one final, vigorous whisk to ensure the chocolate shards are evenly distributed.
- Portion for storage. Transfer the mix into airtight glass jars.
- Conduct a test. Mix 1/3 cup of the powder with 1 cup of hot milk until the liquid is glossy and dark.
- Seal and label. Store in a cool, dry place away from direct sunlight.
Solving Common Cocoa Texture Issues
Even with a foolproof recipe, the environment in your kitchen can play tricks on your homemade hot chocolate mix. The biggest enemy is humidity. If your house is damp, the milk powder can start to clump before you even get it into the jar. If this happens, don't panic.
You can usually save it by giving the mix another pass through the sieve.
Why Your Hot Chocolate Is Gritty
This usually happens if the dark chocolate shards weren't pulsed fine enough. If you see little dark specks floating at the bottom that won't melt, they likely didn't reach that "sand" consistency.
To fix this, you can pour the prepared drink through a small strainer, or simply whisk more vigorously while the liquid is still very hot.
Preventing the Sludge at the Bottom
The "sludge" is often a mix of undissolved cocoa solids and settled sugar. This is why we use powdered sugar instead of granulated; it dissolves much faster. If you still have sediment, try mixing the powder with just a splash of hot liquid first to create a paste, then slowly add the rest of the liquid while stirring.
| Problem | Root Cause | Solution |
|---|---|---|
| Floating lumps | Poor sifting or cold liquid | Use a sieve and ensure liquid is 180°F |
| Thin consistency | Using water instead of milk | Add a spoonful of heavy cream or use whole milk |
| Overly bitter | Too much espresso or cocoa | Increase the powdered sugar by 1/4 cup |
Common Mistakes Checklist
- ✓ Using "natural" cocoa instead of Dutch processed (leads to a sharp, acidic bite).
- ✓ Skipping the sifting step (guarantees a lumpy, frustrating drinking experience).
- ✓ Pulse blending the chocolate for too long (turns the shards into a melted paste).
- ✓ Using low-fat or skim milk powder (results in a thin, watery mouthfeel).
- ✓ Forgetting the salt (the chocolate flavor will stay "flat" and one dimensional).
Simple Flavor and Dietary Swaps
If you need a homemade hot chocolate mix without powdered milk, you can substitute the dry milk with a coconut milk powder or a soy based alternative. Keep in mind that different powders have different fat contents, so the texture may vary slightly.
For a vegan homemade hot chocolate mix, ensure your dark chocolate bar and creamer are also plant based.
| Original Ingredient | Substitute | Why It Works |
|---|---|---|
| Dry Milk Powder | Coconut Milk Powder | High fat content provides similar creaminess. Note: Adds a slight tropical flavor. |
| Dark Chocolate Bar | Cacao Nibs | Adds intense chocolate flavor with zero sugar. Note: Won't melt completely; leaves a crunch. |
| Espresso Powder | Malted Milk Powder | Swaps the coffee depth for a toasted, nutty sweetness. |
For a hot cocoa mix recipe without dry milk, you can actually double the non dairy creamer and the dark chocolate shards. This relies on the fats in the creamer and the cocoa butter to provide the body.
It’s a great way to accommodate dairy sensitivities without sacrificing that creamy homemade hot chocolate texture we all love.
Storage Stability and Zero Waste
Since this is a dry mix, it is incredibly stable. As long as it is kept in an airtight container, it will stay fresh for about 6 months. After that, the milk powder might start to develop a slightly "off" smell. Always store it in a cool, dark cupboard.
If you find yourself with leftover powder at the end of the season, don't throw it out!
Zero waste tip: Use the last few tablespoons of mix to flavor your morning oatmeal or whisk it into a standard pancake batter for a chocolatey breakfast. You can even use the mix as a base for a dry rub for ribs the sugar and cocoa create a beautiful crust when charred.
Better Ways to Serve Mugs
To truly enjoy this creamy homemade hot chocolate mix, don't just dump it into water. Use a frother to get some air into the milk as you heat it. This creates a light, bubbly top that holds onto toppings like marshmallows or whipped cream much better.
If you’re feeling fancy, a tiny grating of fresh nutmeg or a cinnamon stick can add an aromatic layer that smells like a professional bake shop.
If you're making this as a homemade hot chocolate mix single serving, the ratio is 3 to 4 tablespoons of mix to 8 ounces of liquid. I like to top mine with a few extra shards of the same dark chocolate used in the mix.
As they melt into the foam, they create little "pockets" of intense chocolate that are a total joy to find at the bottom of the mug.
- The Mexican Twist: Add 1 teaspoon of ground cinnamon and a pinch of cayenne to the jar.
- The Peppermint Classic: Crush candy canes and layer them on top of the powder in gifting jars.
- The Salted Caramel: Drizzle caramel sauce inside the mug before pouring in the hot cocoa.
Culinary Truths and Myths
There is a common misconception that "expensive cocoa is always better." While quality matters, the real secret is the processing. A mid priced Dutch processed cocoa will often outperform a very expensive natural cocoa in a mix like this because the alkalinity is specifically designed to be drinkable.
Another myth is that you must use boiling water. Actually, boiling water (212°F) can sometimes scald the milk proteins in the powder, leading to a "cooked" or grainy taste.
Aim for roughly 180°F hot enough to melt the chocolate shards but not so hot that it ruins the delicate dairy flavors.
Finally,, some people think adding cornstarch separately is necessary for thickness. Because we use powdered sugar, which already contains cornstarch as an anti caking agent, we get that thickening power built right in. There's no need to add more and risk a "chalky" finish.
Trust the science of the ingredients already in your pantry!

Recipe FAQs
How to make hot chocolate premix at home?
Combine and sift all dry ingredients thoroughly. Pulse the chilled dark chocolate bar in a food processor until it resembles coarse sand, then gently fold this into the sifted powder base. Ensure everything is uniformly mixed for consistent flavor.
Is it cheaper to make your own hot chocolate mix?
Yes, it is significantly cheaper. Buying bulk Dutch processed cocoa and dry milk powder dramatically reduces the cost per serving compared to pre-packaged single serving name brands.
What are the three ingredients in hot chocolate?
Cocoa powder, a sweetener, and a fat/dairy source are the core three. While simple packets use mostly sugar and cocoa, a truly rich mix requires added fat, often from dry milk or real chocolate shards.
How do I make hot chocolate from scratch without any pre-made mix?
Heat 1 cup of milk or water, then whisk in 3-4 tablespoons of your prepared dry mix vigorously. For a truly scratch version, you would slowly melt 1 ounce of high-quality dark chocolate with the liquid before whisking in cocoa and sugar.
Why is my homemade hot chocolate grainy or gritty?
This is usually caused by improperly sized chocolate shards or using granulated sugar instead of powdered. If you enjoyed mastering the texture control here, apply the same principle to our Italian Beef Sandwich recipe where surface area matters for crispness.
Should I use natural cocoa powder or Dutch processed for the best mix?
No, Dutch processed cocoa provides a superior, smoother flavor for mixes. Natural cocoa is acidic and sharp, while Dutch processed (alkalized) cocoa is mellow and deepens the chocolate flavor profile, especially when mixed with dairy fats.
How long can I store homemade hot chocolate mix?
Store sealed in an airtight jar for up to 6 months in a cool, dry pantry. The shelf life is determined by the freshness of the dry milk powder; avoid any moisture to prevent caking or spoilage.
Velvety Hot Chocolate Mix
Ingredients:
Instructions:
Nutrition Facts:
| Calories | 198 kcal |
|---|---|
| Protein | 5.5 g |
| Fat | 8.4 g |
| Carbs | 30.1 g |
| Fiber | 3.1 g |
| Sugar | 23.4 g |
| Sodium | 135 mg |
