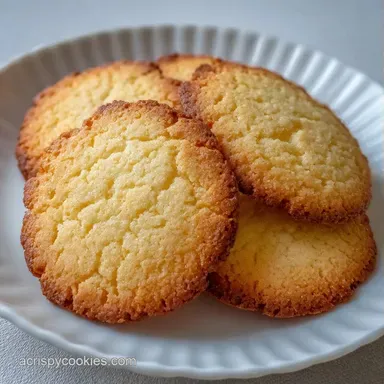
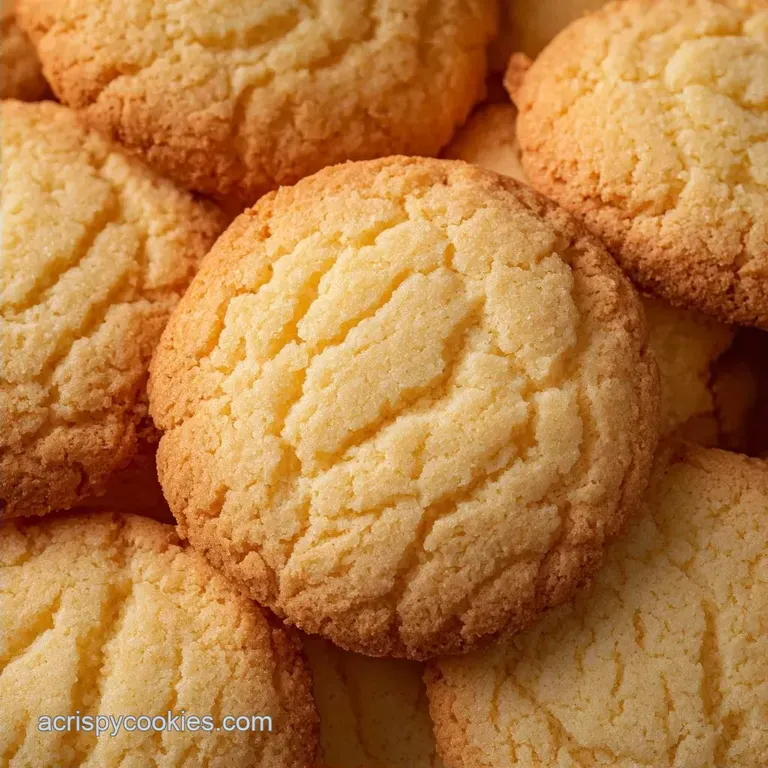
Egg Yolk Butter Cookies: Rich and Velvety
- Time:25 minutes active + 15 minutes baking
- Flavor/Texture Hook: Velvety, buttery snap with a rich, custard like finish
- Perfect for: Holiday platters, tea time, or a simple weekend treat
The smell of browning butter hitting a cool kitchen is enough to wake anyone up. I remember the first time I ditched the egg whites for a batch of cookies; I was staring at three lonely yolks and wondering if the dough would even hold together.
I’d always been told you need the white for structure, but I had a feeling that more fat meant more flavor.
The result was a cookie that didn't just crumble - it practically dissolved. These Egg Yolk Butter Cookies are fundamentally different from your standard sugar cookie. By focusing on the yolk, we're leaning into the lecithin, which creates a tighter, more cohesive crumb that feels luxurious on the tongue.
You can expect a cookie that holds its shape beautifully but has a delicate, shatter like quality when you bite into it. It's a bit like a cross between a shortbread and a French sablé, but with a richness that makes you want to skip dinner. Let's get into the nitty gritty of why this works.
Secrets of Egg Yolk Butter Cookies
To get that specific texture, we have to look at what's happening inside the dough. It's not magic, just a bit of kitchen logic.
- Lecithin Emulsion: Egg yolks are packed with lecithin, a natural emulsifier that binds the fat from the butter with the moisture in the vanilla. This creates a velvety dough that doesn't separate.
- Moisture Reduction: By removing the egg whites, we're cutting out a significant amount of water. Less water means less steam in the oven, which prevents the cookies from puffing up and keeps them dense and rich.
- Starch Stability: Using powdered sugar instead of granulated sugar adds a small amount of cornstarch. This reinforces the structure, ensuring the cookies don't flatten into puddles.
- Fat Saturation: The high fat content coats the flour proteins, which limits gluten development. According to King Arthur Baking, limiting gluten is the key to a tender, "short" crumb.
| Method | Time | Texture | Best For |
|---|---|---|---|
| Standard Oven | 15 mins | Consistent snap | Large batches |
| Brown Butter (Sauté) | 20 mins | Nutty and chewy | Small, rich batches |
| Low & Slow | 22 mins | Pale and sandy | Delicate tea cookies |
Component Analysis
Understanding the role of each ingredient helps you troubleshoot if things go sideways.
| Ingredient | Science Role | Pro Secret |
|---|---|---|
| Unsalted Butter | Primary fat/tenderizer | Keep it at 65°F for the best aeration |
| Egg Yolks | Emulsifier and richness | Room temp yolks blend without breaking |
| Powdered Sugar | Sweetener and stabilizer | Sift it to avoid "sugar pockets" |
| AP Flour | Structural framework | Measure by weight for total accuracy |
What You'll Need
I've tested a few versions of this, and sticking to these specific fats is what gives the recipe its character.
- 1 cup (225g) unsalted butter, softened Why this? Provides the classic creamy base
- 1 cup (120g) powdered sugar, sifted Why this? Creates a finer, smoother texture than granulated
- 3 large (50g) egg yolks Why this? Adds the essential richness and golden color
- 1 tsp (5ml) pure vanilla extract Why this? Cuts through the heavy fat with floral notes
- 2 ¼ cups (280g) all purpose flour Why this? Balanced protein for a sturdy yet tender cookie
- ½ tsp (3g) salt Why this? Essential for balancing the sweetness
If you're out of powdered sugar, you can use superfine caster sugar, but the cookies will spread more and lose that "sandy" feel. For the butter, don't even bother with margarine - it lacks the milk solids needed for that specific butter cookie aroma.
Essential Gear
You don't need a professional kitchen, but a few tools make this a breeze. I usually use a stand mixer such as KitchenAid to get the air into the butter, but a hand mixer works just as well. You'll also need a piping bag with a round tip to get those clean 1 inch rounds.
If you don't have one, a sturdy Ziploc bag with the corner snipped off does the trick. Finally, parchment paper is a must - these cookies have a high sugar content and can stick to a bare pan if you aren't careful.
How to Make It

Right then, let's crack on with the baking. The key here is not overworking the dough once the flour goes in.
Step 1: The Creaming Phase
Beat the softened butter and powdered sugar together using a mixer for 2-3 minutes. You're looking for the mixture to look pale, fluffy, and light. If it's still yellow and dense, keep going. This step traps air bubbles that help the cookie stay light.
Step 2: Incorporating the Richness
Add the egg yolks one by one. Beat well after each addition to ensure the emulsion stays stable. Stir in the vanilla extract last. The batter should look glossy and smooth at this point.
Step 3: Folding the Dry Ingredients
Sift the flour and salt directly into the wet mixture. Mix on low speed or fold by hand with a spatula. Stop the moment the white streaks of flour disappear. Overmixing here develops gluten, which makes the cookies tough instead of velvety.
Step 4: Shaping and Baking
Transfer the dough to a piping bag. Pipe 1 inch rounds onto a parchment lined sheet, spacing them 2 inches apart. Bake at 350°F (175°C) for 12-15 minutes. Watch them closely - you want the edges to be very pale gold. They should feel set but not hard.
Chef Note: If you want a more rustic look, you can roll the dough into small balls and flatten them with a fork. Just be consistent with the size so they bake evenly.
What Can Go Wrong
Even with a foolproof plan, things happen. I once forgot to sift my sugar and ended up with these weird white lumps in my cookies. Not the end of the world, but not the look I wanted.
Why Your Cookies Puddle
If your cookies spread too much and merge into one giant sheet, it's usually a temperature issue. If the butter was too soft (almost melting), the structure collapses before the flour can set.
Why Your Dough Crumbles
A crumbly dough usually means too much flour or not enough fat. This happens often when measuring flour by the cup instead of a scale. The flour gets packed down, and you end up with 20% more than you need.
| Problem | Root Cause | Solution |
|---|---|---|
| Excessive Spreading | Butter too warm | Chill dough for 30 mins before piping |
| Dry/Sandy Texture | Over measured flour | Use a kitchen scale for grams |
| Pale/Underbaked | Oven temp too low | Use an oven thermometer to verify 350°F |
Common Mistakes Checklist
- ✓ Sifted powdered sugar to remove lumps
- ✓ Butter is soft but not greasy/melting
- ✓ Egg yolks added individually to maintain emulsion
- ✓ Flour folded in just until combined
- ✓ Parchment paper used to prevent sticking
Adjusting the Batch
Depending on who you're feeding, you might need to change the volume. When making these, remember that fats behave differently when scaled.
Scaling Down (Half Batch) If you're just baking for yourself, halve everything. For the egg, beat one large egg and use exactly 25g of the yolk. Use a smaller baking sheet and reduce the bake time by about 2 minutes, as smaller batches often heat up faster in the oven.
Scaling Up (Double Batch) When doubling, be careful with the salt - only increase it to 3/4 tsp instead of a full teaspoon to avoid an over salted finish. Work in batches when piping; if the dough sits out too long while you're piping the second tray, it might get too warm. If this happens, pop the piping bag in the fridge for 10 minutes. This is similar to the temperature control needed for Classic Chocolate Chip Cookies recipe to prevent spreading.
| Budget Choice | Premium Choice | Impact | Savings |
|---|---|---|---|
| Standard Butter | European Style | Higher fat, richer taste | $2-3 per pack |
| Vanilla Extract | Vanilla Bean Paste | Tiny black specks, deeper flavor | $4-6 per jar |
| AP Flour | Pastry Flour | Slightly more tender crumb | $1 per bag |
Common Baking Myths
There are a few things people tell you about butter cookies that just aren't true. Let's clear them up.
Myth: "Sifting flour is a waste of time." Not for these. Sifting removes clumps and aerates the flour. Since we aren't whisking the dough aggressively, the sift provides the only aeration the dry ingredients get.
Myth: "The cookies are done when they brown." Absolutely not. If these cookies turn dark brown, they'll be hard as rocks. The goal is "pale gold" on the edges. The carryover heat from the pan will finish the cooking process.
Preservation Secrets
Because of the high fat content, these cookies stay fresh longer than a standard cake, but they can still go stale if left out.
Storage Guidelines Keep them in an airtight container at room temperature for up to 5 days. If you live in a humid area, put a small piece of parchment paper between layers to prevent them from sticking together. In the fridge, they'll last 2 weeks, but they might lose some of that "snap."
Freezing and Reheating You can freeze the baked cookies for up to 3 months. Just wrap the container in foil to prevent freezer burn. To eat, let them thaw at room temperature for 20 minutes.
If you want that fresh from the oven feel, pop them in a 300°F oven for 3 minutes.
Zero Waste Tip Since we only used the yolks, you're left with three egg whites. Don't toss them! You can whip them into a quick meringue, add them to your morning omelet, or use them to make a healthy cake.
If you have too many, freeze the whites in an ice cube tray; they thaw perfectly for future baking.
Presentation Tips
These are simple cookies, but you can make them look like they came from a boutique bakery with a few tweaks.
First, try a "double dip" finish. Dip half of the cooled cookie into melted dark chocolate and then immediately into crushed pistachios or sprinkles. It adds a color contrast that makes the golden cookies pop.
If you're serving them for a brunch, a light dusting of powdered sugar through a fine mesh strainer gives them a professional, snowy look.
For the best experience, pair these with a warm beverage. They are incredibly rich, so something to cut through the fat is key. I love serving them with a glass of cold milk or a cup of my Homemade Hot Chocolate Mix during the winter. The bitterness of the cocoa balances the sweetness of the butter.
Finally,, if you're gifting them, stack them in a glass jar with ribbons. Because they are sturdy, they don't crush easily, making them one of the best homemade gifts for people who actually appreciate a rich, traditional treat.
Trust me on this - once your friends taste the difference the yolks make, they'll never go back to basic sugar cookies.
Recipe FAQs
How to make these cookies hard and crunchy?
Bake for the full 15 minutes at 350°F. Ensure the edges are a distinct pale gold and let them cool completely on the baking sheet to fully set the structure.
Would adding more egg yolks help if the dough is crumbling?
Yes, a small amount of extra yolk can bind the dough. The fats and lecithin in the yolks act as an emulsifier to better hold the flour and butter together.
How to make these cookies softer and chewier?
Reduce the baking time to 10-12 minutes. Pull them from the oven as soon as the centers are set but not browned to retain internal moisture.
Is it true that I can skip sifting the powdered sugar?
No, this is a common misconception. Sifting is essential to remove clumps, ensuring the butter and sugar cream into a perfectly smooth, pale mixture.
How to prevent the cookies from spreading too much?
Chill the piped dough rounds for 15 minutes before baking. This firms up the softened butter to prevent flattening. If you enjoyed controlling texture here, see how the same principle creates the shatter crisp in our salted version.
Can I use melted butter instead of softened butter?
No, use softened butter for the correct lift. Melted butter will not trap air during the creaming phase, resulting in a flat, greasy cookie instead of a fluffy one.
Why did my cookies turn out dense instead of light?
You likely didn't beat the butter and sugar long enough. Beat them for a full 2-3 minutes until the mixture is pale and fluffy to trap the air bubbles needed for lightness.
Egg Yolk Butter Cookies