Crispy Golden Egg Cookies: Shatter-Crisp
- Time: 15 min active + 1 hour chilling
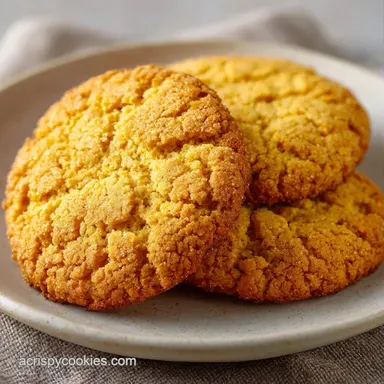
- Flavor/Texture Hook: Mahogany edges with a velvety, melt in-your mouth center
- Perfect for: Afternoon tea or as a sturdy gift for cookie lovers
- Crispy Golden Egg Cookies Recipe
- Why Most Recipes Fail
- Detailed Recipe Specs
- The Shopping List
- Required Kitchen Tools
- Step-By-Step Baking Process
- Fixing Common Cookie Issues
- Troubleshooting Common Issues
- Creative Flavor Variations
- Adjusting Your Batch Size
- Busted Baking Beliefs
- Keeping Them Fresh
- Pairing Your Treats
- Recipe FAQs
- 📝 Recipe Card
The scent of toasted coconut sugar hitting a hot oven is honestly one of my favorite things in the world. It's that deep, caramel like aroma that fills the whole house and makes everyone wander into the kitchen asking what's baking.
But for a long time, I struggled with a very specific problem: my cookies always came out either too cakey or completely flat. They lacked that specific "snap" that defines a truly professional biscuit.
I realized the issue was the moisture content of the whole egg. When you use the white, you're adding water and protein that creates a softer, more bread like structure. By stripping away the whites and focusing only on the yolks, you're essentially increasing the fat ratio. This is how you get those Crispy Golden Egg Cookies that actually hold their shape but still feel luxurious on the tongue.
In this guide, I'm sharing the exact ratios and the timing windows I've tested. We're going to focus on the physics of fat and sugar, making sure you don't end up with a tray of golden puddles. Trust me on this, the chilling step isn't a suggestion - it's the whole point.
Crispy Golden Egg Cookies Recipe
Right then, let's get into the nitty gritty of why this particular version works where others fail. Most people just throw everything in a bowl and hope for the best, but if you want a cookie that shatters when you bite into it, you have to be a bit more intentional.
Why Most Recipes Fail
The biggest mistake I see is ignoring the temperature of the fat. If your butter is too warm, it incorporates too much air during the creaming phase, and then it melts too quickly in the oven. This leads to "the spread," where your beautiful balls of dough turn into one giant sheet of sugar.
Another common pitfall is overworking the flour. Once the flour hits the wet ingredients, gluten starts to form. If you beat the dough with a mixer for five minutes, you're essentially making a tiny loaf of bread rather than a cookie.
We want minimal gluten development to ensure the texture stays crisp rather than chewy or rubbery.
How the Yolks Work: Egg yolks contain lecithin, a natural emulsifier that binds the fats and liquids together without adding the steam inducing water found in egg whites. This results in a denser, richer crumb that crisps up beautifully.
The Sugar Effect: Coconut sugar has a different moisture profile than white sugar. It encourages a deeper browning (caramelization) at lower temperatures, which gives us that signature mahogany look.
Cold Fat Stability: Chilling the dough balls for a full hour ensures the butter is solid again. When the cookie hits the 175°C oven, the outer edges set before the center can melt, creating a structured, thick disk.
| Method | Prep Time | Texture | Best For |
|---|---|---|---|
| Fast (No Chill) | 15 mins | Thin & Spready | Quick cravings |
| Classic (1hr Chill) | 1 hour 15 mins | Thick & Shattering | Professional results |
Detailed Recipe Specs
Before we move to the tools, let's look at the components. I've found that using a scale is the only way to be truly consistent here. If you're using cups, please pack your flour lightly; otherwise, you'll end up with a dry, sandy cookie.
- - Aeration
- Cream butter and sugar for exactly 2-3 minutes.
- - Thermal Target
- Ensure the oven is fully preheated to 175°C (350°F).
- - Fat State
- Dough balls must be chilled for a full 60 minutes.
Component Analysis
| Ingredient | Science Role | Pro Secret |
|---|---|---|
| Unsalted Butter | Structural Fat | Keep it "cool room temp" (should indent but not ooze) |
| Coconut Sugar | Browning Agent | Sift it if you see large clumps to avoid "sugar pockets" |
| Egg Yolks | Emulsifier | Use room temperature yolks for better blending |
| Baking Soda | Leavening | Reacts with the acidity of coconut sugar for a slight lift |
The Shopping List
I'm very picky about the sugar here. You can use brown sugar, but you'll lose that specific toasted nut flavor that coconut sugar provides. If you can't find it, a mix of light brown and a pinch of molasses works, but the result is slightly more humid.
- 115g Unsalted Butter, softenedWhy this? Provides the essential fat for a velvety mouthfeel
- 150g Coconut SugarWhy this? Natural caramel notes and better browning
- 36g Large Egg Yolks (about 2 yolks)Why this? Richness without the moisture of whites
- 5ml Vanilla ExtractWhy this? Rounds out the sweetness with floral notes
- 190g All Purpose FlourWhy this? Standard protein content for a sturdy snap
- 3g Baking SodaWhy this? Creates a tender, open crumb
- 1.5g Sea SaltWhy this? Balances the richness of the yolks
- Pinch of Flaky Sea SaltWhy this? Adds a sharp contrast to the sweet finish
According to King Arthur Baking, the protein content of your flour can significantly impact how much a cookie spreads, so sticking to a standard all purpose flour is your safest bet here.
Required Kitchen Tools
You don't need a professional kitchen, but a few specific tools make this a lot easier. I use a stand mixer such as a KitchenAid for the creaming part, but a hand mixer works just as well.
- Electric Mixer: Essential for getting the butter and sugar fluffy.
- Rubber Spatula: For folding in the flour without overmixing.
- Baking Sheet: A heavy duty aluminum pan is best for even heat distribution.
- Parchment Paper: Non negotiable. Don't trust the "non stick" coating on your pans.
- Wire Cooling Rack: This is where the magic happens as the sugars crystallize.
Step-by-step Baking Process
Let's crack on. Follow these steps exactly, and don't try to skip the fridge time. I've been there, and it's not worth the pancake shaped cookies.
Phase 1: Aerating the Base
- Cream butter and coconut sugar. Use your mixer on medium high for 2-3 minutes until the mixture looks pale and fluffy. Note: This creates tiny air pockets that keep the cookie from being a brick.
- Incorporate egg yolks. Add the yolks one at a time, beating well after each one, then stir in the vanilla extract.
Phase 2: Integrating the Gold
- Combine dry ingredients. In a separate bowl, whisk the flour, baking soda, and salt.
- Fold in the flour. Use a spatula to gently stir the dry mix into the butter mixture, stopping the moment no streaks of flour remain. Note: This prevents gluten development, keeping the Crispy Golden Egg Cookies tender.
Phase 3: The Chill and Bake
- Scoop the dough. Form 1 inch balls and place them on a tray.
- Refrigerate for 1 hour. This is the most important part. Let the fats solidify completely.
- Preheat oven. Set your oven to 175°C (350°F).
- Arrange on sheet. Place the chilled balls on parchment paper, spacing them 2 inches apart.
- Bake 10-12 minutes. Watch for the edges to become deep mahogany colored and the centers to look set.
- Cool on a rack. Transfer them immediately. You'll hear a slight crackle as they cool and harden.
Fixing Common Cookie Issues
Even with a foolproof plan, things happen. Maybe your kitchen is too hot, or your oven runs a bit high. Here is how to handle the most common mishaps.
Troubleshooting Common Issues
| Issue | Solution |
|---|---|
| Why Your Cookies Spread Too Much | If your cookies look like flat discs, the fat likely melted before the structure could set. This usually happens if the butter was too soft at the start or the dough didn't chill long enough. |
| Why Your Cookies Stay Too Soft | Soft cookies usually mean they were pulled out of the oven too early. The center might look done, but the sugars haven't reached the temperature needed to crystallize. |
| Why Your Cookies Taste Rubbery | This is a classic sign of overmixing. When you beat the flour too much, you create a network of gluten that's more suited for a baguette than a biscuit. Always use a spatula for the final step. |
Common Mistakes Checklist:
- ✓ Did you cream the butter for at least 2 minutes?
- ✓ Did you stop mixing the moment the flour disappeared?
- ✓ Were the dough balls chilled for a full 60 minutes?
- ✓ Did you use a wire rack for cooling?
- ✓ Is your oven actually at 175°C (checked with a thermometer)?
Creative Flavor Variations
Once you've nailed the base recipe, you can start playing around. These Crispy Golden Egg Cookies are like a blank canvas. If you're in the mood for something different, try these tweaks.
- Zesty Twist: Add the zest of one organic lemon to the sugar. It cuts through the richness of the yolks perfectly.
- Winter Vibe: Swap half of the vanilla for cinnamon and a pinch of nutmeg. This pairs beautifully with a hot cider.
- Chocolatey Edge: Fold in 50g of mini dark chocolate chips. Since these are such a rich cookie, dark chocolate provides a great bitter contrast. For another chocolatey treat, you might enjoy my Classic Chocolate Chip Cookies recipe.
- Nutty Crunch: Add 1/4 cup of finely crushed toasted hazelnuts.
Decision Shortcut: - If you want a more intense snap, bake for an extra 2 minutes. - If you want a slightly chewier center, reduce the chill time to 45 minutes. - If you want a deeper caramel flavor, use dark coconut sugar.
Adjusting Your Batch Size
Scaling baking isn't always as simple as doubling the numbers. Ratios matter, especially with leavening agents like baking soda.
Scaling Down (Half Batch): Use 57g butter and 75g sugar. For the egg, beat one yolk in a small bowl and measure out exactly 18g. Reduce the baking time by about 2 minutes since smaller batches sometimes heat up faster in the oven.
Scaling Up (Double Batch): When doubling, don't double the baking soda exactly - use about 1.5x the amount (4.5g) to avoid a metallic aftertaste. Work in batches with your baking sheets; never crowd the oven, or you'll drop the temperature and lose that crisp edge.
If you're looking for other easy to scale treats, my Healthy Oatmeal Cookies are a great option for larger groups.
Busted Baking Beliefs
I've heard a lot of "old wives' tales" in the kitchen that just aren't true. Let's clear some of those up so you can bake with confidence.
The "Room Temperature" Myth: People think "softened" means "almost melted." Actually, butter for cookies should be about 18°C (65°F). If you can press your finger into it and it leaves a dent without the butter sticking to your skin, it's perfect.
If it's oily, it's too warm.
The "Flour Fix" Myth: Some believe that adding more flour stops cookies from spreading. In reality, this just makes the cookie dense and cakey without fixing the underlying fat temperature issue. The fix is always more chilling, not more flour.
Keeping Them Fresh
These cookies stay crisp for a surprisingly long time because of the low moisture content from using only yolks.
Storage: Store them in a single layer in an airtight container. If you live in a humid area, toss a small piece of parchment paper between layers to prevent them from sticking. They'll stay perfectly crunchy for up to 7 days at room temperature.
Freezing: You can freeze the raw dough balls! Just freeze them on a tray first, then toss them into a bag. Bake them straight from the freezer, but add 2 minutes to the cook time.
Zero Waste: Don't throw away those leftover egg whites. You can use them to make a light meringue, a healthy omelet, or even a quick batch of macarons. Since we're using exactly 2 yolks, you'll have 2 whites left over - perfect for a small protein packed breakfast.
Pairing Your Treats
Because these have such a rich, buttery profile, you want something to balance the sweetness. I usually serve these with a strong, unsweetened black coffee or a bold Earl Grey tea. The bitterness of the drink highlights the caramel notes of the coconut sugar.
If you're putting together a dessert platter, these go great with fresh raspberries or sliced green apples. The acidity of the fruit cuts through the richness of the yolks, making each bite feel fresh.
Honestly, once you try these Crispy Golden Egg Cookies, you'll probably never go back to the standard whole egg version. Happy baking!
Recipe FAQs
What is the secret to a crunchy cookie?
Chilling the dough and immediate cooling. Refrigerating dough balls for 1 hour prevents spreading, and moving them to a wire rack immediately after baking allows sugars to crystallize.
What ingredient contributes most to a crisp cookie?
Coconut sugar. Its specific composition helps the cookies achieve a shatter crisp texture and deep mahogany color during the 10-12 minute bake.
How to make these cookies hard and crunchy?
Bake until the edges are mahogany colored. Ensure the centers are set and transfer them to a wire rack immediately to allow the structure to harden.
Would adding more egg yolks help crumbling cookies?
No, stick to the measured amount. Adding extra egg yolks can disrupt the fat-to-flour ratio, which may actually make the cookies too soft.
Why do I need to chill the dough balls for one hour?
To solidify the fats. Skipping this step causes the butter to melt too quickly in the oven, resulting in flat, pancake shaped cookies.
Is it true that overmixing the flour makes the cookies crispier?
No, this is a common misconception. Overmixing develops too much gluten, which creates a rubbery texture rather than a crisp one.
Why did my cookies spread too much in the oven?
The butter was likely too soft or the dough didn't chill long enough. If you enjoyed controlling spread here, the same fat ratio logic applies to our shatter crisp cookies.
Crispy Golden Egg Cookies