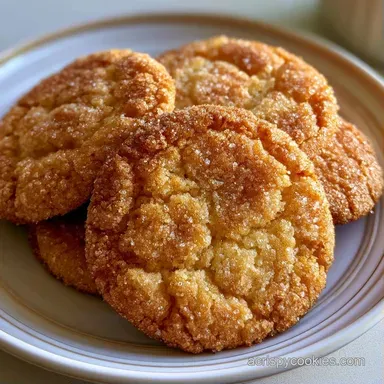
Old Fashioned Granulated Sugar Crispy Cookies: Golden
- Time:15 minutes active + 30 minutes chilling = Total 55 minutes
- Flavor/Texture Hook: Shattering snap with a buttery, caramelized finish
- Perfect for: Colorful party platters, beginner bakers, or a quick tea time treat
Imagine that sound - the sharp, satisfying crack of a cookie that doesn't just crumble, but actually shatters. I remember thinking for years that you needed a professional pastry kitchen or some secret "industrial" ingredient to get that specific texture.
I used to assume that if I didn't use powdered sugar or a complicated icing, the cookies would either be too soft or just plain boring.
But here's the truth: you don't need any of that. Forget everything you know about needing "cake like" sugar cookies. The real magic happens when you lean into the granulated sugar, using it as both a sweetener and a structural tool.
These Granulated Sugar Crispy Cookies prove that simplicity, when done with a bit of precision, beats a complex recipe every single time.
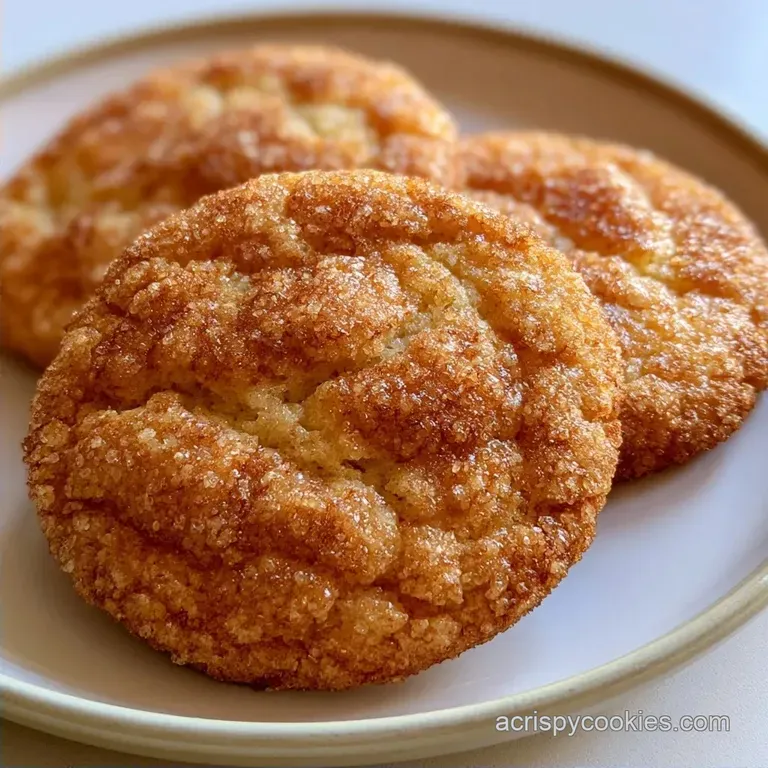
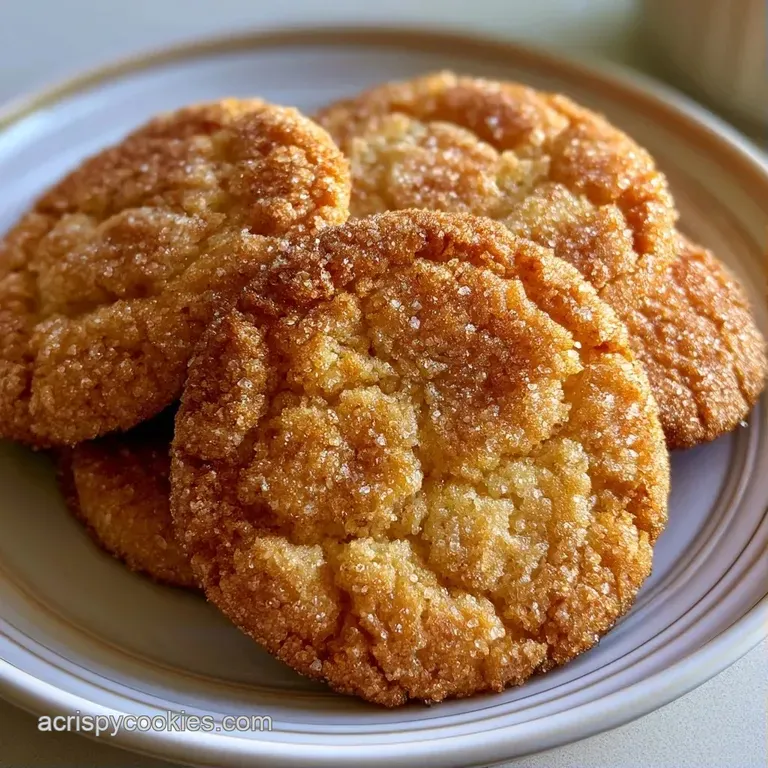
You can expect a treat that looks like it came from a high end boutique but takes almost no effort to put together. We're talking about a golden brown edge, a velvety center that still holds its snap, and a shimmering exterior that catches the light. It's a total vibe for any dessert table.
Granulated Sugar Crispy Cookies Secrets
To get that specific texture, we have to play with a few basic rules of baking. It's not about luck, it's about how the ingredients react to the heat.
Sugar Crystallization: Rolling the dough in sugar creates a dense layer of crystals that doesn't melt entirely. This forms a "shell" that prevents the cookie from becoming cakey.
The Chill Factor: Cold fat takes longer to melt in the oven. By chilling the dough, we slow down the spread, ensuring the cookie stays thick enough to have a center but thin enough to get those crispy edges.
Air Incorporation: Beating the butter and sugar for a full few minutes creates tiny air pockets. These pockets expand and then collapse slightly, leaving behind a light, crisp structure rather than a dense slab.
Leavening Balance: Using baking soda instead of powder encourages more browning and a flatter shape, which is exactly what we want for a shatter effect cookie.
If you're into this kind of texture, you might also love the snap of my Classic Chocolate Chip Cookies recipe, though these sugar cookies are much lighter.
| Method | Time | Texture | Best For |
|---|---|---|---|
| Standard Oven | 10-12 mins | Evenly crisp, gold edges | Large batches, consistent look |
| Cast Iron Pan | 8-10 mins | Deeply caramelized, chewy center | Small batches, rustic vibe |
Ingredient Component Analysis
Understanding what each part does helps you avoid the common "pancake cookie" disaster.
| Ingredient | Science Role | Pro Secret |
|---|---|---|
| Unsalted Butter | Provides structure and flavor | Keep it softened, not melted, for better air |
| Granulated Sugar | Creates the "shatter" crust | Don't skip the rolling step; it's the key |
| All Purpose Flour | The structural backbone | Measure by weight to avoid "cakey" cookies |
| Baking Soda | Promotes browning | Ensures the edges caramelize quickly |
The Essential Ingredient List
Right then, let's look at what you'll need. I've kept this list tight because too many additions can mess with the crispness.
- 1 cup (225g) unsalted butter, softened to room temperature Why this? Essential for that velvety mouthfeel
- 1 ½ cups (300g) granulated sugar Why this? Provides the primary sweetness and structure
- 1 large egg (50g) Why this? Binds everything and adds a hint of richness
- 2 tsp (10ml) vanilla extract Why this? Adds depth so they don't just taste like sugar
- 2 ½ cups (310g) all purpose flour Why this? Standard protein level for the right snap
- 1 tsp (5g) baking soda Why this? Helps with the golden color
- ½ tsp (3g) salt Why this? Cuts through the sweetness
- ¼ cup (50g) granulated sugar (for rolling) Why this? Creates the iconic crispy exterior
Quick Substitutions:
| Original Ingredient | Substitute | Why It Works |
|---|---|---|
| Unsalted Butter | Salted Butter | Works fine. Note: Reduce the added salt by half |
| All Purpose Flour | gluten-free 1:1 | Similar structure. Note: Texture may be slightly grittier |
| Vanilla Extract | Almond Extract | Adds a nutty flavor. Note: Use only 1 tsp; it's stronger |
From Prep to Plate
Let's crack on. Make sure your butter is truly softened - if it's too cold, you'll get lumps; if it's melted, your cookies will spread into one giant sheet.
Phase 1: Creating the Emulsion
- Beat the softened butter and 1 ½ cups of granulated sugar on high speed for 3–5 minutes until the mixture is pale and fluffy. Note: This is where you build the air that makes them light.
- Beat in the egg and vanilla extract until fully incorporated.
Phase 2: Integrating the Dry Base
- In a separate bowl, whisk together the flour, baking soda, and salt.
- Gradually add the dry ingredients to the butter mixture on low speed, mixing only until the white streaks of flour disappear. Note: Overmixing develops gluten, which makes cookies tough instead of crispy.
Phase 3: The Chill Factor
- Scoop the dough into small balls, place them on a tray, and chill in the refrigerator for 30 minutes. Note: This is the most important step for controlling the spread.
Phase 4: Precision Baking
- Preheat your oven to 350°F (175°C).
- Roll each chilled dough ball in the remaining granulated sugar until evenly coated.
- Place the cookies on a lined sheet 2 inches apart and bake for 10–12 minutes until the edges turn light amber and the centers are set.
- Move the cookies to a wire cooling rack immediately after baking to maintain crispness. Note: Leaving them on the hot pan will overcook the bottoms.
Chef's Tip: For a truly viral look, use a round cookie scoop for perfectly uniform spheres. If you don't have one, use a tablespoon and roll them between your palms for a smooth finish.
Avoiding Kitchen Disasters
Even the best of us have "oops" moments. Usually, it comes down to temperature or measurement.
Troubleshooting Common Issues
| Issue | Solution |
|---|---|
| Why Your Cookies Spread | If your Granulated Sugar Crispy Cookies look more like pancakes, your butter was likely too warm or you skipped the chilling phase. |
| Why Your Cookies Stay Soft | This usually happens if the oven temperature is too low or you pulled them out too early. You want those edges to be amber, not just pale gold. |
| Why Your Cookies are Cakey | Too much flour is the culprit here. If you scoop your flour directly with the measuring cup, you're likely packing it down and adding 20% more than you need. Always spoon and level. |
Common Mistakes Checklist:
- ✓ Did you cream the butter and sugar until pale?
- ✓ Did you chill the dough balls for exactly 30 minutes?
- ✓ Did you roll them in sugar after chilling?
- ✓ Did you move them to a rack immediately?
- ✓ Did you avoid overmixing the flour?
Adjusting the Batch Size
Depending on whether you're baking for a crowd or just a midnight snack, you'll need to tweak the process.
Scaling Down (½ Batch): Use 112g of butter and 150g of sugar. Since you can't easily halve an egg, crack one into a bowl, whisk it, and use 25g. Use a smaller baking sheet and reduce the bake time by about 1-2 minutes.
Scaling Up (2x Batch): When doubling, don't double the baking soda exactly; use 1 ¾ tsp instead of 2 tsp to avoid a metallic taste. Work in batches. If you crowd your oven with too many trays, the airflow is blocked, and the cookies won't get that shattering snap.
Baking Tip for Big Batches: If you're using two racks, lower the oven temperature to 325°F (160°C) and rotate the pans halfway through. This prevents the top tray from burning while the bottom remains raw.
Debunking Cookie Lore
There are a few myths floating around that actually hinder your results.
Myth: "Cold butter makes the best cookies." Not for this recipe. Cold butter doesn't emulsify with sugar properly, leading to an uneven texture. You want "room temperature" - where it's soft enough to leave a thumbprint but still holds its shape.
Myth: "You must use a stand mixer." Nope. A hand mixer works just as well. The key is the time spent creaming, not the brand of the tool.
Myth: "Adding more sugar makes them crispier." Actually, too much sugar can make them spread too much and become chewy or sticky. The crispness comes from the rolling and the baking time, not just the amount of sugar in the dough.
Storage Guidelines
To keep that snap, you have to fight moisture. Sugar is a humectant, meaning it pulls water from the air, which turns a crispy cookie into a soft one.
Fridge and Pantry: Store these in an airtight container with a piece of parchment paper between layers. They'll stay crispy for about 5 days. If they do soften, you can pop them in a 300°F (150°C) oven for 3 minutes to refresh the crunch.
Freezing: You can freeze the baked cookies for up to 3 months. Just wrap them tightly in foil and then a freezer bag. Thaw at room temperature for 30 minutes before eating.
Zero Waste Tips: If you have a little bit of dough left that isn't enough for a full cookie, don't throw it away! Roll it into a tiny "tester" ball and bake it. Also, save the leftover rolling sugar to use as a topping for oatmeal or a homemade crumble.
Serving Suggestions
Since these are so simple, the "wow" factor comes from how you present them. I love playing with color balance to make them look like a professional spread.
- - Ruby Red
- Press a single dried raspberry or a few red sanding sugar crystals on top.
- - Emerald Green
- Add a tiny pinch of finely chopped pistachios for a salty contrast.
- - Sunshine Yellow
- Grate a tiny bit of fresh lemon zest over the sugar coating.
For a truly decadent experience, serve these with a scoop of velvety homemade ice cream. The contrast between the freezing, creamy ice cream and the warm, shattering Granulated Sugar Crispy Cookies is absolutely top tier.
If you're serving these at a party, stack them in a pyramid on a white platter. The shimmering sugar crystals catch the light, and the golden edges provide a beautiful, natural frame. Trust me, they'll be gone in minutes.
Recipe FAQs
What does granulated sugar do to a cookie?
It encourages spreading and creates a crisp texture. Unlike brown sugar, granulated sugar lacks moisture and acidity, which allows the dough to dry out more effectively during baking.
What makes a crispy sugar cookie?
The high sugar ratio and precise cooling method. Baking until the edges reach a light amber hue and immediately transferring them to a wire rack prevents steam from softening the bottoms.
Can you make cookies with just granulated sugar?
Yes, it is essential for this specific snap. Using only granulated sugar avoids the chewiness associated with molasses. If you enjoyed mastering the crisp texture here, see how the same principle works in our thin crispy sugar cookies.
How to make the middle of the cookies crisp?
Bake until the edges are light amber and the centers are fully set. Avoid pulling them out too early, as a pale center will remain soft once the cookies cool.
How to make cookies crispy outside and soft inside?
Reduce the baking time slightly. Remove the cookies from the oven just as the edges set but before the heat fully dries out the center.
Is it true that chilling the dough is optional for a crispy result?
No, this is a common misconception. Skipping the 30-minute chill causes the butter to melt too rapidly in the oven, resulting in cookies that spread too thin and lose their structure.
How to make soft cookies crunchy again?
Place them in a 300°F (150°C) oven for 3 minutes. This brief heat treatment evaporates absorbed moisture and restores the original snap.
Granulated Sugar Crispy Cookies