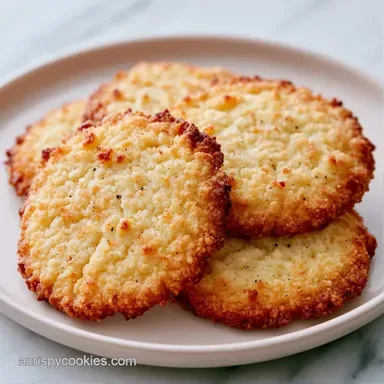
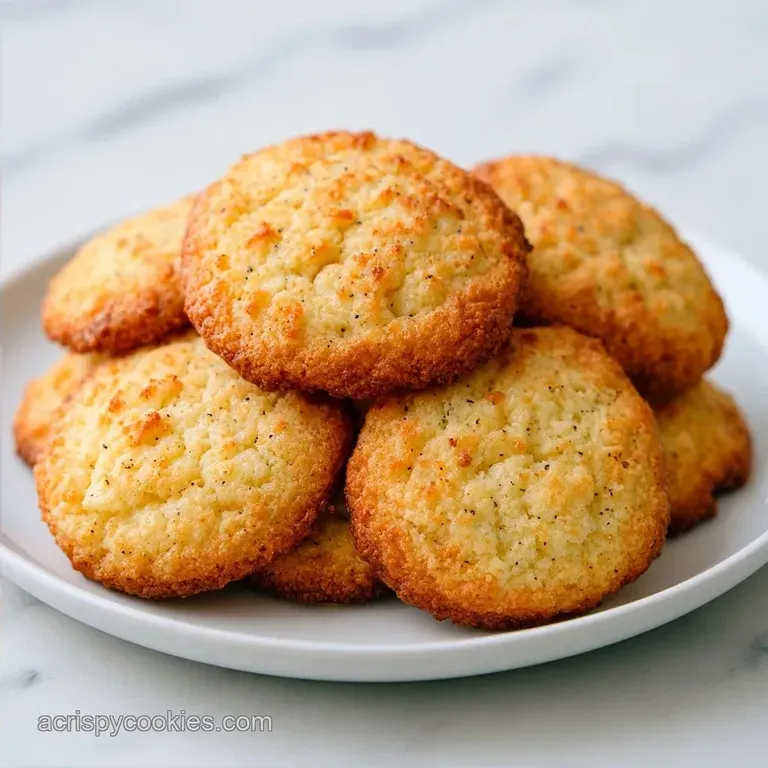
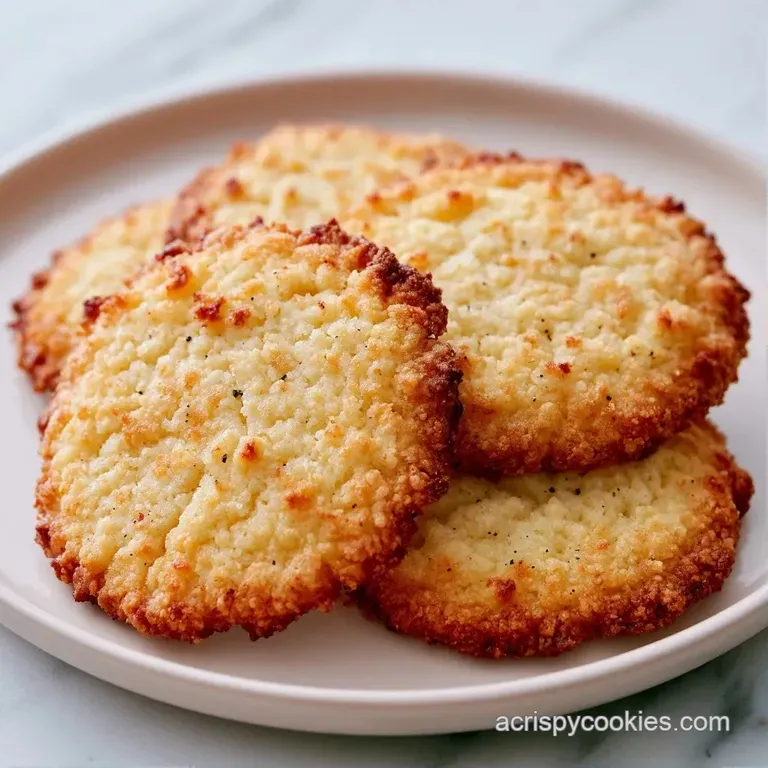
Vanilla Bean Crispy Cookies: Shatter Crisp
- Time:15 minutes active + 10 minutes baking = Total 25 minutes
- Flavor/Texture Hook: Shatter crisp edges with a velvety vanilla finish
- Perfect for: Afternoon tea, holiday cookie tins, or a quick sweet craving
Vanilla Bean Crispy Cookies
Imagine it's a rainy Tuesday, the kind of day where the house feels a bit too quiet and you need something that smells like a warm hug. I remember the first time I tried to recreate those ultra thin, snap able cookies from a boutique shop in the city.
I wanted that specific, concentrated vanilla hit and a texture that didn't just crunch, but actually shattered when you bit into it.
The secret wasn't in the oven temperature, but in the way the fats and sugars played together. I spent a few weekends experimenting with the ratio of granulated to powdered sugar, trying to find the line between a soft sugar cookie and something that felt like a delicate wafer.
When I finally hit that sweet spot, the aroma of the vanilla bean paste hitting the hot oven filled my entire apartment, and I knew I'd cracked the code.
These Vanilla Bean Crispy Cookies are all about contrast. You get the rich, buttery base that melts on your tongue, paired with the intense, speckled beauty of real vanilla beans. They're thin, elegant, and have a professional finish that makes people think you spent hours on them, even though the active work is minimal.
The Secret to the Snap
I've always been a flavor detective when it comes to cookies. Most people just throw in some extract and call it a day, but if you want restaurant quality, you have to look at the structure.
The Sugar Split: Using both granulated and powdered sugar is key. Granulated sugar creates the crisp, caramelized edges, while the powdered sugar keeps the center from becoming too hard, giving it a refined, velvety mouthfeel.
Starch Stability: A tiny bit of cornstarch prevents the gluten in the flour from getting too tough. This ensures the cookie snaps cleanly rather than bending or feeling bready.
Fat Temperature: Softened butter, not melted butter, allows us to trap air during the creaming process. This air creates tiny pockets that expand and then collapse, resulting in that signature thinness.
Moisture Control: The small amount of baking soda reacts with the heat to encourage the cookies to spread. This spreading is what gives them their thin, crispy profile.
| Method | Time | Texture | Best For |
|---|---|---|---|
| Conventional Oven | 10 minutes | Consistent, golden snap | Large batches |
| Air Fryer | 7 minutes | Extra crispy edges | 2-4 cookies |
| Stovetop Finish | 2 minutes | Toasted, nuttier flavor | Gourmet plating |
Note: "Stovetop Finish" involves a quick flash sear in a dry pan after baking to intensify the caramelization.
The Component Analysis
When you're trying to replicate a professional taste, you have to understand what each ingredient is actually doing. It's not just about the flavor; it's about the architecture of the cookie.
| Ingredient | Science Role | Pro Secret |
|---|---|---|
| Butter | Structure & Flavor | Use European style butter for a higher fat content and richer taste |
| Vanilla Bean Paste | Intense Aroma | The seeds provide visual proof of quality and concentrated flavor |
| Cornstarch | Texture Modifier | Keeps the crumb tender while allowing the edges to shatter |
| Powdered Sugar | Mouthfeel | Prevents the cookie from feeling like a hard biscuit |
Right then, let's look at the actual list. Don't bother with low-fat butter here; it'll mess with the spread and leave you with a cakey mess. Trust me on this.
Essential Ingredient List
- 1 cup unsalted butter, softened (225g) Why this? Provides the base for the crisp texture
- 1 cup granulated sugar (200g) Why this? Creates the caramelized, crispy edges
- 1/2 cup powdered sugar (60g) Why this? Adds a smooth, velvety finish
- 2 tsp vanilla bean paste (10ml) Why this? Much more intense than extract
- 1 large egg (50g) Why this? Binds the dough and adds lift
- 2 1/2 cups all purpose flour (310g) Why this? The structural foundation
- 2 tsp cornstarch (6g) Why this? Softens the protein in the flour
- 1/2 tsp baking soda (3g) Why this? Promotes spreading and browning
- 1/4 tsp salt (1.5g) Why this? Balances the sweetness
Substitution Table
| Original Ingredient | Substitute | Why It Works |
|---|---|---|
| Vanilla Bean Paste | Vanilla Extract (3 tsp) | Similar flavor. Note: Lacks the beautiful black seeds |
| All Purpose Flour | gluten-free 1:1 Blend | Works for structure. Note: May be slightly grittier |
| Unsalted Butter | Salted Butter (omit salt) | Same fat content. Note: Adjust salt based on brand |
If you're planning to make these for a party, you might want to pair them with something creamy. I often serve these with a side of my velvety homemade ice cream to balance the crunch.
The Baking Process
Let's crack on with the actual making. The most important part here is not overmixing. If you work the dough too much, you'll develop too much gluten, and your cookies will be tough instead of crispy.
- Beat the softened butter with granulated sugar and powdered sugar using an electric mixer until the mixture is pale and fluffy. Note: This incorporates the air needed for a light texture.
- Incorporate the egg and vanilla bean paste, mixing until the batter is smooth and vanilla seeds are evenly distributed.
- In a separate bowl, whisk together the all purpose flour, cornstarch, baking soda, and salt.
- Gradually add the dry ingredients to the wet ingredients on low speed, mixing only until flour streaks disappear. Note: Stop immediately to avoid a cakey cookie.
- Scoop small balls of dough (approx. 1 tbsp size) and place them 2 inches apart on parchment lined baking sheets.
- Bake at 350°F (175°C) for 8-10 minutes until the edges turn light mahogany gold and the centers remain pale.
- Allow cookies to cool on the baking sheet for 5 minutes to set the centers.
- Transfer to a wire rack to cool completely until they feel firm and snap easily.
Chef's Tip: For a truly professional look, use a round cookie scoop for perfectly uniform spheres. If you don't have one, a tablespoon works, but consistency is key for even baking.
Fixing Common Glitches
Nothing is more frustrating than opening the oven to find a giant, single cookie sheet. Most issues with Vanilla Bean Crispy Cookies come down to temperature or measurement.
Troubleshooting Common Issues
| Issue | Solution |
|---|---|
| Why Your Cookies Spread Too Much | If your cookies are merging into one big pancake, your butter was likely too soft or even melted. |
| Why Your Cookies Feel Cakey | This usually happens from overmixing the flour or using too much flour. Overmixing develops gluten, which creates a bread like structure instead of a delicate snap. |
| Why Your Cookies Are Burnt Bottoms | Your baking sheet might be too thin, or your oven rack is too low. This causes the bottom to sear before the center has a chance to set. |
Common Mistakes Checklist
- ✓ Checked that butter is 65°F (soft but not oily)
- ✓ Weighed flour instead of scooping with the cup
- ✓ Stopped mixing as soon as the flour vanished
- ✓ Used parchment paper to prevent bottom sticking
- ✓ Let cookies set on the pan for 5 minutes
Adjusting the Batch Size
If you're just making a treat for yourself or baking for a whole neighborhood, you'll need to tweak the process.
Scaling Down (1/2 Batch): Use 1/2 cup butter and 1/2 cup granulated sugar. For the egg, crack it into a bowl, whisk it well, and use exactly 25g (about half). Use a smaller baking sheet and reduce the bake time by about 1-2 minutes, keeping a close eye on the edges.
Scaling Up (2x Batch): When doubling the recipe, do not double the baking soda or salt fully - go to 1.5x instead to avoid a chemical aftertaste. Work in batches; overcrowding your counter with dough can lead to the butter softening too much.
If baking multiple sheets at once, lower the oven temp to 325°F (160°C) and extend the time by 2-3 minutes to ensure even heat distribution.
Decision Shortcut
- If you want a thinner snap → Bake for the full 10 minutes.
- If you want a slightly chewier center → Pull them at 8 minutes.
- If you want a deeper color → Increase granulated sugar by 1 tbsp.
Debunking Cookie Lore
There are a few things people tell you about sugar cookies that are just plain wrong.
Myth: More flour makes them crispier. Actually, adding too much flour makes them cakey and thick. The crispness comes from the sugar caramelizing and the moisture evaporating, not from adding more starch.
Myth: Vanilla extract is just as good as paste. In a basic cake, sure. But for Vanilla Bean Crispy Cookies, the paste provides a depth of flavor and those signature black specks that you simply can't get from a clear liquid extract.
Myth: You must chill the dough for 24 hours. While chilling helps with some recipes, these are designed for a quick turnaround. Chilling actually prevents the spread we want for this specific thin, crispy style.
Freshness and Waste
To keep that shatter crisp texture, you have to fight moisture. Humidity is the enemy of the crispy cookie.
Storage Guidelines: Store your cookies in a single layer in an airtight container. If you're stacking them, place a piece of parchment paper between layers to prevent sticking. They'll stay crisp for about 7 days at room temperature. In the fridge, they'll get soft, so avoid it.
For long term storage, freeze them for up to 3 months in a freezer safe bag.
Zero Waste Tips: If you have a bit of dough left over that's too small for a cookie, don't toss it. Roll it into a tiny ball and flatten it into a "tester" cookie to check the oven temp.
If you have leftover vanilla bean pods from making your own paste, dry them out and put them in your sugar canister to make vanilla sugar for your coffee.
Ideal Dessert Pairings
Since these are quite sweet and buttery, they work best when paired with something that cuts through the richness. A sharp espresso or a cold glass of almond milk is the classic route.
If you're putting together a dessert platter, these provide a great textural contrast to softer treats. For example, they pair beautifully with my Classic Chocolate Chip Cookies recipe to give guests a choice between chewy and crispy.
You can also get creative with toppings. Try dipping half of each cookie in melted dark chocolate and sprinkling a bit of flaky sea salt on top. This transforms the Vanilla Bean Crispy Cookies into something that looks like it came from a high end patisserie.
Just let them cool completely before dipping so the chocolate sets quickly.
Recipe FAQs
What ingredient makes cookies crispy?
Cornstarch and granulated sugar. Granulated sugar crystallizes during baking, while cornstarch helps maintain a crisp structure without over spreading.
What makes a cookie crispy vs chewy?
The ratio of sugars and the use of cornstarch. Higher proportions of granulated sugar create a snap, whereas brown sugar creates chewiness. For a different texture, see how the fat ratio changes in our chewy chocolate chip recipe.
How to make cookies crispy outside and soft inside?
Bake at 350°F (175°C) for 8-10 minutes. Pull the pan from the oven exactly when the edges turn light mahogany gold but the centers are still pale.
What is the secret to a crunchy cookie?
Avoid overmixing the flour. Mixing too much develops gluten, which creates a bread like, cakey structure instead of a delicate, crisp snap.
How to make the middle dough of cookies crisp?
Allow cookies to cool on the baking sheet for 5 minutes. This allows the carry over heat to set the center before transferring them to a wire rack.
Is it true that using melted butter is the best way to get a thin, crispy cookie?
No, this is a common misconception. Butter that is too soft or melted often causes the dough to collapse, resulting in cookies that merge into one big pancake.
How to prevent cookies from having burnt bottoms?
Raise your oven rack to the center position. This prevents the bottoms from searing before the centers have a chance to set properly.
Vanilla Bean Crispy Cookies