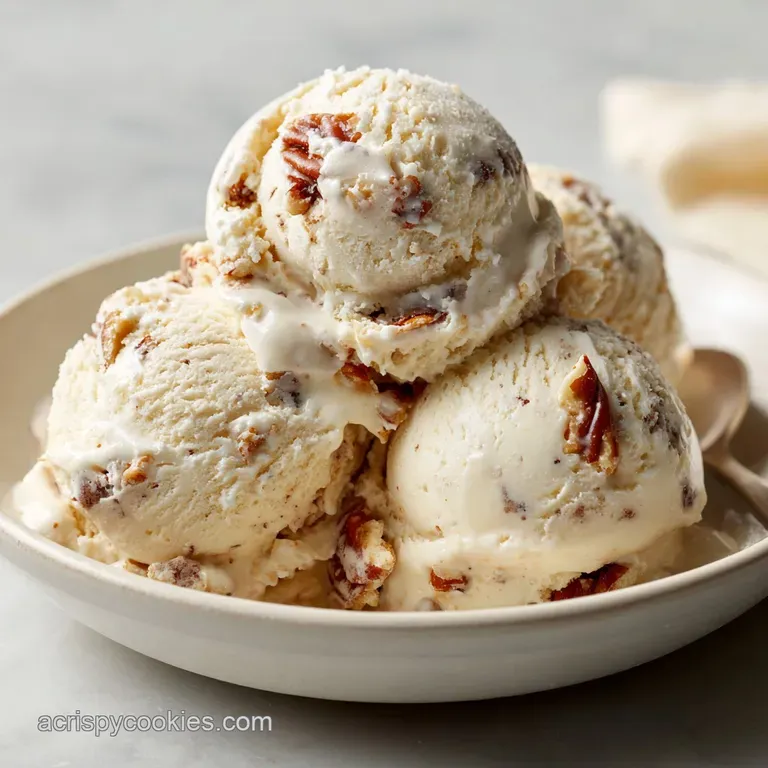
Rich Homemade Custard Ice Cream
- Time: Active 30 minutes, Passive 5 hours, Total 5 hours 30 mins
- Flavor/Texture Hook: Rich, buttery custard with a dense, non icy finish
- Perfect for: Summer dinner parties, birthday celebrations, or a weekend project
I still remember the first time I tried to make a batch of vanilla bean clouds in my tiny apartment kitchen. I didn't have a fancy machine, so I tried the "salt and ice in a bag" method I’d seen online. After twenty minutes of frantic shaking, I ended up with cold, salty milk and sore arms.
It was a disaster, but it sparked a deep obsession with how the professionals get that specific, dense pull when they drag a scoop through a container.
That failure taught me that great results don't come from brute force, but from chemistry. The rhythm of the whisk hitting the side of the pot and the way the kitchen smells like warm, floral vanilla when the milk starts to steam is pure magic.
Before I bought my first home aid ice cream maker, I thought this was a secret guarded by boutique shops. It isn't. Once you understand the dance between the fat and the sugar, you'll never settle for a grocery store tub again.
Essential Specs for Success
The secret to this Homemade Ice Cream lies in the precision of the custard. We aren't just mixing ingredients, we're creating a stable emulsion that can withstand the formation of ice crystals.
The high fat content from the 2 cups of heavy cream acts as a lubricant for the tongue, while the 5 large egg yolks provide the lecithin needed to bind everything together into a smooth, glossy liquid.
The Physics of the Freeze: Sugar lowers the freezing point of water, ensuring the base remains scoopable rather than a solid block of ice. Meanwhile, the constant churning incorporates tiny air bubbles, known as overrun, which prevents the mixture from feeling like a frozen brick.
| Method | Total Time | Final Texture | Best For |
|---|---|---|---|
| Traditional Churn | 6 hours | Dense and velvety | Pure flavor enthusiasts |
| No Churn (Whipped) | 4 hours | Light and airy | Quick treats without gear |
| Old-Fashioned Hand Crank | 7 hours | Slightly granular | Nostalgic family gatherings |
Choosing the right method depends on how much "pull" you want in your scoop. If you are looking for that thick, premium mouthfeel, the custard based churn method in this recipe is the gold standard. It provides a structural integrity that simpler recipes lack, making it the ideal companion for other desserts. This velvety scoop is a dream when paired with a warm Maggiano's Butter Cake recipe.
The Elements of the Custard
When you look at the ingredients for this Homemade Ice Cream, it seems simple, but each component plays a mechanical role. You cannot swap heavy cream for skim milk and expect the same results, because fat is what prevents those jagged ice crystals from ruining your experience.
We need that 36% fat content to create the structural walls that hold the air bubbles in place.
| Ingredient | Science Role | Pro Secret |
|---|---|---|
| Heavy Cream (2 cups) | Fat source | Use cold cream to stop the cooking process |
| Egg Yolks (5 large) | Emulsifier | Lecithin in yolks prevents fat separation |
| Granulated Sugar (0.75 cup) | Freezing point depressant | Dissolve fully to avoid a sandy texture |
| Whole Milk (1 cup) | Hydration | Don't use 2%, the water content is too high |
Chef's Tip: Freeze your empty storage container for at least 30 minutes before the ice cream is finished churning. Transferring the soft mixture into a room temperature bowl causes immediate melting at the edges, which refreezes into large, crunchy ice crystals.
If you find yourself missing an ingredient, don't panic. There are ways to adapt the recipe without losing that signature silkiness. If you're in the mood for fruitier bars, my Cherry Delight Recipe uses a similar chilling logic, but for a churned base, stick to the table below for the best results.
| Original Ingredient | Substitute | Why It Works |
|---|---|---|
| Whole Milk (1 cup) | Half and Half (1 cup) | Increases fat; yields a richer, denser scoop |
| White Sugar (0.75 cup) | Honey (0.5 cup) | Adds floral notes. Note: Makes it much softer |
| Vanilla Extract (1 tbsp) | Vanilla Bean (1 pod) | Deepens flavor with visual "specks" of bean |
Tools for the Best Texture
To get professional results at home, a few specific tools make the process foolproof. You'll need a heavy bottomed saucepan to prevent the milk from scorching on the bottom, which can impart a burnt flavor to the entire batch.
A digital thermometer is also highly recommended, as we need to hit exactly 170°F (77°C) to cook the eggs safely without scrambling them.
Beyond the stove, the ice cream maker is the star. Whether it's a compressor model or one with a freezer bowl, ensure the bowl is frozen solid. Most failures happen because the bowl wasn't cold enough. If you can hear liquid sloshing inside the bowl when you shake it, it's not ready yet.
Give it a full 24 hours in the back of the freezer to be certain.
Controlling the Temperature
The biggest challenge in making Homemade Ice Cream is managing heat. We heat the milk to infuse the vanilla and dissolve the sugar, but then we must drop that temperature as quickly as possible. A slow cool down in the fridge can lead to bacterial growth or an uneven texture.
I always recommend an ice bath for the finished custard to lock in the freshness.
Impact of Fat Content
Fat is the "body" of the dessert. When you use the full 2 cups of heavy cream and 1 cup of whole milk, you're hovering around 18-20% milkfat. This is what defines "Super Premium" ice cream. Lowering this fat percentage increases the water content, and water turns into ice.
If you want a smooth melt, do not compromise on the fat.
Understanding Air Incorporation
Churning isn't just about freezing, it's about aeration. Without air, you’d be eating a frozen block of sweet butter. The paddle, or dasher, of your machine folds in air as the mixture thickens. For a chunky texture, fold in pieces of a Penn Station Chocolate recipe during the last few minutes of churning.
step-by-step Churning Guide
1. Infusing the Dairy
In your heavy bottomed saucepan, combine 1 cup of whole milk, 0.75 cup sugar, and a pinch of salt. Heat this over medium heat, stirring occasionally, until the sugar dissolves and steam rises. Note: Do not let it reach a rolling boil, as this can change the protein structure of the milk.
2. Preparing the Custard Base
While the milk is heating, whisk 5 large egg yolks in a medium heat proof bowl. You want them to be pale and slightly thickened. Why this? Whisking breaks the protein strands for easier tempering.
3. Tempering the Egg Yolks
Slowly drizzle about half a cup of the warm milk into the egg yolks while whisking constantly. Note: This raises the temperature of the eggs gradually so they don't curdle.
4. Thickening the Liquid
Pour the egg mixture back into the saucepan with the remaining milk. Cook over medium low heat, stirring constantly with a heat resistant spatula, until the mixture coats the back of a spoon. This usually happens at 170°F (77°C).
5. Straining the Mixture
Immediately pour the custard through a fine mesh sieve into a clean bowl. Why this? This catches any tiny bits of cooked egg for a silky finish.
6. The Deep Chill Period
Stir in 2 cups of heavy cream and 1 tbsp vanilla extract. Cover the surface directly with plastic wrap to prevent a skin from forming and refrigerate until the liquid is completely cold, at least 4 hours or overnight.
7. Churning to Soft Serve
Pour the cold custard into your frozen ice cream canister. Turn on the machine and churn until it reaches the consistency of soft serve. This typically takes 20 to 25 minutes depending on your machine's power.
8. The Final Hardening
Transfer the soft ice cream to your chilled storage container. Press a piece of parchment paper against the surface and freeze until firm and scoopable, usually about 4 hours.
Fixes for Common Textural Issues
Even with the best intentions, the kitchen can be unpredictable. The most common heartbreak with Homemade Ice Cream is ending up with something "icy" or "gritty." This usually stems from the temperature of the base when it enters the machine.
If the custard is even slightly warm, it will take too long to freeze, allowing large ice crystals to grow.
Troubleshooting Common Issues
| Issue | Solution |
|---|---|
| Why Is It Gritty | Grittiness usually means the sugar didn't dissolve properly or the custard was overcooked. If you don't whisk the egg yolks and sugar together immediately, the sugar can actually "burn" the yolks, cre |
| Why Did Eggs Scramble | This happens when the heat is too high or you stop stirring. The proteins in the yolks clump together at high temperatures. If you see tiny yellow flecks, your strainer is your best friend. Strain it |
| Why Is It Hard | Home freezers are much colder than professional dipping cabinets. If your scoop is a rock, it might be low in sugar or fat. Let it sit on the counter for 5 to 10 minutes before serving to allow the ed |
Flavor Variations and Dairy Swaps
Once you have the vanilla base down, the world is yours. You can add anything from crushed cookies to fresh fruit purees. For the best results with add ins, wait until the last 2 minutes of churning. This ensures they are evenly distributed without being pulverized by the dasher.
| Servings | Heavy Cream | Egg Yolks | Sugar | Churn Time |
|---|---|---|---|---|
| 6 People | 1 cup | 3 yolks | 0.33 cup | 15 mins |
| 12 People | 2 cups | 5 yolks | 0.75 cup | 25 mins |
| 24 People | 4 cups | 10 yolks | 1.5 cups | 45 mins |
Work in batches if your machine canister is small.
Adding Fresh Fruit
If you want to make fruit flavored Homemade Ice Cream, avoid just tossing in chunks of raw fruit. They contain water, which will freeze into hard ice rocks. Instead, macerate the fruit in a little sugar and lemon juice, then cook it down into a thick syrup or puree before swirling it into the finished churn.
dairy-free Options
You can make a decent version of this using full fat coconut milk (the kind in the tin). However, you must keep the egg yolks to maintain the custard texture. If you want to go fully vegan, you'll need to use an alternative thickener like cornstarch or arrowroot, but the "melt" will be different.
No Machine Methods
If you don't have a churner, you can still make this. Whip the heavy cream to stiff peaks and fold it into the cooled custard base. Freeze it in a shallow pan and stir it vigorously with a fork every 30 minutes for 3 hours.
It won't be quite as smooth as a machine made batch, but it's a great "aid ice cream" shortcut for beginners.
Storing and Using Every Drop
Storage is where many people lose the quality they worked so hard to build. Oxygen is the enemy of fat. When Homemade Ice Cream is exposed to air in the freezer, it undergoes "sublimation," where the ice crystals grow and the flavor begins to taste like "freezer."
- Fridge: Keep the un churned custard for up to 2 days.
- Freezer: Best within 2 weeks. After that, the texture begins to degrade.
- Zero Waste: If you have leftover egg whites from the 5 yolks, don't toss them! Use them to make a batch of meringues or a healthy egg white omelet. If a batch turns out too icy, melt it down and use it as a rich creamer for your coffee.
Chef's Note: To prevent freezer burn, press a piece of wax paper or plastic wrap directly onto the surface of the ice cream before putting the lid on the container. This eliminates the air gap where ice crystals love to form.
Plating for Maximum Visual Appeal
The way you serve your Homemade Ice Cream can change the entire experience. A cold bowl is essential if you put a frozen scoop into a warm porcelain bowl, the bottom will turn into soup before you get your second bite. I like to keep a few small glass bowls in the freezer just for this purpose.
Classic Sundae Style
Go beyond the basic chocolate syrup. A drizzle of high-quality olive oil and a sprinkle of flaky sea salt can transform a simple vanilla scoop into a gourmet dessert. The salt cuts through the fat of the 2 cups of heavy cream, making the flavor pop.
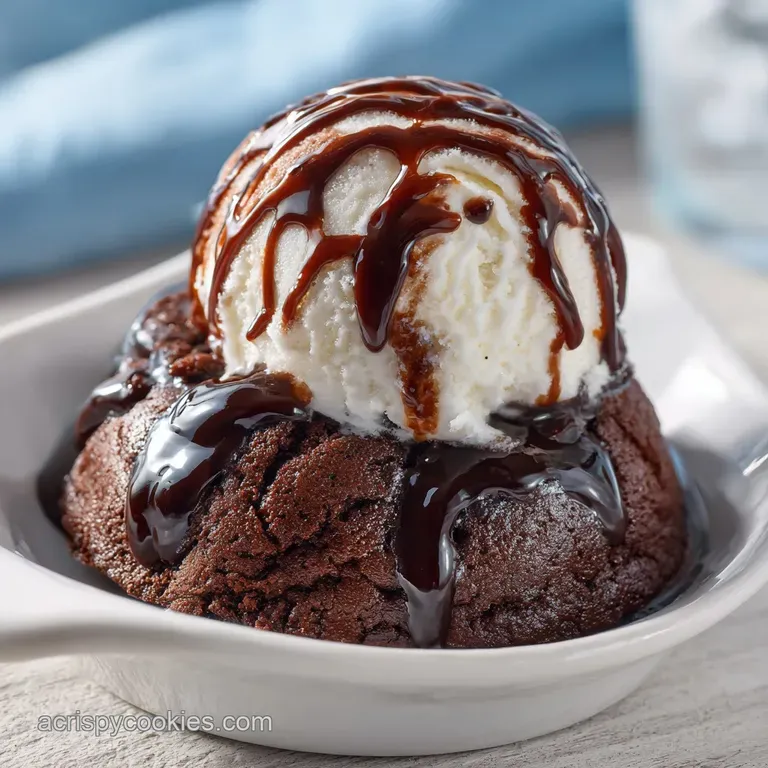
The A La Mode
There is nothing quite like a cold scoop melting into a warm pastry. Whether it's a cobbler, a brownie, or a slice of cake, the contrast in temperatures is the ultimate sensory experience.
If you're serving a crowd, try making a "flight" of different toppings in small ramekins so guests can customize their own experience.
Debunking Common Myths
- Myth 1: "You need salt in the custard to make it freeze." Truth: Salt goes in the ice outside the canister to lower the freezing point of the ice bath. Putting salt inside the mixture (beyond a pinch for flavor) will just make it salty and prevent it from freezing properly.
- Myth 2: "High speed churning makes it smoother." Truth: High speeds often incorporate too much air or, worse, can churn the cream into butter. Slow and steady wins the race for a dense, professional scoop.
- Myth 3: "Alcohol helps it stay soft." Truth: While a tablespoon of vodka can lower the freezing point, too much will prevent the ice cream from ever setting up. Use it sparingly, only about 1 tablespoon per quart.

Recipe FAQs
Can you make ice cream with a KitchenAid attachment?
Yes, if you have the freezer bowl attachment. The KitchenAid stand mixer requires the specialized, pre-frozen bowl accessory to function as a churner; it handles the aeration perfectly.
How to make jailhouse ice cream?
Mix half and-half or whole milk with sugar and flavoring in a sealable plastic bag. Place this inner bag inside a larger bag filled with ice and rock salt, then shake vigorously for 15-20 minutes until frozen.
How to make 3 ingredient ice cream at home?
Whip 2 cups of heavy cream until soft peaks form, then gently fold in 1 can of sweetened condensed milk and your flavoring. Freeze immediately; this is the classic "no-churn" method that relies on the high fat and sugar content for texture.
How to make home-made ice cream without an ice cream maker?
Chill your custard base thoroughly, pour it into a shallow metal pan, and freeze. Stir or whip the mixture every 30 minutes for about 3 hours to break up ice crystals until it reaches a soft serve consistency.
Is it true that adding alcohol helps homemade ice cream stay soft?
Yes, but use it sparingly. Alcohol lowers the freezing point, preventing the mixture from becoming rock solid, but adding too much will prevent it from freezing properly at all.
Why is my homemade ice cream gritty after freezing?
The grit is almost always caused by large, poorly formed ice crystals. This usually happens because the base wasn't cold enough when it entered the churn, or the sugar did not fully dissolve during the cooking stage.
What is the secret to achieving a dense, professional ice cream texture?
The secret lies in a high-quality custard base stabilized by egg yolks and a quick freeze time. If you master the tempering technique used here, you learn how to create stable emulsions; see how we apply similar binding principles in our Breakfast Enchiladas with recipe recipe for a different context.
Velvety Homemade Ice Cream

Ingredients:
Instructions:
Nutrition Facts:
| Calories | 219 kcal |
|---|---|
| Protein | 2.7 g |
| Fat | 17.2 g |
| Carbs | 14.8 g |
| Fiber | 0 g |
| Sugar | 14.5 g |
| Sodium | 35 mg |
