Homemade Cocoa Mix Recipe: Velvety Chocolate
- Time: Active 10 minutes, Passive 0 minutes, Total 10 minutes
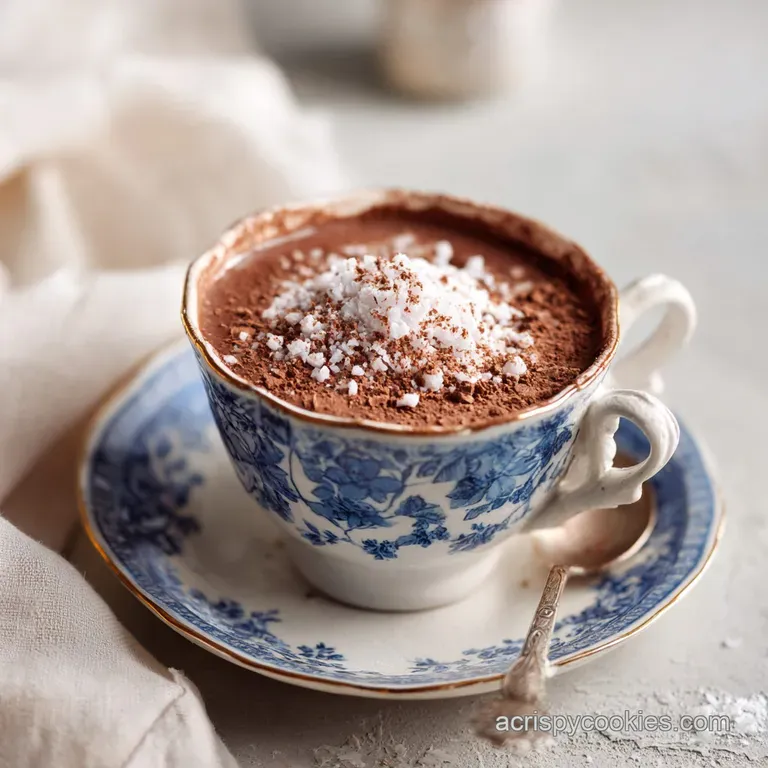
- Flavor/Texture Hook: Velvety, deep chocolate with a hint of warming cinnamon
- Perfect for: Holiday gifting, snowy weeknights, or a stable pantry staple
Crafting Your Perfect Cocoa Mix Recipe
You know that specific, nostalgic smell when you tear open a paper pouch of instant cocoa? It is usually mostly sugar and artificial fillers, leaving a watery aftertaste that never quite hits the spot.
I remember one February afternoon when a massive snowstorm hit, and I realized my pantry was empty of the "good stuff." I tried making a quick mug with just cocoa powder and sugar, but it was clumpy, bitter, and honestly, a bit of a disaster.
That kitchen failure sent me down a rabbit hole of testing ratios until I landed on this specific blend. We are moving away from the thin, grayish drinks of the past and toward something that actually coats the spoon.
This version relies on Dutch processed cocoa and a tiny secret ingredient cornstarch to give the liquid a bit of "heavier" body that feels like a luxury.
This recipe is about taking control of the intensity. You get to decide exactly how dark the chocolate is and how much spice lingers on your tongue. We are building a professional grade base that stays fresh for months, meaning you are always just a splash of hot milk away from a cozy moment.
It's stable, reliable, and significantly better than anything you can buy in a grocery store.
Science of Velvety Cocoa
The physics of a great drinkable chocolate depends entirely on particle size and solubility. When we mix these dry components, we are creating a suspension that needs to stay stable once liquid is introduced.
- Alkalization Effect: Dutch processed cocoa has been treated with an alkalizing agent to neutralize its natural acidity, which increases solubility and deepens the dark color.
- Starch Gelatinization: A tiny amount of cornstarch acts as a thickener; as the hot liquid hits the mix, the starch granules swell and create a smoother, more viscous mouthfeel.
- Emulsification: The non dairy creamer contains fats that help bridge the gap between the watery base and the cocoa solids, preventing that gritty separation at the bottom of the mug.
- Flavor Suppression: Salt doesn't just make it "salty" - it actively blocks our taste buds' ability to perceive certain bitter notes in the cocoa, making the chocolate taste "darker" but not "sharper."
| Preparation Method | Time | Texture Result | Best Usage |
|---|---|---|---|
| Hot Water Base | 2 minutes | Light, clean, more cocoa forward | Quick afternoon pick me-up |
| Whole Milk Base | 4 minutes | Thick, creamy, dessert like | After dinner treat |
| Half & Half Base | 5 minutes | Ultra rich, custard like | Special occasion indulgence |
Choosing your liquid base is the first step in customizing the experience. While water is the most convenient, the proteins in cow's milk or oat milk interact with our Homemade Hot Chocolate recipe to create a much more stable foam and a richer finish on the palate.
Component Role Breakdown
| Ingredient | Science Role | Pro Secret |
|---|---|---|
| Confectioner's Sugar | Prevents clumping and dissolves faster than granulated sugar | Sift it twice to ensure no "sugar boulders" remain in the jar |
| Dutch Cocoa Powder | Provides a mellow, earthy base with low acidity | High fat cocoa (20%+) yields a much more silky drink |
| Cornstarch | Acts as a mild thickener and anti caking agent | It keeps the mix pourable even in humid kitchen environments |
Required Pantry Essentials
To get the best results from this cocoa mix recipe, we need to be picky about the quality of our dry goods. Since there is no cooking involved to "mask" mediocre ingredients, every component stands front and center.
- 2 cups (240g) Confectioner's sugar: This is essential for the "instant" factor. Why this? The fine particles dissolve instantly without leaving a gritty texture.
- 1 cup (100g) Dutch processed cocoa powder: Look for "alkalized" on the label. Why this? It provides a darker color and a smoother, less acidic flavor profile.
- 2.5 cups (225g) Instant non fat dry milk powder: This provides the dairy backbone. Why this? It allows the mix to be used with just hot water if needed.
- 1 tsp (6g) Fine sea salt: Do not use coarse kosher salt here. Why this? Fine salt distributes evenly so you don't get a "salty sip."
- 2 tsp (5g) Cornstarch: Our secret for a better mouthfeel. Why this? It thickens the drink slightly and prevents the powder from clumping.
- 0.5 cup (50g) Non dairy creamer powder: This adds a specific type of richness. Why this? It adds fats that stay stable at room temperature for months.
- 0.5 cup (90g) Mini chocolate chips: These melt into the bottom of the mug. Why this? They provide a "fresh chocolate" burst that powder alone cannot match.
- 1 tsp (2g) Ground cinnamon: Just a hint of warmth. Why this? It complements the earthy notes of the cocoa without being overwhelming.
If you are looking for other ways to use up that cocoa powder, this blend shares many of the same flavor profiles found in my favorite Magic Cookie Bars recipe.
Essential Mixing Tools
You don't need fancy machinery, but a few specific tools will make your life much easier. The goal is a uniform, dust like consistency that looks professional.
A large fine mesh sieve is my number one recommendation. Cocoa powder and powdered sugar are notorious for hugging each other and forming lumps that won't break apart with just a whisk. Sifting them together is the only way to guarantee a smooth cup.
You will also want a large glass or stainless steel bowl. Avoid plastic if you can, as cocoa powder is incredibly fine and the static electricity in plastic bowls can make the powder jump everywhere. Finally, grab some airtight jars I love using Weck jars or classic Mason jars to keep the moisture out.
Executing the Blend
- Sift the sugar. Place 2 cups of Confectioner's sugar into a large bowl through a fine mesh sieve. Note: This removes the packed lumps that often form in the bag.
- Add the cocoa. Sift 1 cup of Dutch processed cocoa powder into the same bowl. Note: Cocoa is naturally oily and prone to clumping, so do not skip this.
- Incorporate the dairy. Whisk in 2.5 cups of instant non fat dry milk powder and 0.5 cup of non dairy creamer. Check until no large white patches remain.
- Season the mix. Sprinkle in 1 tsp of fine sea salt and 1 tsp of ground cinnamon. Note: Adding these now ensures they are evenly distributed through all 24 servings.
- Add the stabilizer. Whisk in 2 tsp of cornstarch. Stir until the powder looks uniform and dusty.
- Fold in chips. Gently stir in 0.5 cup of mini chocolate chips. Note: Mini chips are better than standard ones because they melt faster in the hot liquid.
- Test the blend. Mix 3 tablespoons of the powder with 8 ounces of hot milk to check the flavor.
- Transfer for storage. Pour the finished mix into an airtight container. Seal tightly and store in a cool, dark place.
Chef's Tip: If you want an even more "gourmet" texture, pulse half of the finished mix (including the chocolate chips) in a food processor for 10 seconds. This creates different particle sizes that dissolve at different rates!
Solving Mixing Errors
Why Your Cocoa Clumps
If you find little balls of dry powder floating on top of your drink, it is usually because the liquid wasn't hot enough or the powder wasn't sifted. Cocoa is hydrophobic, meaning it actually repels water at first. You need heat and agitation (stirring) to break that tension.
Why the Mix Tastes Flat
A "flat" tasting cocoa usually lacks either salt or fat. If you are using water instead of milk, try adding a tiny bit more creamer to the mix. The salt is also vital; it acts as a bridge that connects the sugar to the cocoa's deeper notes.
| Problem | Root Cause | Solution |
|---|---|---|
| Gritty Texture | Undissolved cocoa or large salt crystals | Use a fine mesh sieve and switch to fine sea salt |
| Too Sweet | Sugar to cocoa ratio is off | Add 1-2 tbsp of extra cocoa powder to the batch |
| Thin/Watery | Not enough cornstarch or milk powder | Increase milk powder by 1/4 cup or use warm milk instead of water |
Common Mistakes Checklist
- ✓ Skipping the sifting step (leads to "sugar bombs" in your mug)
- ✓ Using "Natural" cocoa instead of Dutch processed (makes the drink too acidic)
- ✓ Storing the mix in a damp area (sugar absorbs moisture and turns into a brick)
- ✓ Forgetting the salt (the chocolate flavor will stay "one dimensional")
- ✓ Using cold milk (the chocolate chips won't melt, they'll just sit at the bottom)
Resizing the Batch
When you are making this cocoa mix recipe for a large group like a holiday party or as wedding favors you need to be careful with the spices. Spices don't always scale linearly.
For a double batch (48 servings), you can simply double the sugar, cocoa, and milk powder. However, keep the cinnamon and salt at about 1.5 times the original amount first, then taste. You can always add more, but you can't take it out once it is integrated.
If you are cutting the recipe in half for a small jar, follow the measurements exactly but ensure you are using a bowl large enough to allow for vigorous whisking. Even for a small batch, the air incorporated during whisking helps keep the powder light and easy to scoop.
Cocoa Truths Exposed
A common misconception is that "Hot Cocoa" and "Hot Chocolate" are the same thing. Technically, hot cocoa is made from cocoa powder (which has had the cocoa butter removed), while hot chocolate is made from melted bars.
Our recipe actually straddles the line by using powder for ease and mini chips for that authentic cocoa butter richness.
Another myth is that you must use boiling water. Actually, boiling water can "scorch" the delicate flavor of high-quality cocoa. The sweet spot is around 180°F (82°C).
This is hot enough to melt the chips and gelatinize the cornstarch but cool enough to preserve the complex floral notes of the Dutch cocoa.
Storage and Sustainability
This mix is incredibly hardy. If kept in a truly airtight jar in a cool, dark pantry, it will stay perfect for up to 6 months. The main enemy here is humidity. If moisture gets into the jar, the sugar will "bridge," creating a solid block that is nearly impossible to scoop.
If you find yourself with a few tablespoons left at the bottom of the jar that aren't quite enough for a full mug, don't toss them! This powder makes an incredible addition to your morning coffee (instant mocha!) or can be folded into a Hershey Brownie Recipe for an extra punch of chocolate. You can even use it as a dusting for truffles or tossed with popcorn for a sweet and salty snack.
Creative Serving Ideas
To really make this look like a professional drink, presentation is everything. I like to serve mine in a heavy ceramic mug that holds heat well. A big dollop of homemade whipped cream is the classic choice, but a few toasted marshmallows provide a lovely "shatter" of caramelized sugar that contrasts with the velvety liquid.
For gifting, layer the ingredients in a glass jar rather than mixing them. Put the sugar at the bottom, followed by the cocoa, the milk powder, and finally the chocolate chips on top. It looks beautiful on a shelf and tells the recipient exactly what kind of quality they are getting.
Attach a little tag with the instructions: "Mix 3 tablespoons with 8oz of hot milk." It is a simple, thoughtful gift that people actually use.

Recipe FAQs
What are the ratios in a good hot cocoa mix?
A balanced ratio is approximately 2 parts confectioner's sugar to 1 part cocoa powder by volume. Our optimized mix uses this balance plus dry milk, cornstarch for texture, and salt to enhance depth. We use a 2:1:2.5 ratio of Sugar:Cocoa:Milk Powder for the best dissolution.
Are cocoa powder and cocoa mix the same?
No, they are fundamentally different components. Cocoa powder is pure ground cacao solids, providing intense chocolate flavor, while cocoa mix is a blend containing cocoa, sugar, milk solids, and stabilizers. If you only use cocoa powder, your drink will be bitter and watery.
What are the common mistakes in hot cocoa mix?
The most common mistake is skipping the fine sifting step. Cocoa and powdered sugar clump easily; without sifting, you end up with gritty spots or pockets of pure sugar in the final drink. Mastering the skill of ensuring uniform dry ingredients is crucial, similar to controlling the texture when developing batters for recipes like our Cranberry Bliss Bars recipe.
How to build a three ingredient chocolate mix?
Combine high-quality Dutch processed cocoa, fine confectioner's sugar, and fine sea salt. Mix these in a 4:2:0.1 ratio by weight for a simple, dark base that requires hot milk to truly shine. For a richer mouthfeel, you must add a fat source, often found in dry milk powder or creamer.
Why does my homemade mix sometimes taste flat or bitter?
False, it usually means you omitted the salt or the mix lacks sufficient fat. Salt doesn't just add flavor; it actively suppresses the bitterness receptors on your tongue, allowing the cocoa notes to emerge cleaner.
Ensure you use Dutch processed cocoa, which is naturally less acidic than natural cocoa.
How should I store the finished cocoa powder mix?
Store the mix in a truly airtight container away from heat and light. Humidity is the main enemy; moisture causes the sugar to absorb water and solidify the entire batch into a brick. Kept dry, this mix will remain fresh for up to six months.
How to achieve a velvety, non-gritty texture in the final drink?
Incorporate a small amount of cornstarch directly into your dry mix. This starch swells when heated, creating a micro thickening effect that mimics the richness of melted chocolate. If you enjoyed mastering this texture control in the dry ingredients, see how the same principle of controlled suspension works in our No Bake Chocolate recipe.
Homemade Cocoa Mix Recipe
Ingredients:
Instructions:
Nutrition Facts:
| Calories | 113 kcal |
|---|---|
| Protein | 4.4 g |
| Fat | 2.4 g |
| Carbs | 21 g |
| Fiber | 1.4 g |
| Sugar | 17.4 g |
| Sodium | 97 mg |
