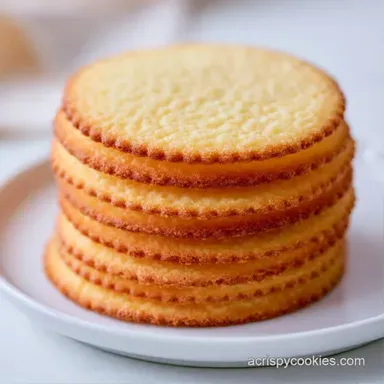
Crisp Vanilla Wafer Cookies: Shatter-Crisp
- Time: 10 min active + 20 min cook = 30 minutes total
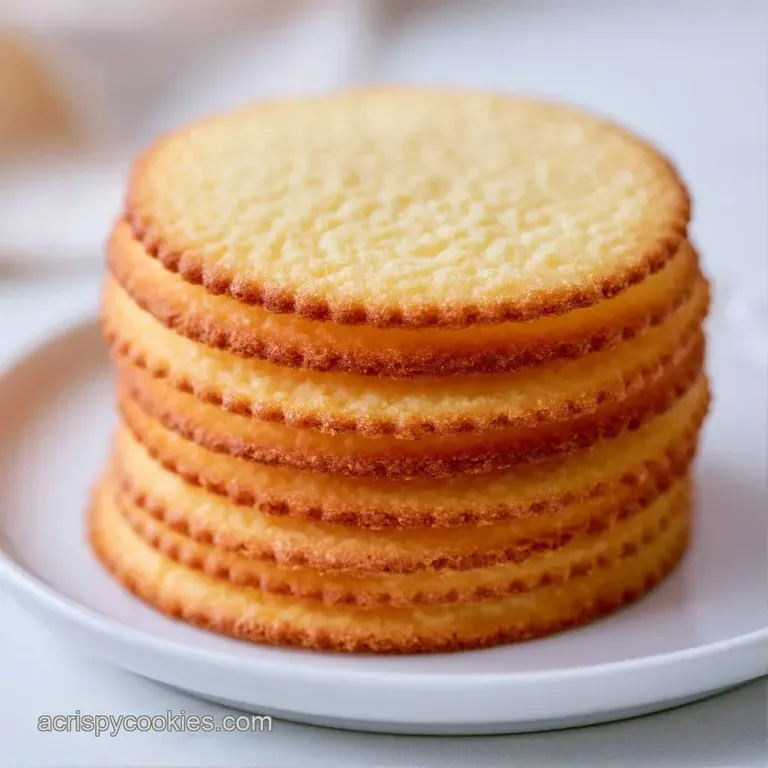
- Flavor/Texture Hook: Shatter crisp texture with a velvety vanilla finish
- Perfect for: Base layers for banana pudding or a light tea time snack
That specific sound, a sharp snap followed by a clean break, is the only way to know if a wafer is actually done. I remember trying a version of these years ago that felt more like a thick, soft sugar cookie. It wasn't wrong, but it wasn't a wafer.
A true wafer should feel delicate, almost like a thin sheet of glass made from butter and sugar.
Most people think you need cornstarch or professional grade equipment to get that store-bought consistency. Honestly, that's just not true. The secret is actually in the sugar ratio and the oven temperature. If you go too hot, you get a brown cookie; if you go too low, you get a biscuit.
When you hit that sweet spot, you get Crisp Vanilla Wafer Cookies that are lightweight and sturdy.
I spent a few weekends testing how different sugars affected the "shatter" factor. I found that using only granulated sugar made them too porous, while only powdered sugar made them too soft. The blend is the key. Trust me on this, don't skip the powdered sugar just because you don't feel like opening the bag.
It's what gives the cookie its smooth, velvety interior.
Crisp Vanilla Wafer Cookies Secrets
The goal here is to remove as much moisture as possible without burning the sugars. We aren't looking for a "chewy" center. We want a uniform, dry crispness across the whole surface.
- Sugar Synergy
- Granulated sugar provides the structure, while powdered sugar (which contains a tiny bit of cornstarch) prevents the cookie from spreading too thin.
- over Low heat Drying
- Baking at 325°F instead of the standard 350°F allows the cookies to dehydrate slowly, ensuring they stay pale but become crisp.
- Butter Emulsion
- The small amount of milk helps the fats and sugars bond more tightly, creating a denser, smoother crumb.
- Minimal Gluten
- Mixing only until the flour disappears prevents the cookies from becoming tough or bread like.
| Method | Time | Texture | Best For |
|---|---|---|---|
| Fast Bake (350°F) | 10 mins | Chewy/Browned | Quick snacks |
| Classic (325°F) | 15 mins | Shatter Crisp | Pudding layers |
| Slow Dry (300°F) | 20 mins | Glassy/Brittle | Long term storage |
Component Analysis
Understanding what each ingredient does helps you avoid the common pitfalls of home baking. If your cookies are coming out too soft, it's usually a failure in one of these roles.
| Ingredient | Science Role | Pro Secret |
|---|---|---|
| Unsalted Butter | Fat/Tenderizer | Must be soft, not melted, to hold air |
| Powdered Sugar | Stabilizer | Keeps the round shape during piping |
| All Purpose Flour | Structural Base | Sift it to avoid "flour pockets" |
| Whole Milk | Hydration | Creates the glossy, smooth finish |
Shopping List Breakdown
Get your ingredients to room temperature before you start. Cold butter won't cream properly, and cold milk can cause the batter to seize.
- 1/2 cup (115g) unsalted butter, softened Why this? Provides the essential fat for a melt in-mouth feel
- 1/2 cup (100g) granulated sugar Why this? Creates the primary crispness
- 1/4 cup (30g) powdered sugar Why this? Ensures a smooth, non porous texture
- 1 tsp (5ml) pure vanilla extract Why this? Deep aromatic flavor
- 1 tbsp (15ml) whole milk Why this? Emulsifies the fats and sugars
- 1 cup (125g) all purpose flour Why this? Standard protein level for a sturdy snap
- 1/4 tsp (1.5g) salt Why this? Balances the sweetness
If you're looking for other ways to use your butter and flour, these pair beautifully with my Classic Chocolate Chip Cookies recipe if you're planning a full dessert platter.
| Original Ingredient | Substitute | Why It Works |
|---|---|---|
| Unsalted Butter | Vegan Butter Stick | Similar fat ratio. Note: Check for salt content |
| Whole Milk | Almond Milk | Provides liquid. Note: Slightly less richness |
| AP Flour | gluten-free 1:1 Blend | Similar structure. Note: May be slightly more brittle |
Right then, let's make sure you have the right tools. You don't need a professional kitchen, but a piping bag (or a sturdy Ziploc bag with the corner snipped) is essential. Since we are piping rounds, a parchment lined sheet is a must to prevent sticking.
Essential Equipment List
A hand mixer or a stand mixer such as KitchenAid works best for the creaming stage. You want to incorporate enough air to keep the cookies light, but not so much that they puff up like cakes.
- Electric Hand Mixer
- Piping Bag with a round tip
- Baking Sheets (2 large ones)
- Parchment Paper
- Wire Cooling Rack
- Fine Mesh Sifter
Key Steps
Follow these steps precisely. Baking is more about ratios than intuition, especially when you want a specific texture like a wafer.
- Beat the softened butter with granulated sugar and powdered sugar. Mix until the batter is pale, fluffy, and looks like a thick frosting.
- Stir in the vanilla extract and milk. Beat on low speed until the batter looks glossy and the liquid is fully combined.
- Sift in the all purpose flour and salt. Mix on the lowest speed just until the white streaks disappear. Note: Overmixing here will make the cookies tough.
- Transfer the dough to a piping bag.
- Pipe 1 inch rounds onto parchment lined baking sheets. Leave 2 inches of space between each cookie so they have room to breathe.
- Bake at 325°F (160°C) for 12-15 minutes. Watch for the edges to turn a light mahogany color while the centers stay pale.
- Allow the wafers to sit on the hot pan for 5 minutes. Note: This is when they finish setting their structure.
- Transfer to a wire rack to cool completely. They will reach their maximum snap only after they are fully cold.
Chef's Tip: For an even more professional finish, freeze your butter for 10 minutes before softening it. This creates a more consistent crystal structure during the creaming process. Also, if you want a deeper flavor, try adding a tiny pinch of espresso powder to the flour.
Troubleshooting Guide
The most common issue with Crisp Vanilla Wafer Cookies is a lack of "snap." If your cookies feel like soft biscuits, you likely have too much moisture left in the dough.
| Issue | Solution |
|---|---|
| Why Your Cookies Spread | If your rounds turn into flat pancakes, your butter was likely too warm. When butter is near its melting point, it can't hold the air bubbles created during creaming. |
| Why Your Wafers Are Tough | Toughness comes from overdeveloped gluten. If you beat the flour into the dough for minutes instead of seconds, you've created a bread like structure. |
| Why the Bottoms Burn | Dark colored baking sheets absorb more heat. If the bottoms are mahogany but the tops are raw, lower your rack one position or use a light colored pan. |
Common Mistakes Checklist
- ✓ Butter is softened but not oily or melted
- ✓ Flour was sifted to avoid clumps
- ✓ Oven temperature was verified with a thermometer
- ✓ Cookies were allowed to set on the pan for 5 minutes
- ✓ Piping bag was held vertically for consistent rounds
Adjusting the Batch Size
When you change the volume of a recipe, you can't always just multiply everything linearly. This is especially true for liquids and leavening.
Cutting the Recipe (Half Batch): Divide all ingredients by two. For the milk and vanilla, use a measuring spoon and carefully halve the volume. Use a smaller baking sheet to ensure the heat circulates properly.
Increasing the Batch (Double/Triple): If you're making a huge batch, don't overcrowd your mixer. Work in two separate batches of dough. Only increase salt and vanilla to 1.5x the original amount; full doubling can sometimes make the flavor too intense.
If you're baking multiple trays at once, lower your oven temperature by 25°F (to about 150°C) and extend the bake time by 2-3 minutes. This prevents the bottom tray from burning before the top tray is set.
| Scale | Temp Adjustment | Time Adjustment | Note |
|---|---|---|---|
| 1/2 Batch | No change | Reduce 1-2 mins | Use a small tray |
| 2x Batch | Reduce 25°F | Increase 3 mins | Rotate trays halfway |
Wafer Misconceptions
There is a common belief that you must chill wafer dough for hours before baking. In this specific recipe, you don't. Because we use a blend of powdered sugar and a low amount of milk, the dough is stable enough to pipe immediately. Chilling can actually make the butter too hard to pipe smoothly.
Another myth is that adding more butter makes the cookie crispier. In reality, too much fat interferes with the sugar's ability to crystallize, which can actually lead to a greasy, softer cookie. Stick to the ratios.
Storage Guidelines
To keep that shatter crisp texture, you must fight humidity. According to King Arthur Baking, moisture is the enemy of a crisp cookie.
Room Temperature: Store in an airtight container for up to 7 days. If you live in a humid climate, add a small food grade silica packet or a piece of dry bread to the container to absorb excess moisture. Freezing: These freeze brilliantly.
Place them in a freezer safe bag for up to 3 months. To revive them, pop them in a 300°F oven for 2 minutes.
Zero Waste: Never throw away broken wafers. Crush them up to create a velvety crust for a cheesecake or use them as a topping for a bowl of frozen yogurt. You can also soak broken pieces in coffee for a quick, homemade version of a tiramisu base.
Serving and Enjoying
These cookies are a classic for a reason. While they're great on their own, they're most famous as the foundation for a banana pudding. The way the wafer absorbs the cream without becoming mushy is the goal. For a more decadent treat, try serving these alongside some homemade custard ice cream.
If you want to dress them up, dip half of each cooled wafer into melted dark chocolate and sprinkle with a pinch of sea salt. The bitterness of the chocolate cuts through the sweet vanilla, creating a sophisticated balance.
For a cozy afternoon, pair these with a strong cup of black coffee or an Earl Grey tea. The tannins in the tea complement the buttery notes of the cookie, making each bite feel richer. Trust me, once you've had these homemade, the store-bought versions will taste like cardboard.
Recipe FAQs
What is the secret to the signature snap in these wafers?
Bake at 325°F (160°C) until edges reach a light mahogany color. Letting the cookies set on the hot pan for 5 minutes before transferring them to a wire rack is essential for the final crunch.
How to prevent the cookies from spreading too much?
Keep the butter softened but not warm. Butter near its melting point cannot hold the air bubbles created during creaming, which causes the rounds to flatten into pancakes.
How to avoid a tough, bread like texture?
Stir in the flour on the lowest speed just until the white streaks disappear. Beating the flour into the dough for too long overdevelops the gluten, ruining the delicate wafer texture.
What are the best ways to use vanilla wafer cookies?
Layer them in a banana pudding or crush them for a cheesecake crust. They also serve as a light, crisp accompaniment to coffee or tea.
Is it true that these cookies should be stored in the fridge to stay crisp?
No, this is a common misconception. Store them in an airtight container at room temperature to avoid introducing humidity, which softens the cookies.
How to revive wafers that have gone soft?
Pop them in a 300°F oven for 2 minutes. This quick heat treatment removes excess moisture and restores the original shatter crisp texture.
What is the best way to make an even thinner sugar cookie?
Adjust the ratio to increase sugar and decrease flour. If you enjoyed mastering the texture control here, see how the same principle works in our thin crispy sugar cookies.
Crisp Vanilla Wafer Cookies