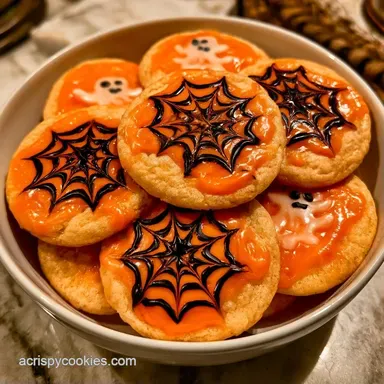
Spooky Halloween Cookies in 25 Minutes
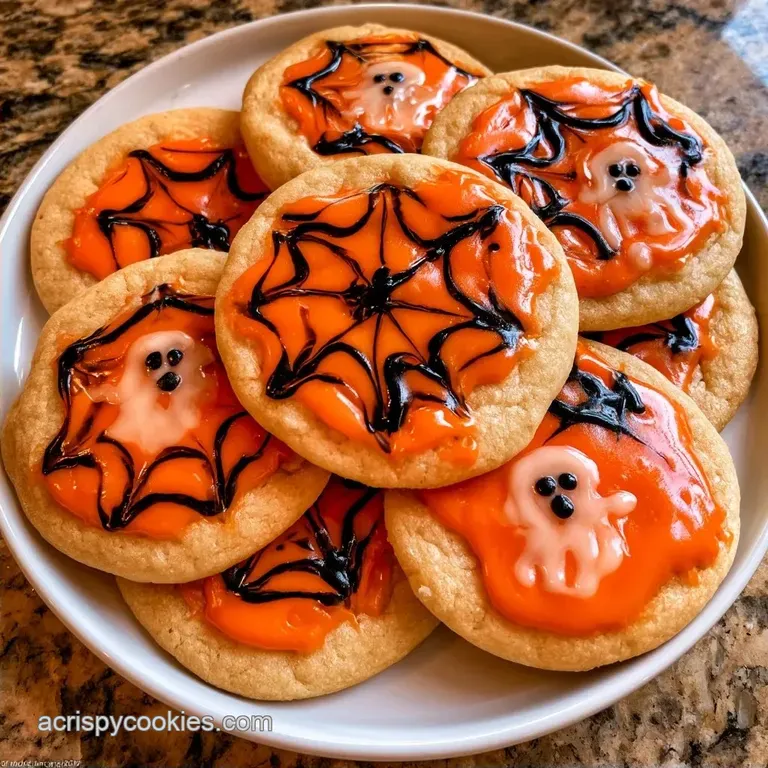
- Duration: 15 min active + 10 min bake
- Taste & Texture: Buttery vanilla base with a smooth, glossy icing
- Ideal for: Quick party platters or family baking
The scent of melted butter and warm vanilla always fills my home as October arrives. There is a common belief that sugar cookies require a whole day of preparation, specifically hours in the fridge to keep them from flattening out in the oven.
I once believed that too, until I found that a simple adjustment to the flour ratio makes the chilling step completely unnecessary.
Achieving sharp, defined edges doesn't require planning your baking schedule days in advance. These Spooky Halloween Cookies are designed specifically for that "last-minute party" panic. They bake rapidly and create a sturdy, flat base that won't crack while you're piping on the icing.
Expect a treat that delivers a professional bakery flavor in a fraction of the usual effort. We are aiming for a vibrant, colorful presentation that looks perfect on a platter. Whether you are crafting ghosts or ghoulish eyeballs, this base ensures your designs stay sharp.
Easy Spooky Halloween Cookies for Your Party
Forget the myth that great sugar cookies require a 24 hour nap in the refrigerator. By creaming the butter and sugar until they're pale and fluffy, and then adding just enough flour to stabilize the fat, we create a structure that handles the oven heat without spreading.
This means you can go from a bowl of flour to a tray of decorated treats in about 25 minutes.
The goal here is a cookie that is sturdy enough to hold a shape but doesn't taste like a piece of cardboard. We keep the bake time short, about 10 minutes, so the centers stay tender. When you pair that with a quick drying icing, you get a treat that looks professional but feels like home baking.
What Nobody Tells You
Flour Ratio: A slightly higher flour count prevents the butter from leaking out too fast, which stops the cookies from flattening.
Creaming Method: Beating the butter and sugar until pale traps air, giving the cookies a light lift without needing a long chill.
Short Bake: Pulling them out while the edges are barely golden keeps the center from drying out.
| Feature | This Fast Method | Classic Chilled Method |
|---|---|---|
| Prep Time | 15 minutes | 2-4 hours |
| Shape Hold | High | Very High |
| Texture | Soft center | Dense and snappy |
| Effort | Low | Medium |
What Each Ingredient Does
Butter creates the rich, melt-in-your-mouth texture we love. Avoid using melted butter; softened butter at room temperature is key to preventing the cookies from spreading too far. Sugar isn't just for taste, it also helps create air pockets while creaming.
All-purpose flour is the structural base. It provides the gluten needed to keep your cookies looking like ghosts rather than puddles. A touch of baking powder adds a bit of lift to keep them from feeling too heavy.
For the icing, powdered sugar and milk are combined into a thick paste that dries quickly, which is essential for detailed layering.
The Shopping List
- 1 cup (225g) unsalted butter, softened The Reason: Better creaming for air pockets
- 1 cup (200g) granulated sugar The Reason: Provides sweetness and structure
- 1 large (50g) egg The Reason: Binds the dough together
- 2 tsp (10ml) pure vanilla extract The Reason: Classic bakery aroma
- 2 ¾ cups (340g) all purpose flour The Reason: Prevents the shapes from flattening
- 1 tsp (5g) baking powder The Reason: Adds a subtle lift
- ½ tsp (3g) salt The Reason: Balances the sweetness
- 2 cups (240g) powdered sugar, sifted The Reason: Keeps icing smooth
- 2 tbsp (30ml) milk The Reason: Makes icing pipeable
- ½ tsp (2.5ml) vanilla extract The Reason: Enhances the topping flavor
- Gel food coloring The Reason: Strong color without thinning the paste
Quick Substitutions
| Original Ingredient | Substitute | Why It Works |
|---|---|---|
| Unsalted Butter | Vegan Butter | Comparable fat content. Note: May spread a bit more |
| All Purpose Flour | 1:1 GF Flour | Great for gluten-free needs. Note: Texture is slightly grainier |
| Milk | Almond Milk | Similar liquid consistency. Note: No change in flavor |
Get the Right Tools
You'll need a stand mixer or a hand mixer to get the butter and sugar fluffy. A large mixing bowl and a whisk for the dry ingredients are basics. For the shaping, a rolling pin and a set of cookie cutters are a must.
Parchment paper is non negotiable here. It prevents the bottoms from browning too fast and makes cleanup a breeze. For the icing, use a piping bag with a small round tip, or just snip the corner off a plastic freezer bag if you're keeping it simple.
Steps to Bake Them
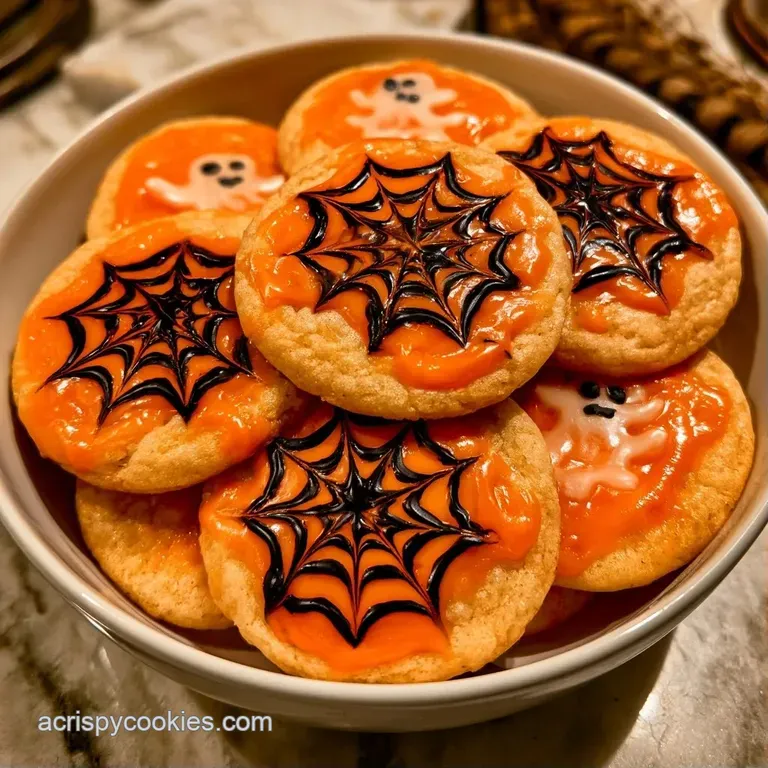
The Base Mix
Using medium-high speed, cream the softened butter with the granulated sugar until the mixture looks pale and fluffy. Stir in the vanilla extract and egg, beating the batter until it is smooth and well-incorporated.
Folding in Dry Ingredients
Combine the flour, salt, and baking powder in another bowl. Slowly blend these dry ingredients into the butter mixture on low speed. Cease mixing as soon as the flour streaks vanish. Note: Overmixing makes the cookies tough.
Shaping and Baking
Heat your oven to 350°F (175°C). Using a floured work surface, flatten the dough to a thickness of ¼ inch. Use cutters to create your spooky shapes and arrange them on a baking sheet lined with parchment.
Bake for 8-10 minutes until the edges are barely golden, then let them cool fully on the pan.
The Spooky Finishing Touches
Blend the milk, vanilla, and powdered sugar into a smooth paste. Split the icing between small bowls and mix in your gel food colors. Pipe the designs onto the cooled treats to finish your Spooky Halloween Cookies.
Chef Tip: If the icing is too runny, stir in an extra teaspoon of powdered sugar. If it is too thick to pipe, mix in a drop of milk.
What Nobody Tells You
The real trick to the look is the cooling process. If you move the cookies to a wire rack too early, they can warp or bend. Leaving them on the hot pan for 5 minutes lets the structure set.
Also, using gel colors instead of liquid is a huge deal. Liquid colors add too much water, which makes the icing bleed into the cookie. Gel gives you those neon greens and deep purples without changing the consistency.
Pro Tips & Pitfalls
Dough feels too sticky
If the butter was a bit too warm, the dough might stick to your rolling pin. Don't keep adding flour, or the Spooky Halloween Cookies will taste dry. Instead, put the dough in the freezer for 5 minutes. This firms the butter just enough to make it workable.
Icing is bubbling
This usually happens if you whisk the icing too vigorously with a fork. Use a gentle stirring motion with a spoon to avoid trapping air. If you see bubbles, let the icing sit for 10 minutes before piping, and they'll vanish.
Cookies spread too much
Check your oven temperature with a separate thermometer. If the oven is too cool, the butter melts before the flour sets, causing a spread. Ensure your baking sheets aren't hot from a previous batch before adding the raw dough.
Freezing and Reheating Guide
Store these in a sealed jar on the counter for 3-4 days. If you're making them in advance, you can keep the baked, un iced cookies in a freezer bag for 2 months. Just thaw them at room temperature before decorating.
For the decorated cookies, the fridge is your friend for up to a week. To prevent the icing from sweating, take them out of the fridge 30 minutes before serving. If you want a warm treat, pop them in the microwave for 5-8 seconds, but be careful as the icing will melt quickly.
To avoid waste, any dough scraps should be gathered and re rolled. If you have leftover icing, freeze it in a small airtight container. It stays good for about a month and can be thawed for another batch of Halloween Monster Cookies.
Flavor Variations to Try
If you want a darker look, swap 2 tablespoons of flour for dark cocoa powder. This creates a "midnight" base that makes orange and green icing pop. For a seasonal twist, add a pinch of cinnamon and nutmeg to the dry ingredients for a warm, autumnal flavor.
You can also press a small piece of candy into the center of the dough before baking. If you have some sweets left over, try my Leftover Halloween Candy Cookies for a more chaotic, colorful vibe. For those who like a bit of crunch, fold in half a cup of mini chocolate chips or crushed pretzels.
Quick Adjustment Guide
- Extra spice? → add 1 tsp cinnamon
- More chew? → replace 2 tbsp flour with cornstarch
- Nutty flavor? → swap 1/4 cup flour for almond flour
How to Serve and Enjoy
The presentation is where these really shine. Since they are so visual, avoid crowding them on a single plate. Instead, create a scene.
Plating Levels
| Level | Setup | Vibe |
|---|---|---|
| Simple | Flat white plate | Casual home snack |
| Polished | Black slate tray with orange napkins | Party centerpiece |
| Restaurant | Three tiered stand with fake spider webs | Viral "Wow" factor |
For a a full spread, pair your Spooky Halloween Cookies with a dark berry punch or a warm apple cider. If you're serving them to kids, arrange them in a circle like a "cookie clock" with a large pumpkin in the center. The contrast between the bright icing and a dark platter always makes the colors look more vivid.
Recipe FAQs
How to prevent the cookies from spreading in the oven?
Chill the cut-out shapes for 15 minutes before baking. This firms up the butter so the spooky designs maintain their edges.
Can I use acorn flour instead of all-purpose flour?
No, stick with all-purpose flour. Acorn flour lacks the gluten structure needed for the roll-and-cut method. Check out the texture balance in our monster cookie recipe for a different base.
Is it true that I need to grease the pan if I use parchment paper?
Not true. Parchment paper provides a complete non-stick surface on its own.
Why does the icing feel too thin to pipe?
Add more powdered sugar one tablespoon at a time. Whisk until the paste holds a peak and doesn't run when piped.
Where should I keep decorated cookies to avoid smudging?
Arrange the treats separately on a baking sheet until the icing is firm. After they've set, move them gently to a cool, dry area.
Does the dough require refrigeration before rolling?
Actually, no. The recipe is designed to be rolled immediately after mixing for a soft, pliable consistency.
Spooky Halloween Cookies in 25 Minutes