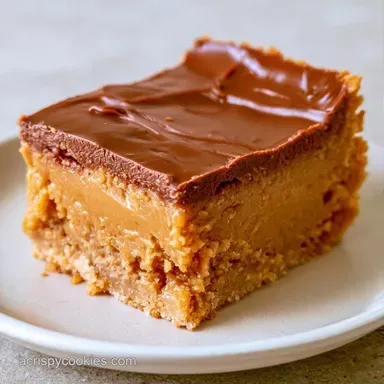
Chocolate Peanut Butter Bars with Graham Crackers
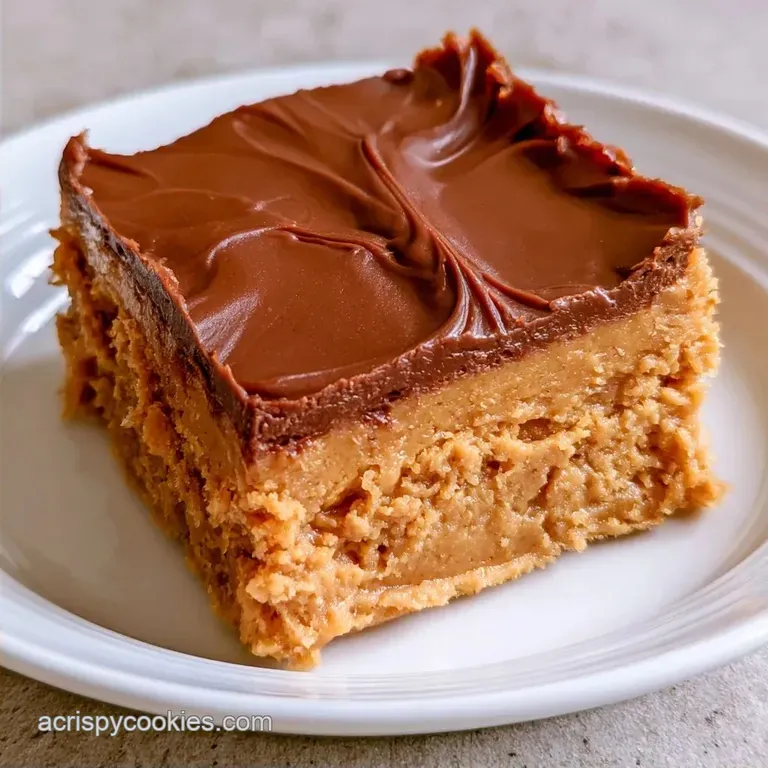
- Time: 15 min prep + 2 hours refrigerating
- Taste/Feel: A salty peanut butter base with a crisp chocolate finish
- Best for: Quick party platters or midnight snacks
The aroma of melted chocolate and toasted peanut butter is enough to lure anyone into the kitchen. I once tried a version that was basically just sweet goop; I skipped the graham cracker crumbs, assuming the peanut butter alone would provide enough structure.
It didn't, leaving me with a sticky mess that clung to the roof of my mouth for an hour.
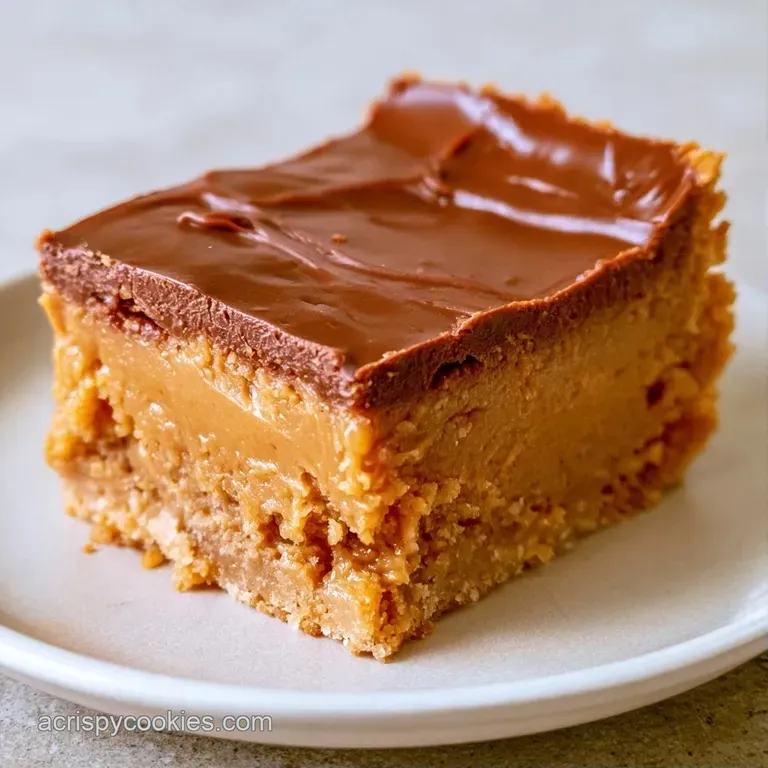
You don't need professional equipment or a pastry degree to master these. The magic is in the contrast: a hearty base that dissolves quickly, topped with a chocolate layer that actually snaps when you bite in.
This recipe avoids the "rubbery" trap by balancing the fats. Combining butter and peanut butter ensures the base stays creamy. You can expect a dessert that tastes like a gourmet candy bar but takes very little effort to create.
What Makes This So Good
The Crumbs: Adding graham cracker crumbs provides a structural grid. This stops the bars from feeling like fudge and gives them a slight crunch.
The PB Buffer: Stirring a bit of peanut butter into the chocolate topping prevents it from seizing. It also keeps the chocolate from becoming too brittle, creating a velvety finish that doesn't crack and shatter everywhere.
Temperature Control: Using melted butter instead of softened butter ensures the sugar dissolves completely. This removes any gritty texture from the base.
| Feature | Homemade Bars | store-bought Candy |
|---|---|---|
| Texture | Fudgy and dense | Often waxy or airy |
| Sweetness | Adjustable salt/sugar | Overwhelmingly sugary |
| Ingredients | Real butter and PB | Often uses palm oil |
Shopping List Breakdown
The peanut butter is the heavy lifter here. I suggest a creamy, no stir variety. Natural peanut butter can be too oily, which might make the base spread too much in the pan. The powdered sugar acts as the binder, turning the fats into a cohesive dough.
For the topping, semi sweet chocolate chips are the standard. They provide enough bitterness to balance the salt of the peanut butter. If you use milk chocolate, the bars can taste a bit like a kids' snack, which is fine, but semi sweet feels more grown up.
Recipe Specs
These bars are designed for a 9x13 inch pan. This size ensures the layers stay thin enough to be elegant but thick enough to feel like a real dessert. The total time is mostly waiting for the fridge to do its job. If you try to cut them before the 2 hour mark, the chocolate will smear into the peanut butter.
The yield is 16 bars. If you want them as bite sized treats for a crowd, you can easily slice them into 32 smaller squares. According to USDA FoodData Central, peanut butter is very calorie dense, so a smaller slice often satisfies the craving.
Essential Kitchen Gear
You only need a few basic items. A large mixing bowl is a must for the base. For the topping, use a microwave safe glass bowl. Avoid plastic if possible, as it can create hot spots that burn the chocolate.
A silicone spatula is the best tool for pressing the base into the pan. It allows you to get the mixture right into the corners without leaving air pockets. You'll also need a sheet of parchment paper to act as a sling for lifting the bars out.
Step by step Method
Because this is a no-bake treat, the process focuses on assembly and chilling. The strategy is simple: prepare the base, add the topping, and let the refrigerator do the work.
Phase 1: Pressing the Base
- Melt the unsalted butter, then stir in the creamy peanut butter and powdered sugar in a large bowl. Mix until the consistency is smooth and cohesive.
- Fold in the graham cracker crumbs. Stir until no streaks of butter remain. Note: Avoid overmixing so the crumbs don't break down too much.
- Line a 9x13 inch pan with parchment paper, ensuring the edges hang over the sides. Use a spatula to press the mixture firmly into the bottom.
Phase 2: Melting the Topping
- Combine the chocolate chips and the remaining 2 tbsp of peanut butter in a microwave safe bowl.
- Heat in 30-second bursts, stirring between each interval until the mixture is glossy and completely smooth.
- Pour the chocolate over the peanut butter base. Use a spatula to spread it evenly until it reaches all four corners.
Phase 3: Setting and Slicing
- Chill the pan in the refrigerator for at least 2 hours. Check until the chocolate is firm to the touch.
- Use the parchment paper handles to lift the bars out of the pan.
- Use a sharp knife to slice the block into 16 equal rectangles. Note: Wiping the knife with a warm cloth between cuts prevents smearing.
Avoiding Kitchen Disasters
If your base feels too soft, it's usually a ratio issue. Too much butter or a very runny peanut butter can cause this. If you notice the mixture is almost like a batter, stir in an extra handful of graham cracker crumbs to stiffen it up.
When the chocolate doesn't melt evenly, it's often because the microwave was run for too long in one go. Chocolate burns quickly. Always stick to those 30 second bursts. If you see clumps, keep stirring; the residual heat usually finishes the job.
The Base is Too Crumbly
This happens if you used a very dry powdered sugar or didn't use enough butter. The crumbs won't stick together and the bars will fall apart when sliced.
The Chocolate Seized
Seizing occurs if a drop of water gets into the melting chocolate. It turns from a smooth liquid into a grainy, clumped mass.
The Bars are Sticking
Using a dull knife or cutting too early causes the layers to slide. Always use a sharp blade and ensure the bars are fully chilled.
| Problem | Root Cause | Solution |
|---|---|---|
| Crumbly Base | Not enough fat/binder | Stir in 1 tbsp melted butter |
| Grainy Topping | Overheated chocolate | Stir in 1 tsp coconut oil |
| Smearing Layers | Cut too early | Chill for another 30 mins |
Adjusting the Batch Size
If you only have an 8x8 inch pan, cut the recipe in half. You'll use 1/2 cup of peanut butter and 1 cup of powdered sugar. The chilling time stays the same, but the bars will be slightly thicker.
For a double batch, do not simply double the salt or vanilla if you add them. Keep those at 1.5x. Work in two separate pans rather than one deep pan, otherwise the center will take forever to set.
| Goal | What to change |
|---|---|
| Thicker Bars | Use an 8x8 pan |
| Less Sweet | Use 70% dark chocolate |
| Nut Free | Swap PB for Sunflower butter |
Common Kitchen Myths
Some people think you need to "temper" the chocolate for these bars to get a snap. That's not true for a fridge set dessert. The cold temperature does the work for you.
Another myth is that you must use homemade graham crumbs. store-bought crumbs work just as well, provided they aren't the honey flavored kind, which can make the bars cloyingly sweet.
Keeping It Fresh
Keep these snacks refrigerated in a sealed container for up to 7 days. They often taste even better after a day as the flavors blend. If you can't finish them in a week, they freeze wonderfully. Wrap each piece in parchment and place them in a freezer bag; they'll last 3 months.
To avoid waste, don't rinse any remaining chocolate ganache down the drain. Instead, spoon it over apple wedges or sliced bananas for a quick treat.
Perfect Complements
Since these are quite indulgent, a bit of acidity helps balance the richness. Serving them with fresh strawberries or a tangy raspberry coulis works perfectly. If you're assembling a dessert platter, pair them with a lighter accompaniment, such as lemon zest shortbread.
For more chocolatey options, try the Classic Chocolate Chip Cookies recipe. Their distinct chewiness provides a nice contrast to the density of these bars. To wash them down, a chilled glass of skim milk or a bold cup of black coffee makes a great pairing.
Easy Dietary Adaptations
To turn these Chocolate Peanut Butter Bars gluten-free, just swap the graham crackers for a certified GF variety or crushed rice cereal. Both options preserve the original flavor and texture perfectly. If you're looking for other gluten-free treats, my GF Chocolate Chip Cookie Bars are always a crowd pleaser.
You can make these vegan by using plant based butter and dairy-free chocolate chips. Almond butter is another great option to replace peanut butter, though it provides a slightly more floral, nuttier essence.
For a lower sugar version, experiment with powdered monk fruit sweetener. Since this can sometimes create a cooling aftertaste, I recommend substituting only half of the sugar at first. A sprinkle of flaky sea salt across the top of the chocolate before chilling also helps balance the sweetness.
Recipe FAQs
When are these bars ready to slice?
After chilling for at least 2 hours. This ensures the chocolate layer is completely firm to the touch for clean edges.
Is it true that chocolate must be melted on a stove to avoid burning?
Not true. Microwaving in 30-second intervals with stirring between each is a safe and efficient method.
Can I use crunchy peanut butter instead of creamy?
Yes, for added texture. If you enjoyed the chewiness here, apply that same texture preference to our monster cookie bars.
How to get clean cuts when slicing?
Use a sharp knife. Carefully cut the chilled block into 16 equal rectangles to prevent the layers from smearing.
What causes the chocolate topping to clump?
Insufficient stirring. Ensure you stir the chocolate and peanut butter between every microwave interval until the mixture is glossy and smooth.
Chocolate Peanut Butter Bars